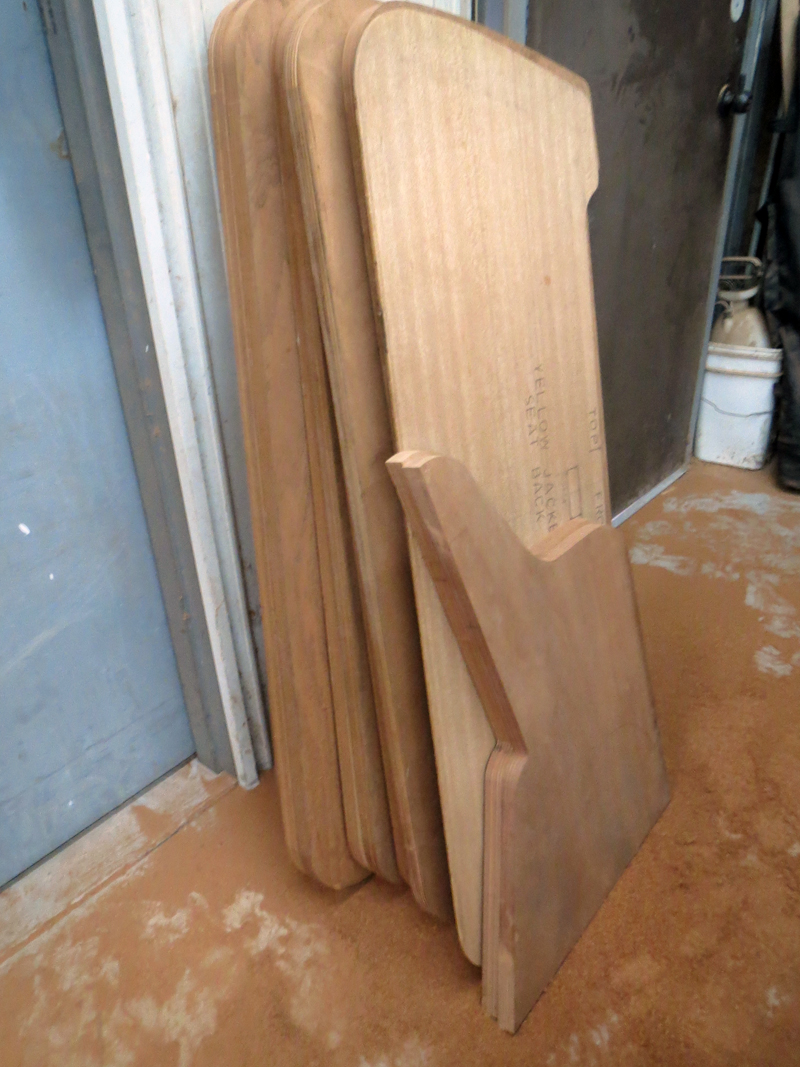
Supporting the Denison Yellow Jackets!
Most recent update at top of page
FINAL UPDATE MARCH 20, 2013
The benches were delivered to the donors today!! The Yellow Jacket Cheerleaders and football team were on hand for the event, along with city and school district officials. Thanks to all who made this project possible!
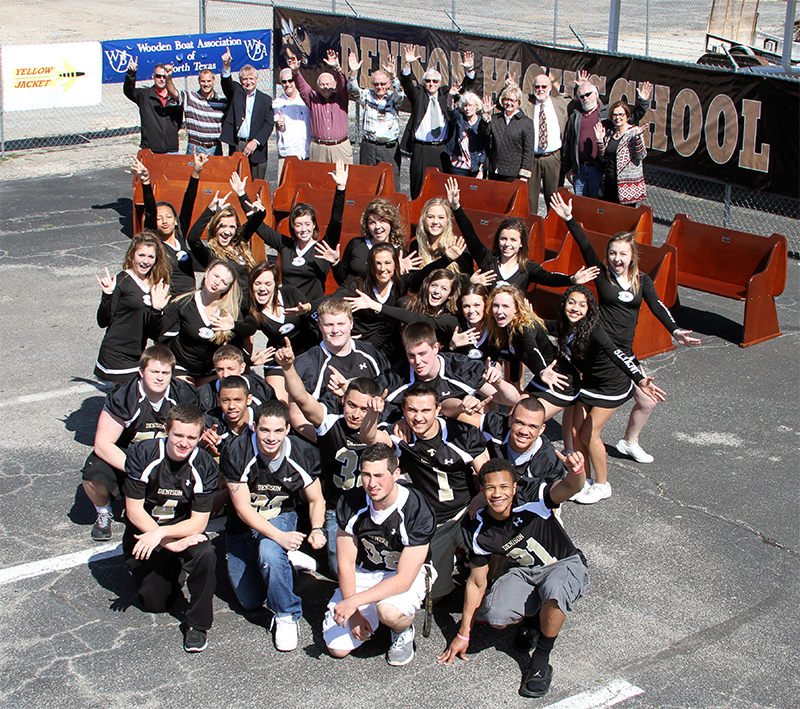
This was the scene at the Denison ISD Service Center on Wednesday afternoon, March 20.
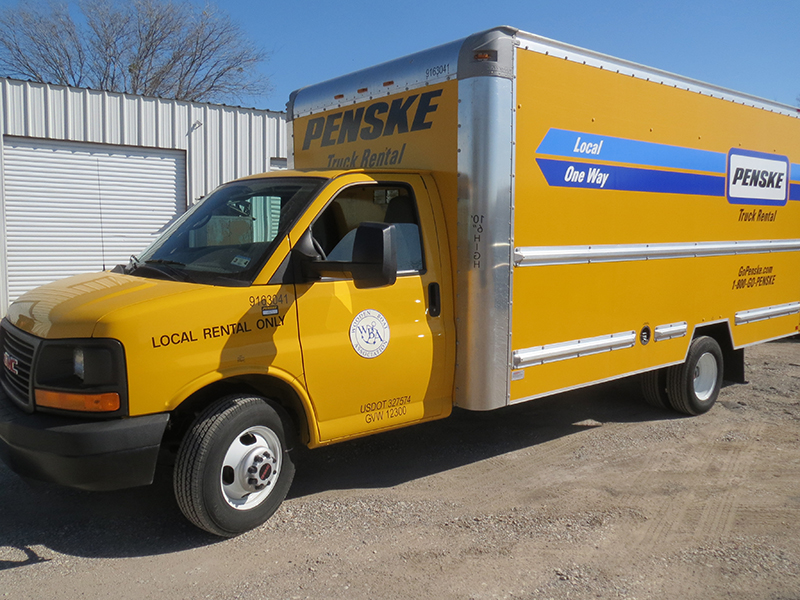
The WBA bench team used this 16' rental truck to deliver the benches from the Lucas Shop to Denison.
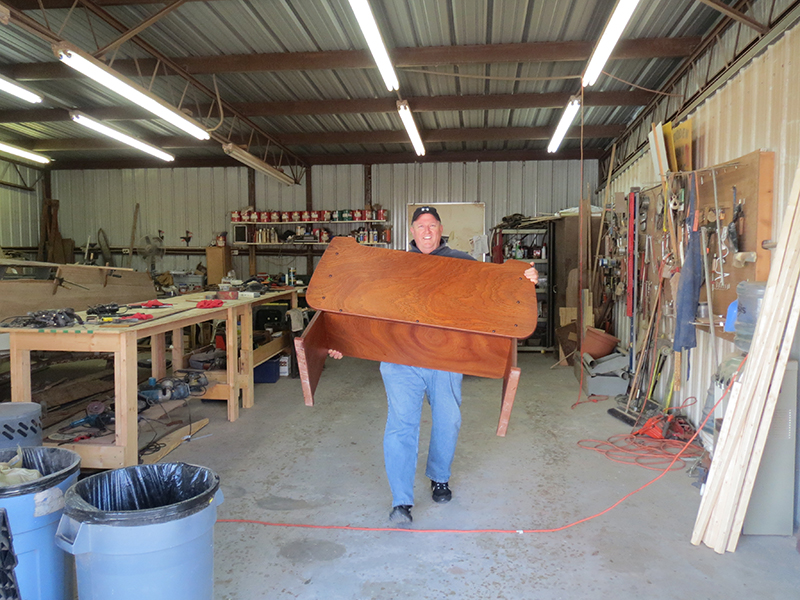
Jim Donovan often makes a two-man job into a one-man job as he carries a bench as if it were a folding chair at a church picnic.
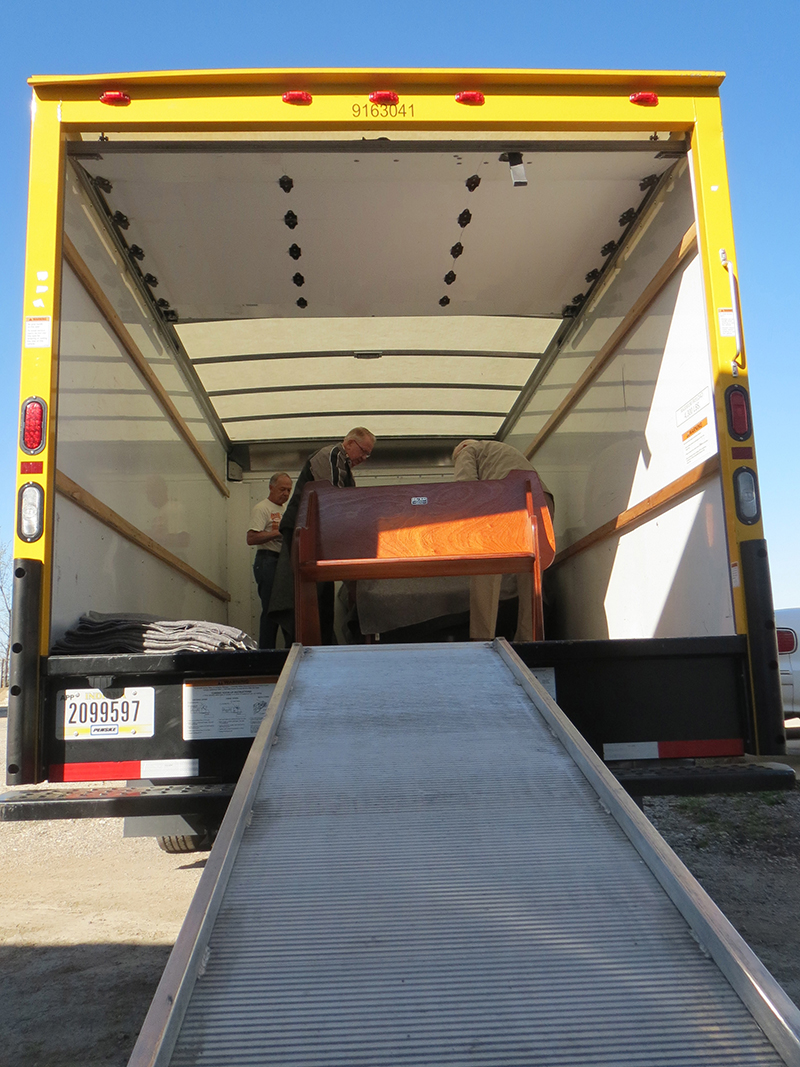
The 16-footer turned out to be more than enough truck to hold the benches!
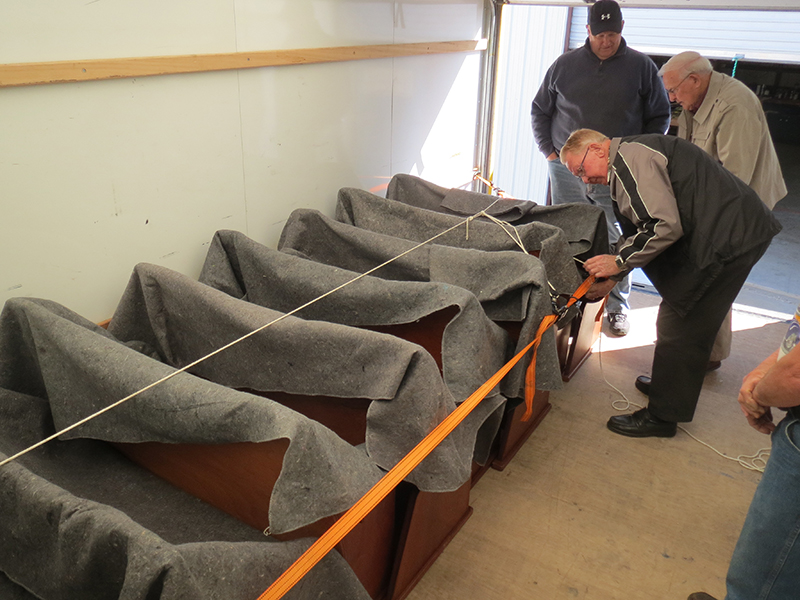
Lew, Bob and Jim secure the benches with ratchet straps and line, using furniture pads to protect the benches during transit.
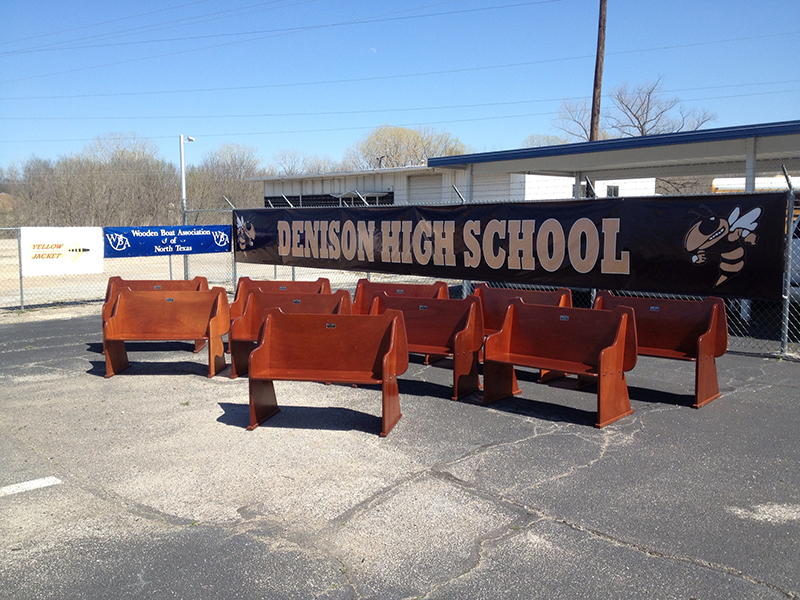
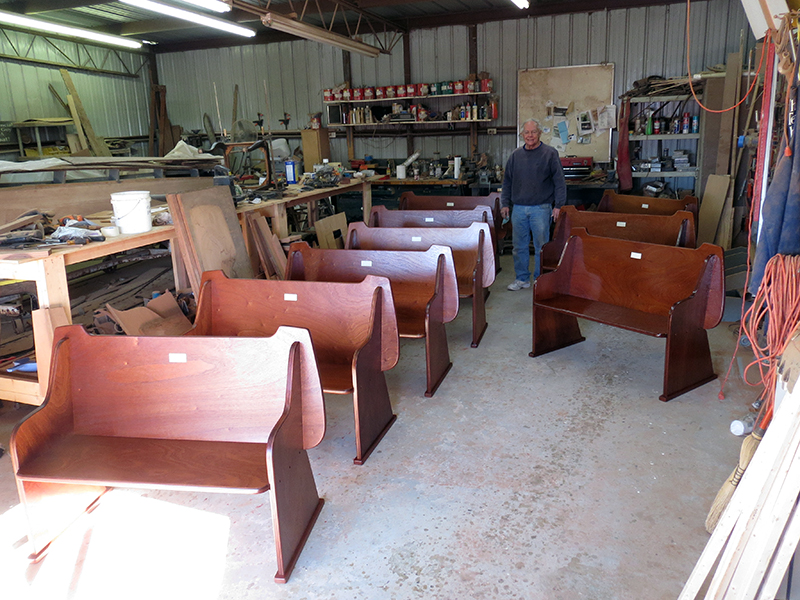
Here are all ten benches together for the first and last time, just before the donors and student athletes arrived.
UPDATE MARCH 16, 2013
The benches and plaques are all complete!! Final touch-ups have been done, and now we're planning their delivery to Denison. Stay tuned...delivery should happen within days!!!
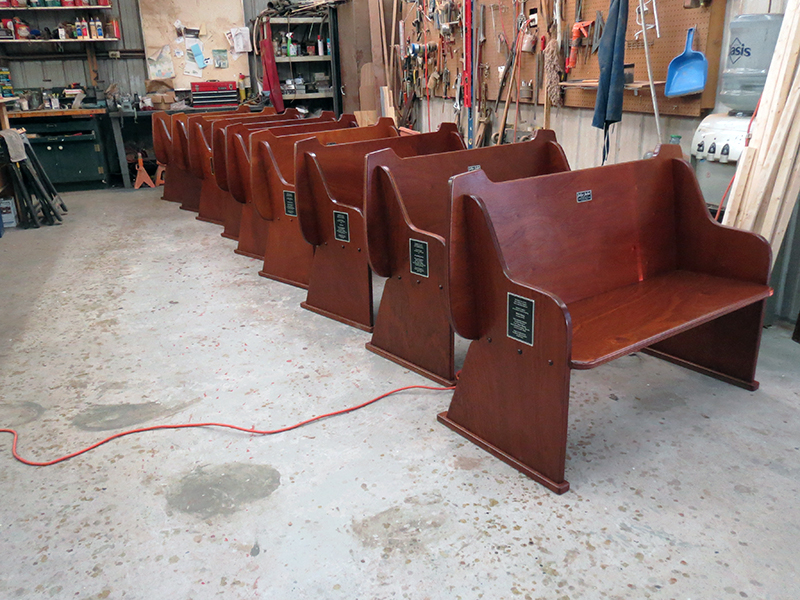
All lined up and ready to go! Donor plaques are affixed to the right side of each bench. Yellow Jacket dash tags are inlaid into the seat back.
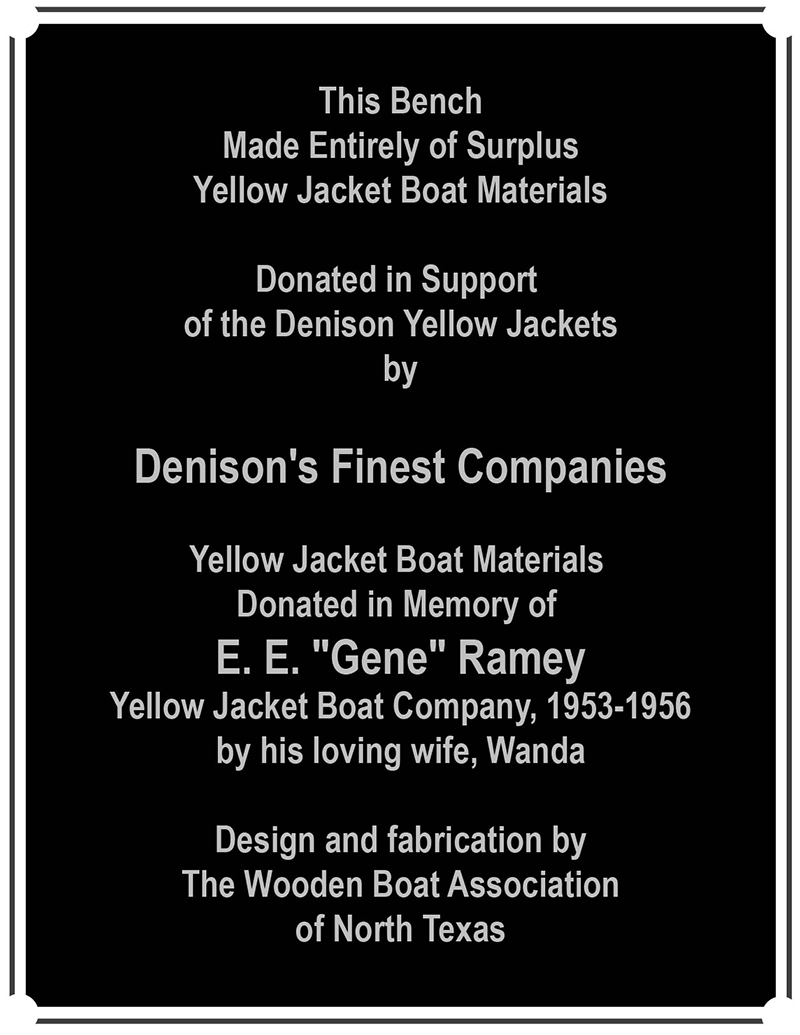
Donor plaques feature the text above, with each donor's name (or family name) appearing where the words "Denison's Finest Companies" appear above.
UPDATE MARCH 4, 2013
No photos today, but the good news is that Dave Peiffer with help from Robin McGeorge and Troy Marshall, was able to spray the top coat of varnish on all nine benches! Mother Nature cooperated temperature-wise, and was only a little mischievous with the wind. With a few touch-ups we should be in good shape. Donor plaques were delivered today, and should begin to be affixed to the benches on Wednesday. This will be our final update until we announce delivery. Look for something mid-month.
UPDATE MARCH 2, 2013
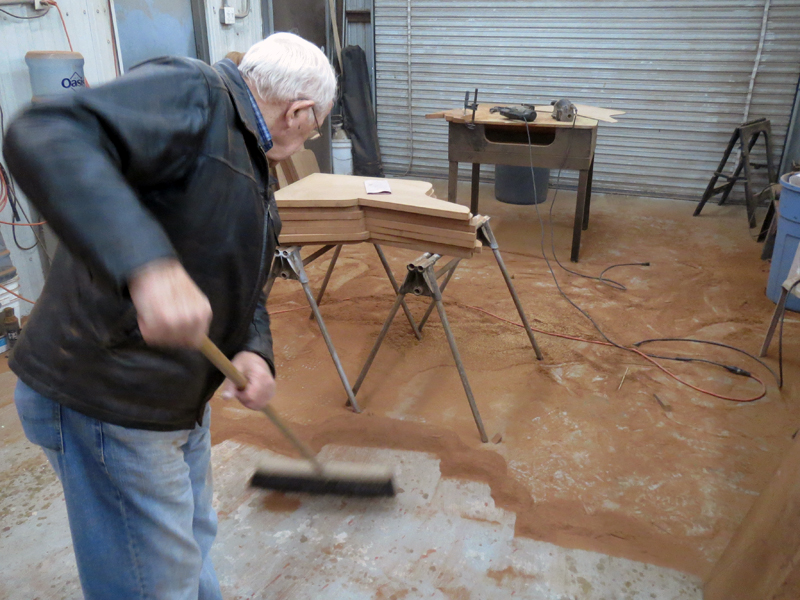
It was a clean sweep! Today was cleanup day at the shop, sweeping and blowing a great volume of accumulated sawdust from our work area, making ready for the drying of the benches following their final coat of varnish. See captions below photos for more detail. Next scheduled work day is Monday, at a time to be determined by Dave Peiffer, working closely with Mother Nature, for spraying varnish.
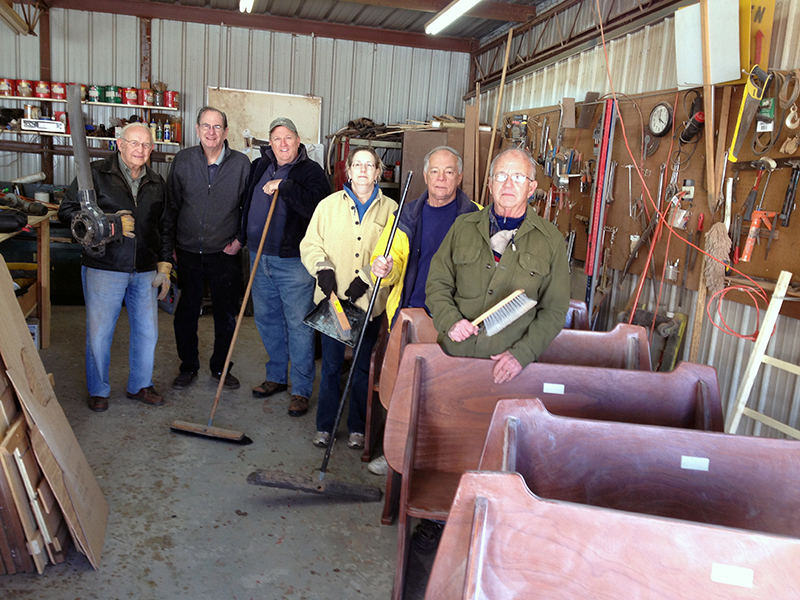
OK, this photo was supposed to be the clean-up gang looking tough with the tools of their trade. But the three guys on the left didn't get the memo about looking tough. So, by comparison, the three on the right look like they're not having a good time. Actually, they're just following the photographer's creative direction. (l-r) Lew White holds a leaf blower, the WBA's secret weapon against sawdust in hard-to-sweep places. We had two of them going as our work session reached a fever pitch. It looked so much like the Dust Bowl, a couple people hopped in an old car and left for Californy! Robin McGeorge is not holding a cleaning tool. You'll have to ask him why. Jim Donovan, Gay Perry, Dave Peiffer and Seb Borrello are equipped with push brooms and shop brushes, which were used at the beginning of the process to get the worst of the dust on the floor and benches, and then at the end to sweep up any settled remnants from the Dust Blow.
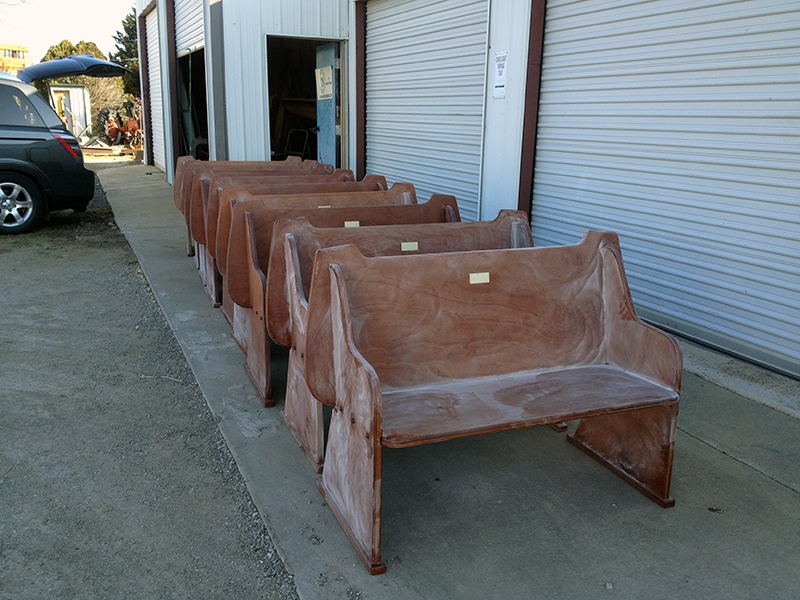
The benches had to wait outside during the Dust Blow. On Monday, weather permitting, they will receive a cleaning of their own, first with compressed air, then with a tack cloth, to remove all dust prior to varnishing.
UPDATE FEBRUARY 28,2013
With the able help of Lew White, Dave Peiffer, Seb Borrello and David Kanally, we sanded all the benches and inserted the button plugs in some 150 screw head counterbores. We're now ready for the final coat of varnish. Next work day (VERY IMPORTANT, please come, we will be cleaning out the shop bay to make ready for the drying of the benches!) will be Saturday, March 2, 9 a.m. - noon. See captions below pictures for more detail about what happened today.

Seb, Lew and Dave P. fine sand the varnish on all the benches. This sanding serves two purposes; first to create some texture in the surface for the next coat of varnish to "key" into, and second, to level the surface so the next coat will be as flat as possible.
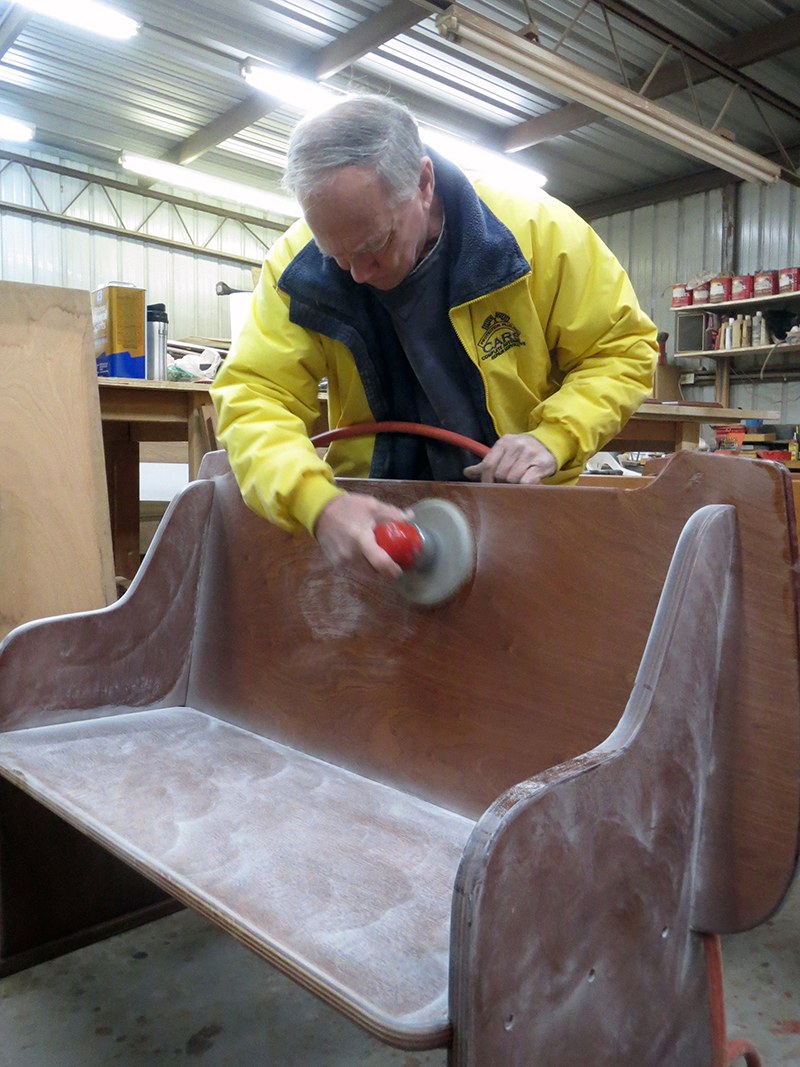
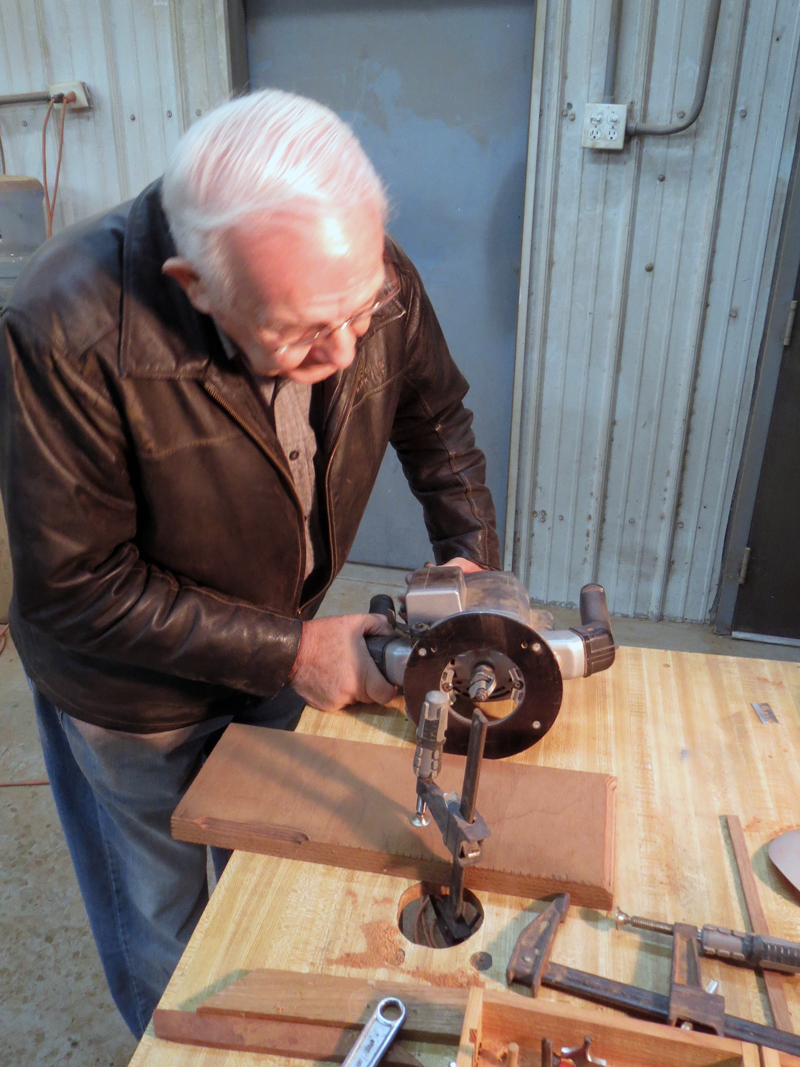
Dave Peiffer uses an air-drive random orbital sander with very fine sandpaper to sand the varnish on a bench.
Seb Borrello uses 320 grit wet-or-dry sandpaper to hand-sand the edges. Hand sanding is required on the edges, since it would be very easy to sand the varnish completely off with a power sander.
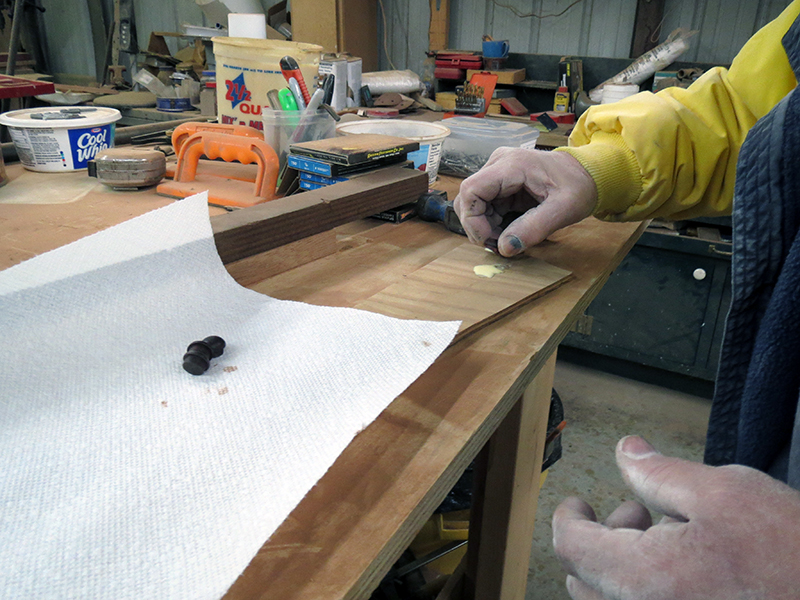
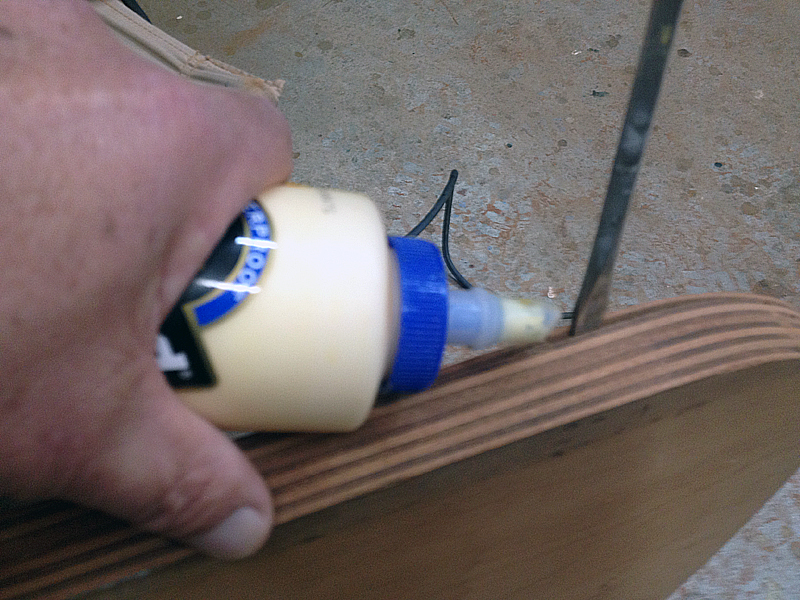
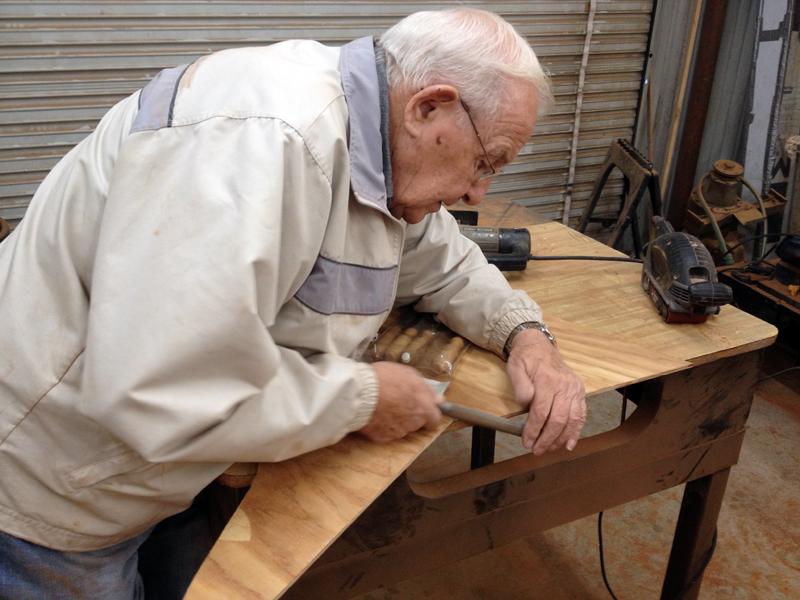
Once the benches were sanded, it was time to cover all the screw holes with button plugs. The buttons are actually made of maple, which makes them very sturdy. They have been stained mahogany color. Here, Dave P. is dipping the end of the button in a bit of glue to hold it in place.
Lew White and Seb Borrello insert plugs into screw holes on a bench. 150 plugs were required for the project.
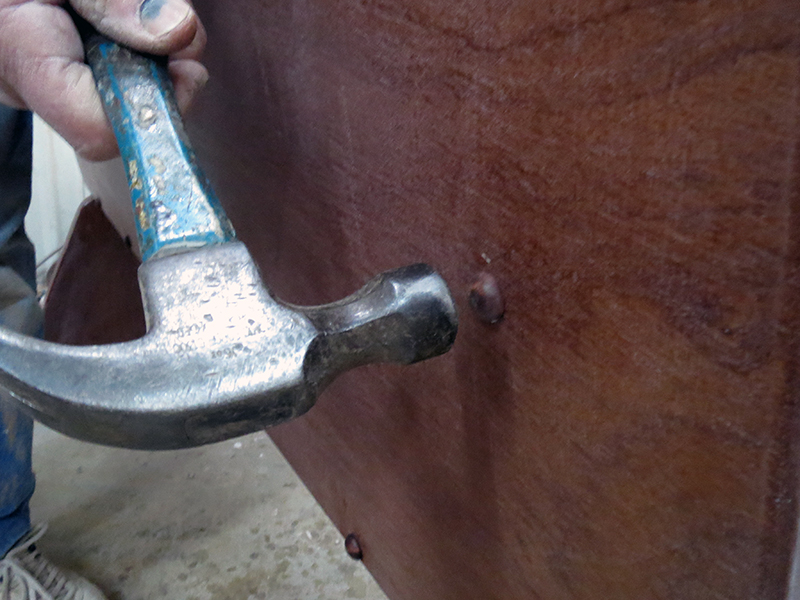
Once the button is inserted into the screw hole counterbore, a slight tap with a hammer sends it home. Any glue residue must be wiped clean before the next coat of varnish is applied.
So all the benches reached this stage today...all varnish has been sanded and all plugs have been inserted. Next step will be to blow all the sanding dust off with compressed air, then wipe each bench down with a tack cloth to remove every bit of dust prior to spraying. This work will likely be done on Monday, weather permitting. Before that, on this Saturday, we'll clean out the shop in preparation for the drying of the benches.
UPDATE FEBRUARY 25,2013
No pictures today. Lew and David went to the shop and tested the finish on the benches for readiness to sand, and found it still not quite hard enough. Next work day (please come, we need several sanders!) will be Thursday, February 28, 9 a.m. - noon.
UPDATE FEBRUARY 24,2013
Given the bountiful good weather on Sunday, and the prediction of a week or so of stinky weather to come, Dave Peiffer and David Kanally decided to make the most of the day and get some spray varnishing done. Our next scheduled work day will be Tuesday, February 26, 9 a.m.-noon. See captions below photos for more detail.
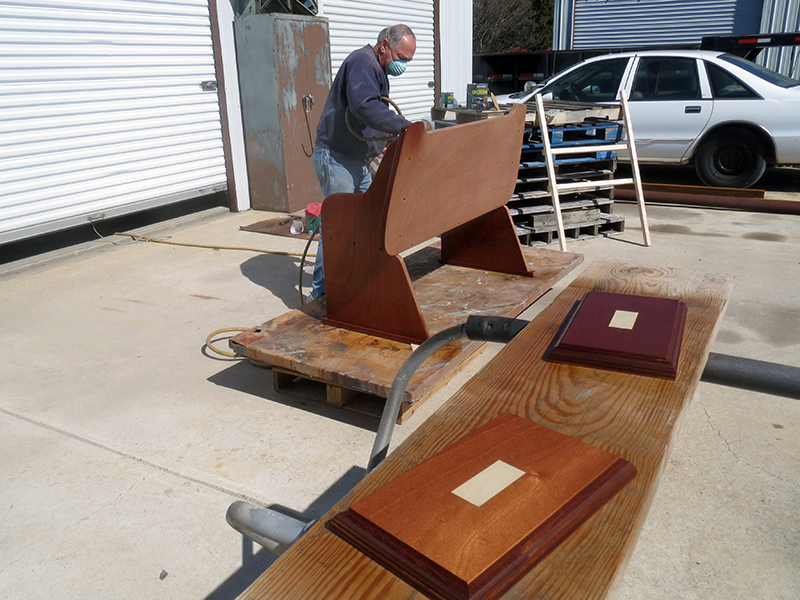
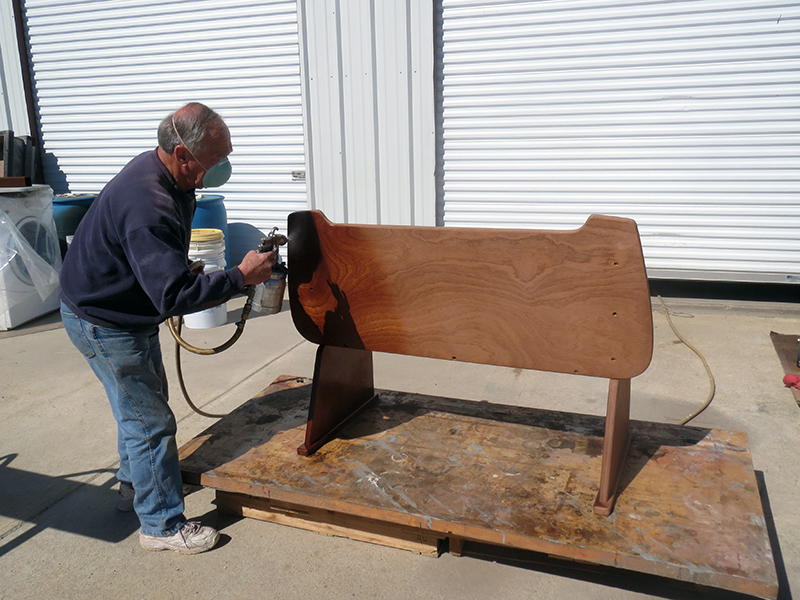
The two wall plaques glisten in the foreground, sporting their first coat of Helmsman spar varnish, as Dave Peiffer sprays spar varnish on a bench out in front of the shop.
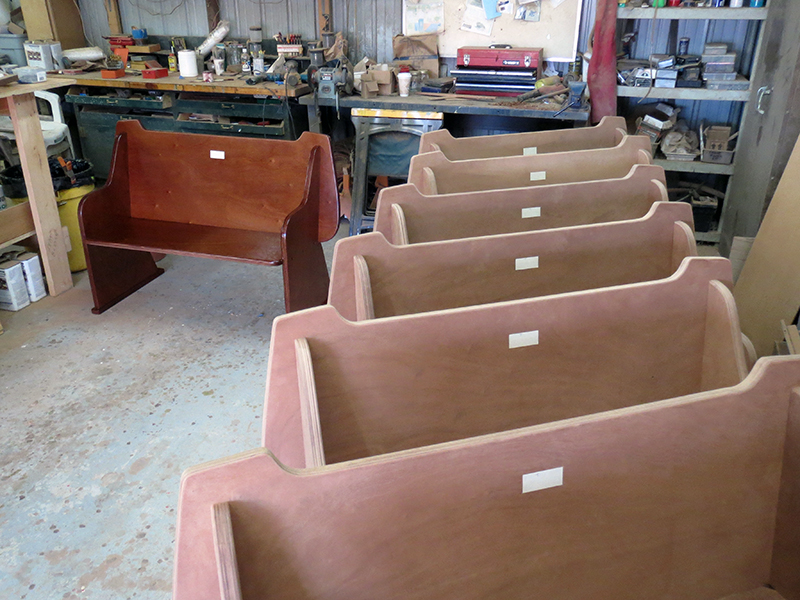
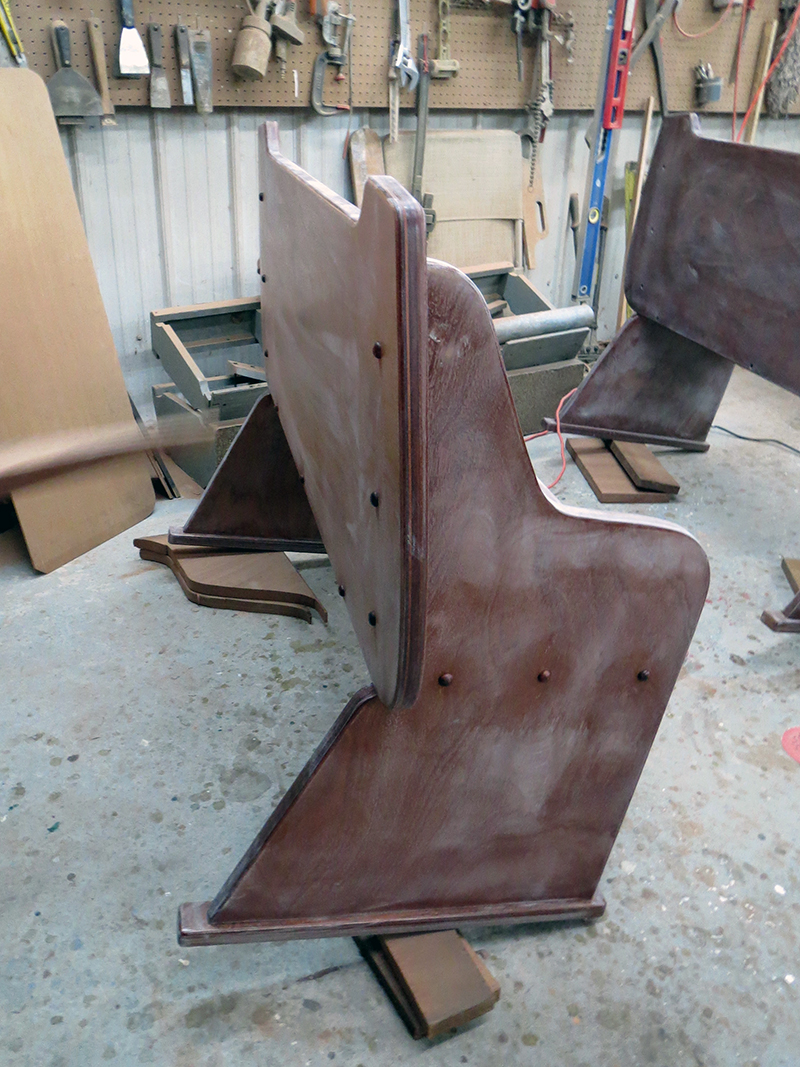
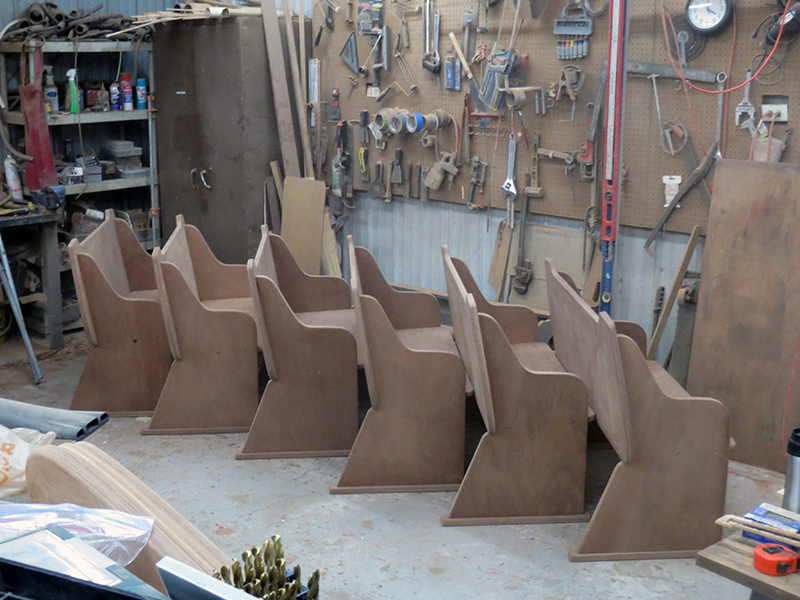
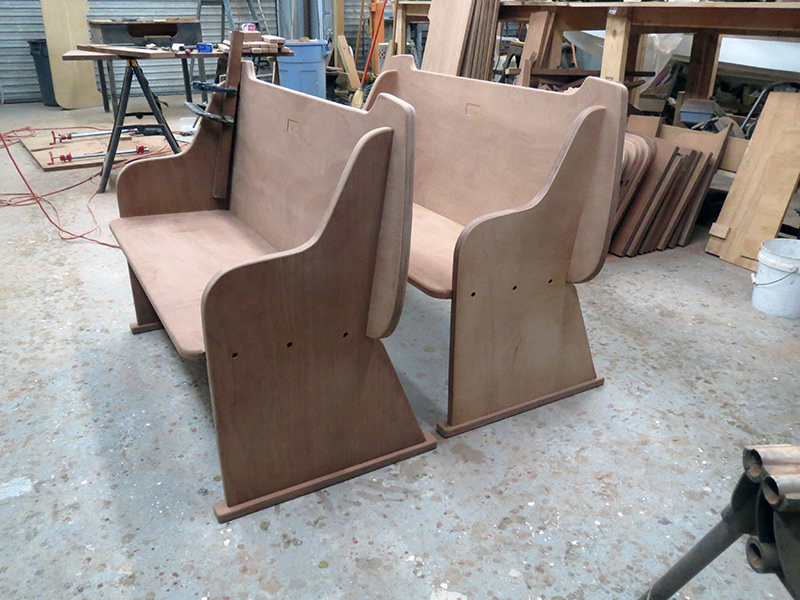
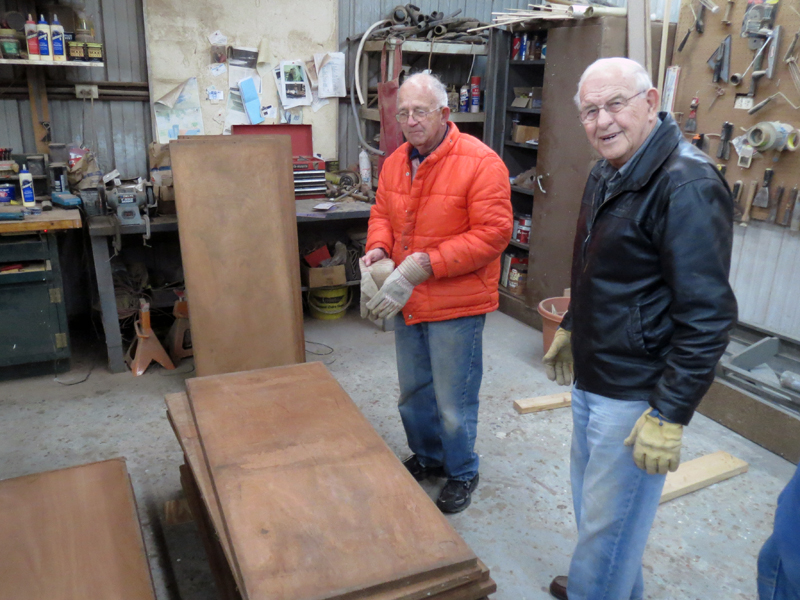
Remember, now, no stain is used in the finishing of these benches. The clear spar varnish brings out the deep mahogany color of this beautiful vintage plywood. On the left, a varnished bench and on the right, benches waiting in line for their turn to get the Dave Peiffer treatment.
The deep, rich colors brought out by the first spray of varnish can be seen on the left, while the unfinished wood is seen on the right.
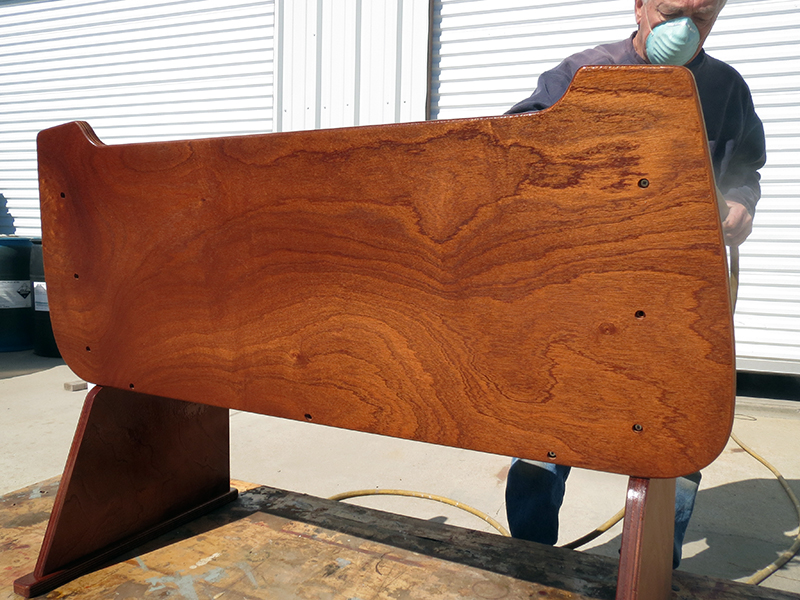
The grain patterns of each bench are different. Each bench has its own "fingerprint" of grain.
Dave Peiffer stands behind his work! Nine benches all drying now, waiting for further sanding and other touchup work on Tuesday. All benches must be sanded with very fine sandpaper now, to get ready for the second coat of varnish.
UPDATE FEBRUARY 23,2013
The remaining three benches were assembled today, with the helping hands of Lew White, Dave Peiffer, Seb Borrello, Bob Adair and David Kanally. Lew also routered the sides of the two wall plaques, and hang-up grooves were cut in the backs of the plaques. Our next work day will be Tuesday, February 26, 9 a.m.-noon. See captions below photos for more detail.
Dave Peiffer and Lew White carry bench #8 of 10 to its staging position at the shop.
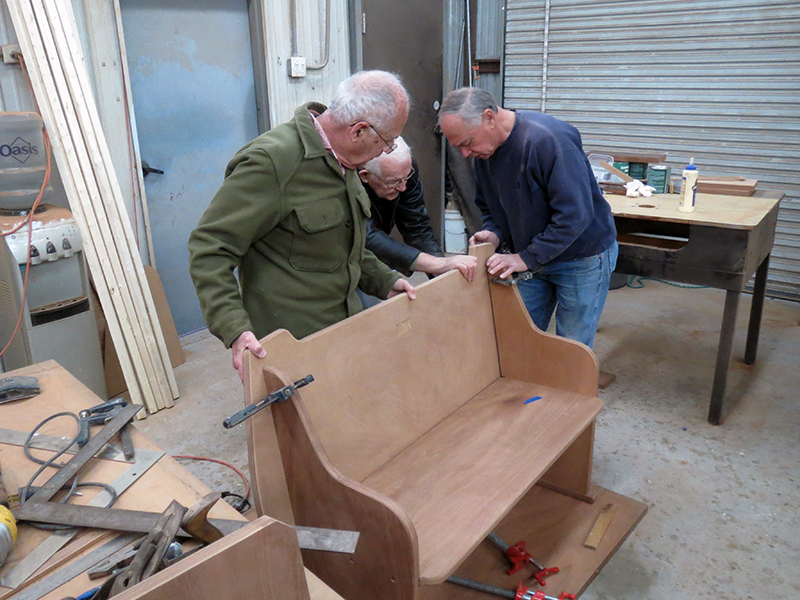
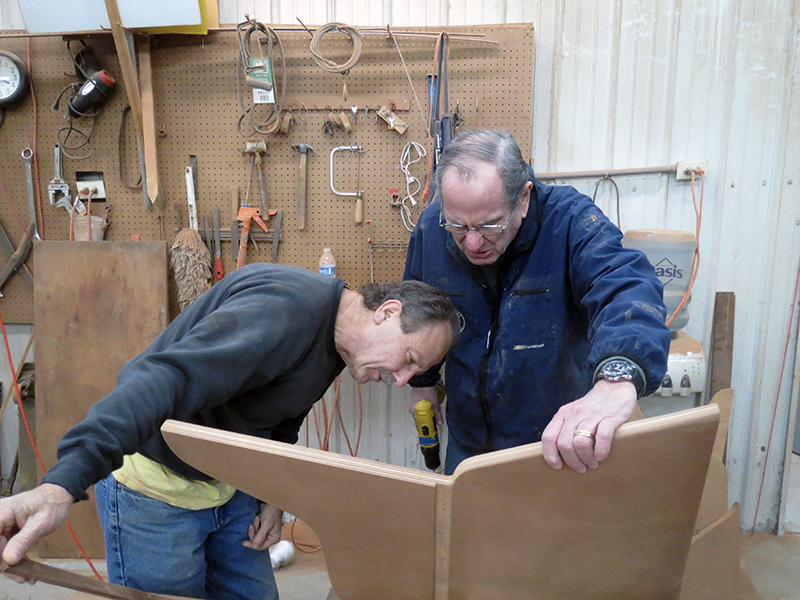
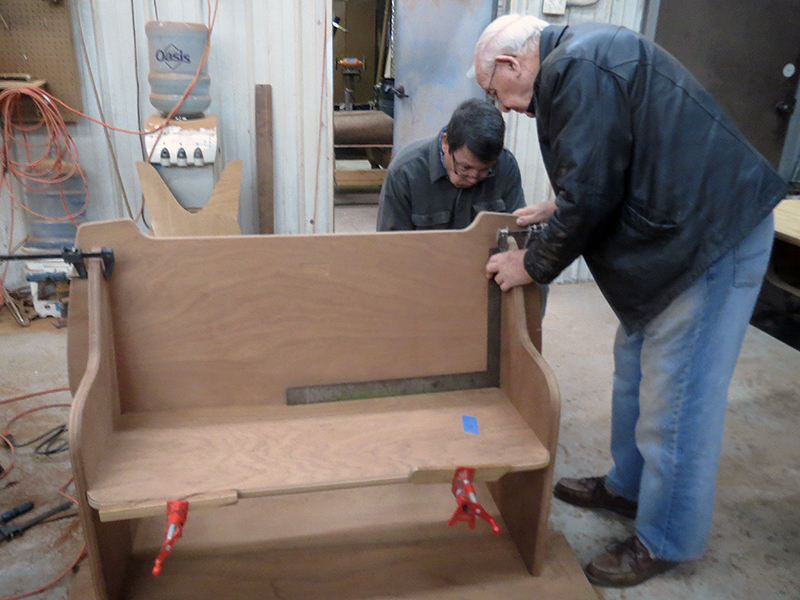
Seb Borrello, Lew White and Dave Peiffer center the seat back on bench #9 of 10 as they prepare to clamp it into place before permanently affixing it with glue and stainless steel screws.
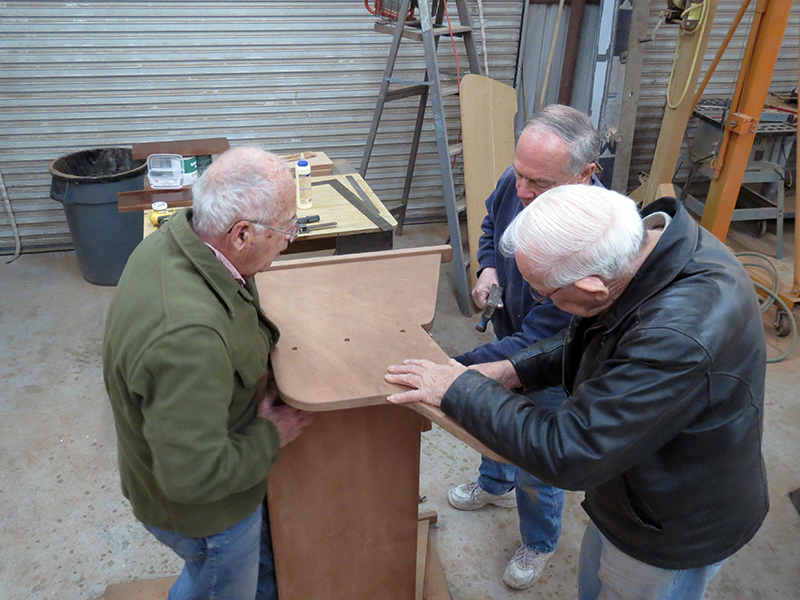
Seb Borrello, Dave Peiffer and Lew White fit a side piece to bench #10 of 10. The back edges of the side pieces and the seat bottom must be completely flush so the back fits tight.
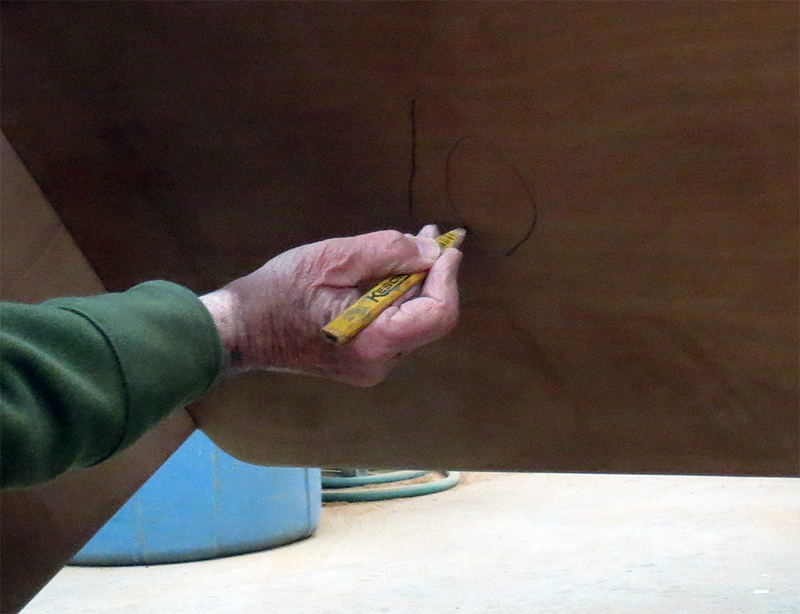
Seb writes the number 10 in pencil on the bottom of the seat of bench #10 of 10. Each bench has a pencil-written number corresponding to the order of assembly.
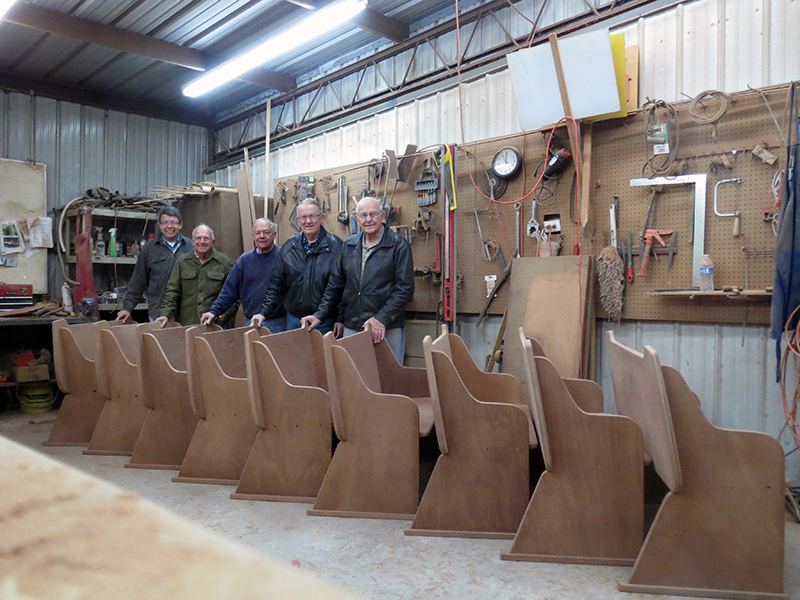
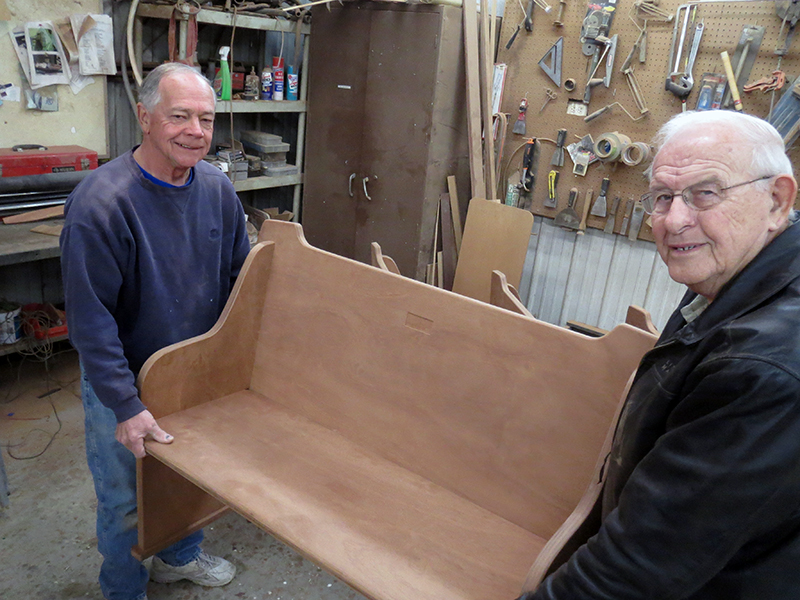
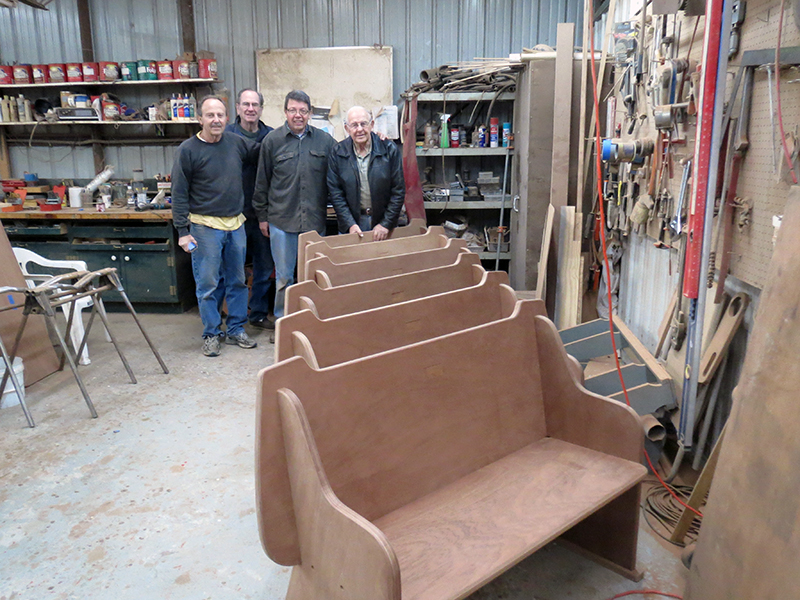
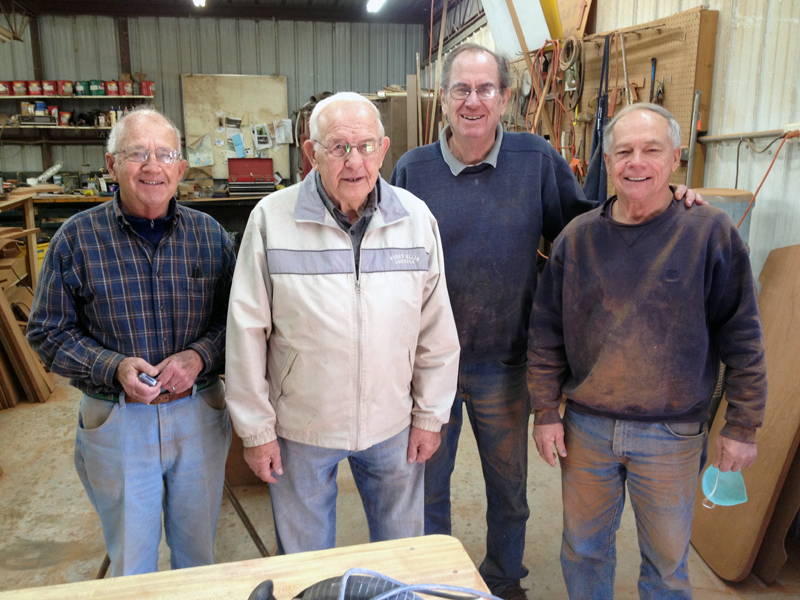
(l-r) David Kanally, Seb Borrello, Dave Peiffer, bench designer Bob Adair and Lew White take a moment to appreciate the completion of all nine remaining benches. Next step will be a light coat of varnish for sealing and fine sanding.
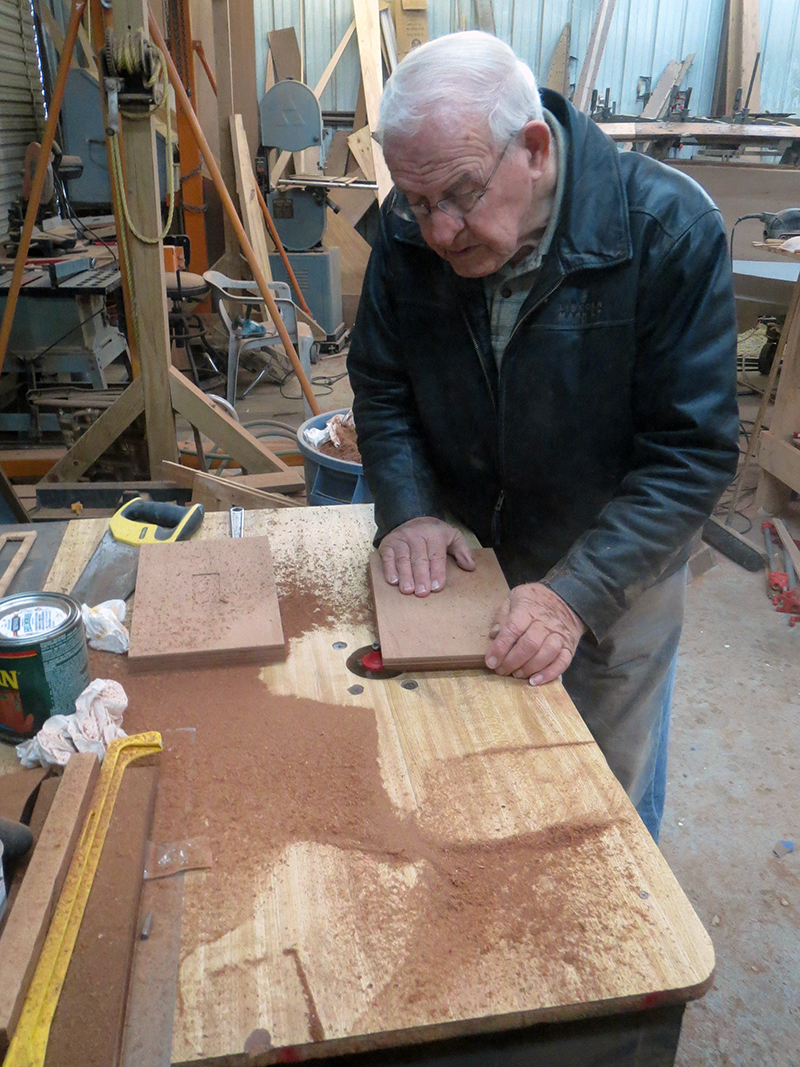
Lew White routers the edges of one of the two wall plaques.
The wall plaque has a rounded edge highlighting the 12 layers of mahogany that make up its 1" thickness. The Yellow Jacket dash tag is embedded in the center of the plaque. On the back of the plaque is a slot that will allow the plaque to be hung from a screw or a headed nail. Soon, these plaques will be fine sanded and varnished to match the benches.
UPDATE FEBRUARY 22,2013
Four more benches were assembled today, thanks to the help of Lew White, Seb Borrello, Troy Marshall, Robin McGeorge and David Kanally. We have three more to assemble, then sanding sealer can be applied. Our next work day will be tomorrow, Saturday, February 23, 9 a.m.-noon. See captions below photos for more detail.
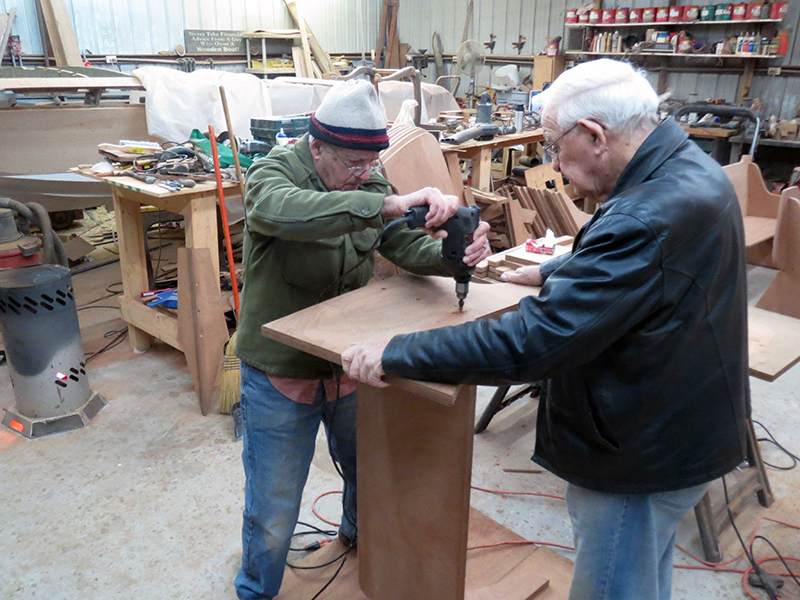
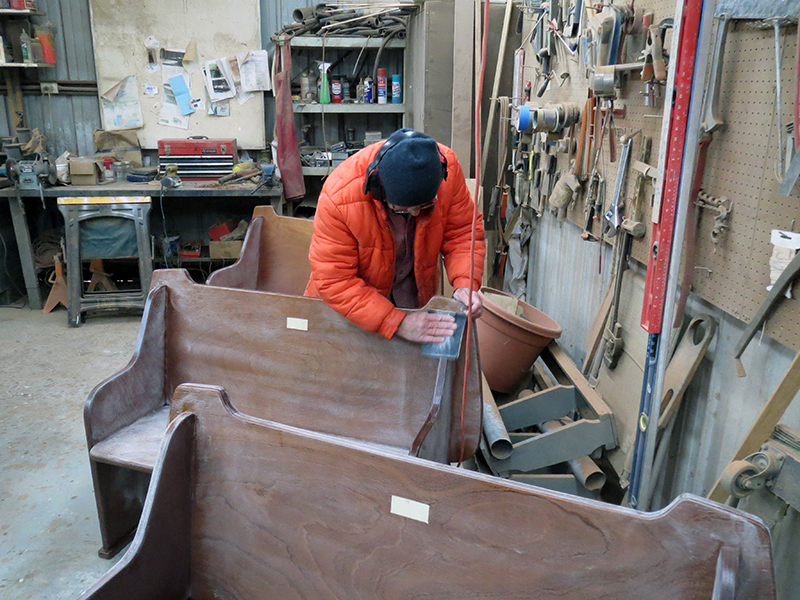
Baby, it was cold outside, so Seb sports a stocking cap as he drills the holes for the screws holding the sides to the seat bottom.
Robin McGeorge provides quality control oversight as Seb Borrello drills pilot holes through a template in a side piece.
Troy Marshall and Robin McGeorge pre-drill counter sinks into the side piece. Button plugs will cover all screw heads in the bench.
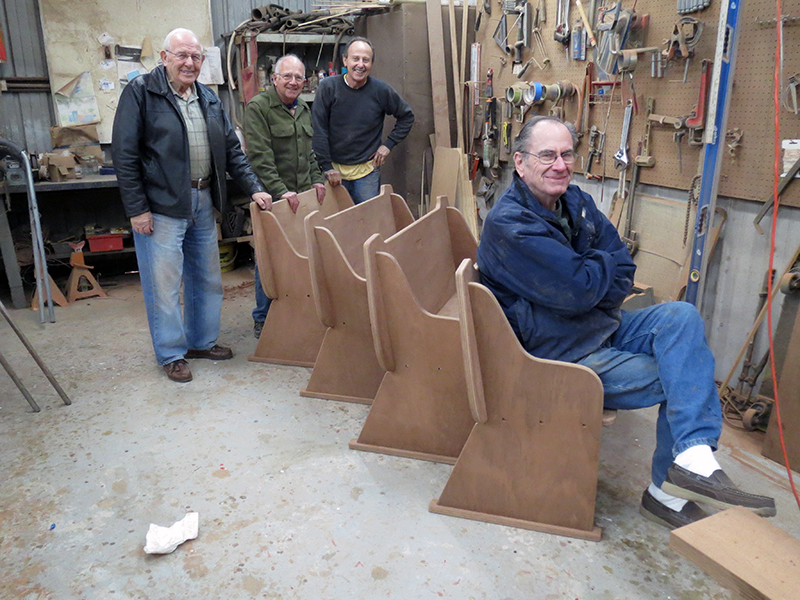
The boys take a break and have a laugh after completion of bench #5 of ten is complete. One more bench would be finished today.
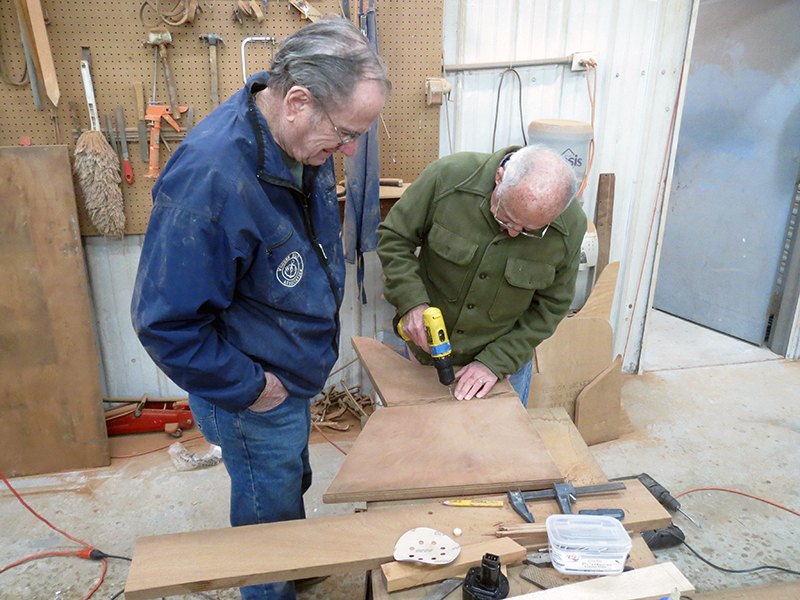
David Kanally drills holes for screws holding the back to the bench side pieces and bench seat bottom. It seems that every time David concentrates, he chews on his tongue. Lew White checks the side pieces for verticality.
Seb took a picture of the rest of the team when bench #6 of 10 was finished today. (l-r) Troy Marshall, Robin McGeorge, David Kanally, Lew White.
We think we can assemble the remaining three benches tomorrow. Join us!
UPDATE FEBRUARY 21,2013
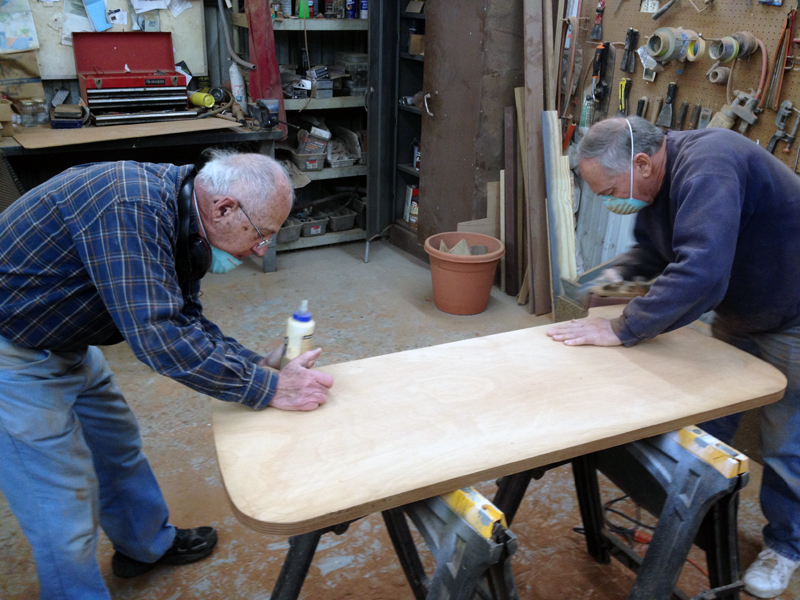
As we had hoped, assembly began today. Lew White and David Kanally put bench 2 of 10 together, creating templates to mark drill holes along the way. Bench 3 of 10 went together a bit more quickly thanks to these templates, and we should be able to put two or three benches together per work day without much trouble. Our next work day will be tomorrow, Friday, February 22, 9 a.m.-noon. See captions below photos for more detail.
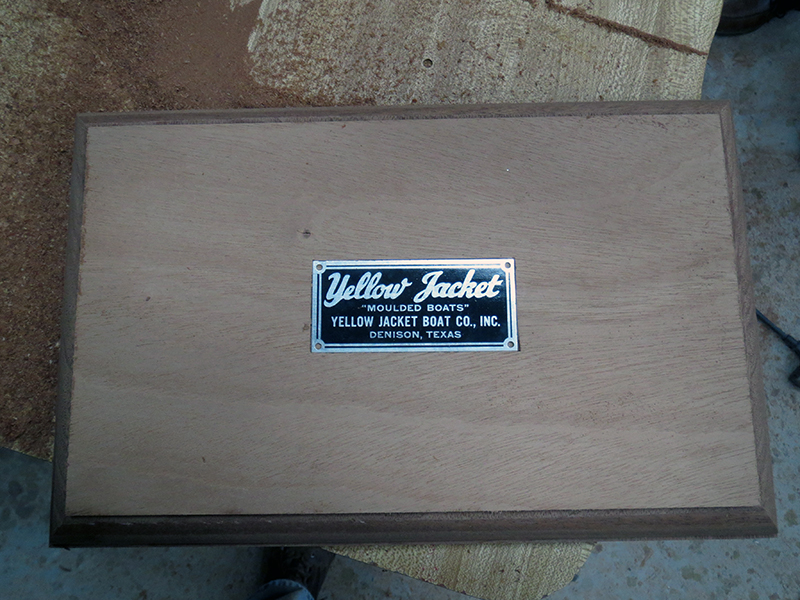
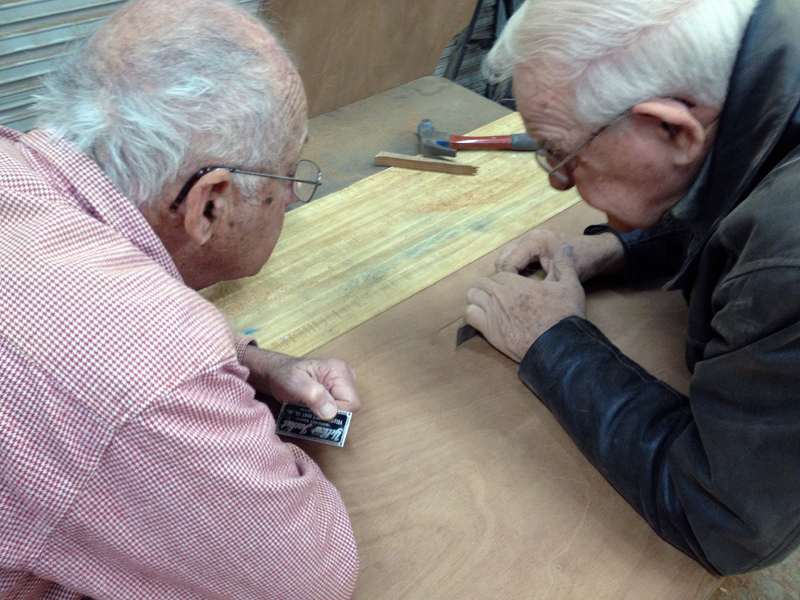
Lew holds a side piece in place so holes can be drilled into the bottom end grain. Each hole has a 1/2" countersink to accommodate the button plugs like those in the finished bench at the bottom of this page. Pieces are held together by 2-1/2" stainless steel exterior screws with square head drive.
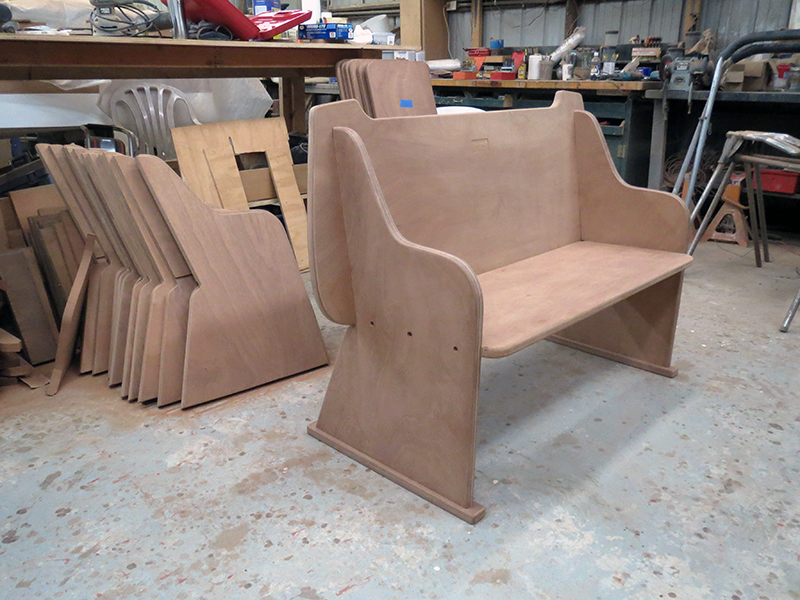
Bench 2 of 10 assembled! It will receive a coat of sanding sealer before the button plugs are put into the screw holes. The sealer will protect the wood from glue spots should we slop a little when puting the plugs in.
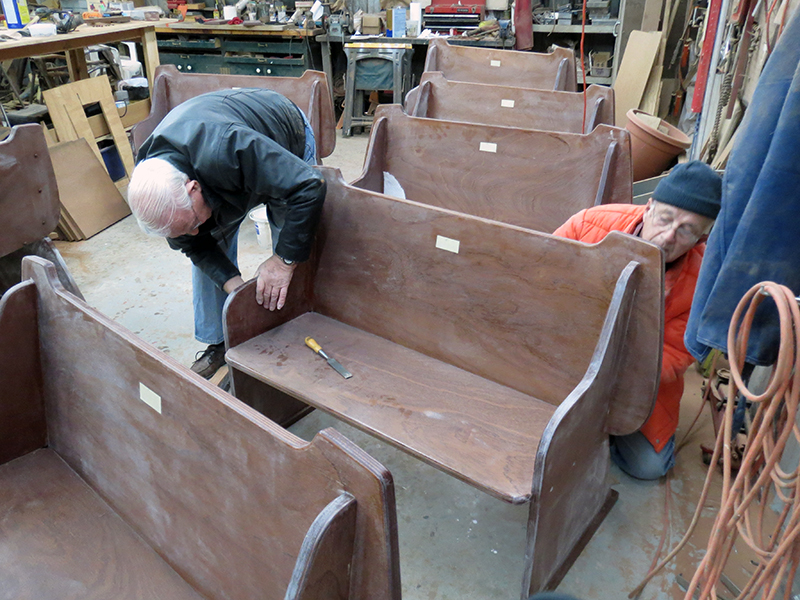
Bench 3 of 10 assembled, sitting in front of bench 2. Notice the clamps on the top of the far side piece on bench 3. This is a delamination repair. It'll be good as new after it dries overnight. Note also that bench 2 of 10 is a little lighter in color than bench 3. This is natural variation in the color of the mahogany plywood. We will finish them in their natural color, without stain. Bench 2 will be a bit more golden in color, while bench three will be a bit darker and redder. We are matching the colors of the various pieces for each bench as closely as possible.
UPDATE FEBRUARY 20,2013
Today was filled with smaller, finer tasks needed prior to the start of assembly. Lew White spent some quality time with his router today, finishing the recesses in the seat backs for the Yellow Jacket dash tags. In addition, David Kanally and Dave Peiffer cut out two wall plaques and Lew made recesses in those for the the dash tags. Dave Peiffer did color tests of sanding sealer and varnish on scrap pieces to see if spraying our finish, instead of brushing it, is an option. Our next scheduled work day is Thursday, Feb. 21, 9 a.m.-noon. There's a potential hail storm in the forecast for Thursday morning, so our start time is weather dependent. See captions below photos for more detail.
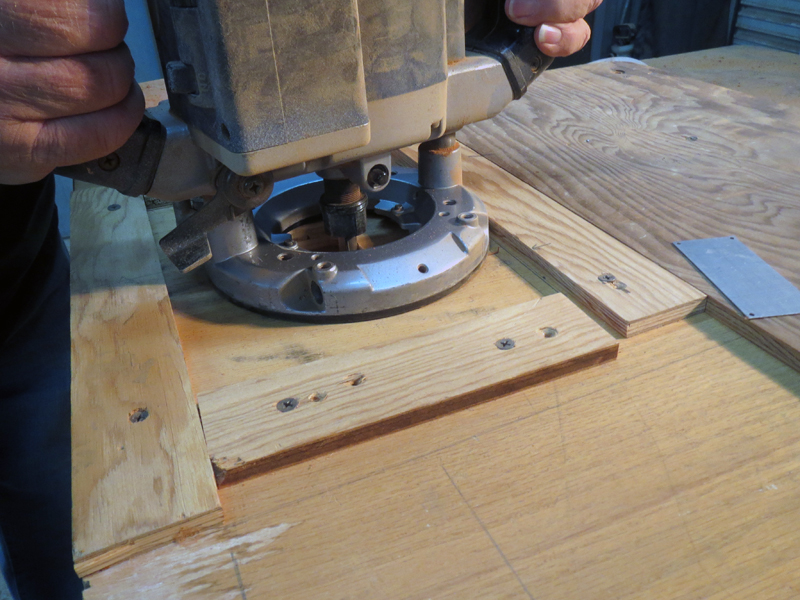
This is Lew's router jig for the recesses for the dash tags. The router's movement is limited by the wood pieces on all sides of it. The router bit is set to make a recess just a little bit deeper than the thickness of the aluminum dash tag. Because the router leaves rounded corners in the inset, Lew must cut the corners square with a sharp chisel (see yesterday's photos).
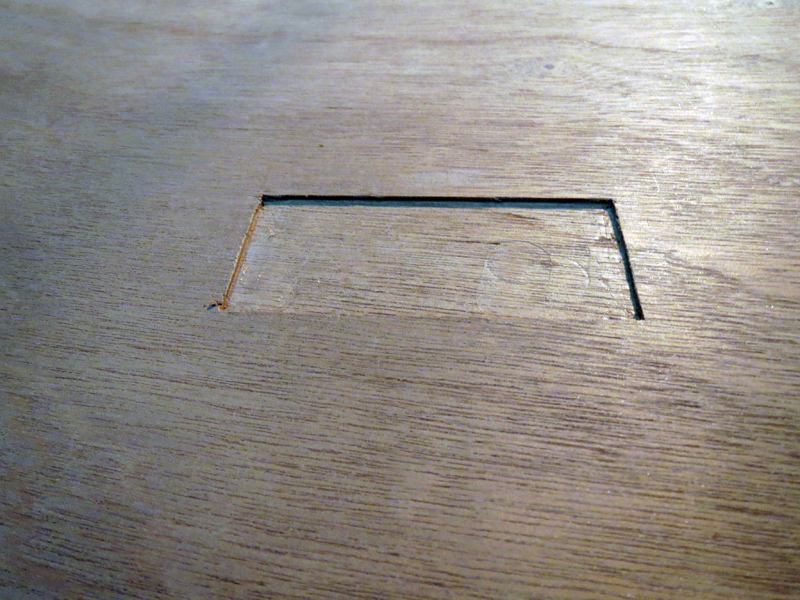
Here's an inset all routered with the corners cut square.
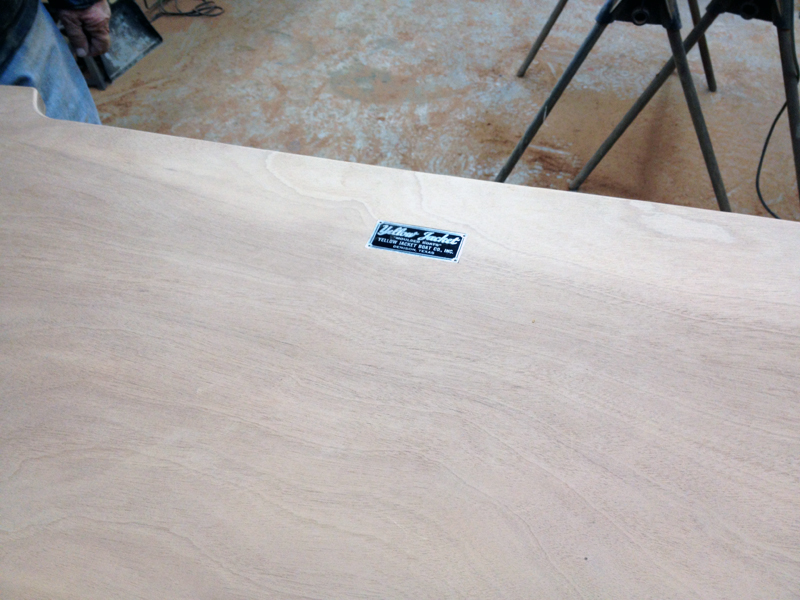
And here's an inset with the dash tag temporarily inserted. This piece is a wall plaque.
Lew is putting various types of edge treatments on a scrap piece in order to decide which trim router bit to use on the wall plaques. Only two wall plaques will be made; they will be given to the two donors whose contributions arrived after the tenth bench had been sold.
UPDATE FEBRUARY 19,2013
Today, we took several steps to advance our project toward the assembly phase. First, Gay Perry and Dave Peiffer completed the fine sanding of the remaining pieces in the shop. Lew White and Seb Borrello did some final edge routering, and then went on to create the first five recesses in the seat backs to accommodate the Yellow Jacket Dash Tags. David Kanally completed the delamination repairs begun yesterday. Our next scheduled work day is Wednesday, Feb. 20, 9 a.m.-noon. See captions below photos for more detail.
Here's Gay finishing up the fine sanding on the bench feet. She also hand sanded the front edges of the seat bottoms today.
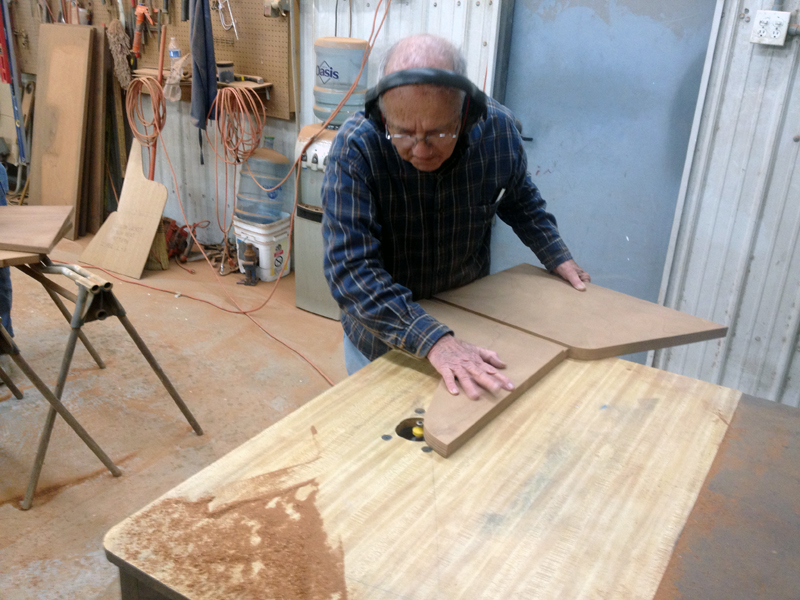
Dave Peiffer pushed on tirelessly, finishing up all the fine sanding on the sides and seat backs today.
Lew White and Seb Borrello redid some of the edge router work to make sure the edges were all rounded in a uniform way.
Lew White used a router and a template to create a perfect recess for the Yellow Jacket dash tag.
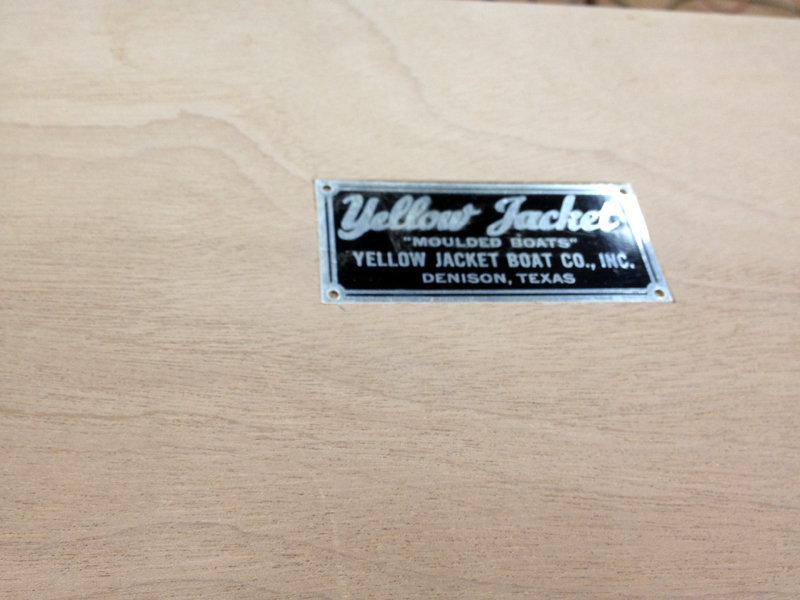
That Yellow Jacket dash tag looks right at home surrounded by original Yellow Jacket mahogany!
Lew White (right) uses a sharp chisel to finish the corners and edges of the recess to receive a Yellow Jacket dash tag, while Seb Borrello (left) stands by to test the fit with an actual tag.
UPDATE FEBRUARY 18,2013
With team members Seb Borrello, Dave Peiffer, Bob Adair and David Kanally, we kept the project on track today! Bob worked at his home shop and then brought the seat bottoms and bench feet to the shop in Lucas. Seb finished up the routing on the sides and the bench feet, while Dave P. got all the side pieces fine sanded. David K. worked on repairs of some delaminated edges. Our next scheduled work day is Tuesday, Feb. 19, 9 a.m.-noon. See captions below photos for more detail.
While holding the gap between delaminated layers apart with a screwdriver, David Kanally drizzles a little Tite Bond II wood glue into the crack. It'll be good as new following clamping overnight.
Dave Peiffer fine sands the edges and surfaces of the side pieces while Seb Borrello finishes up the side piece routering.
By using a router table, Seb is able to maintain tight control of the work piece. The yellow router bit is putting a 1/4" radius along the edges of the side piece.
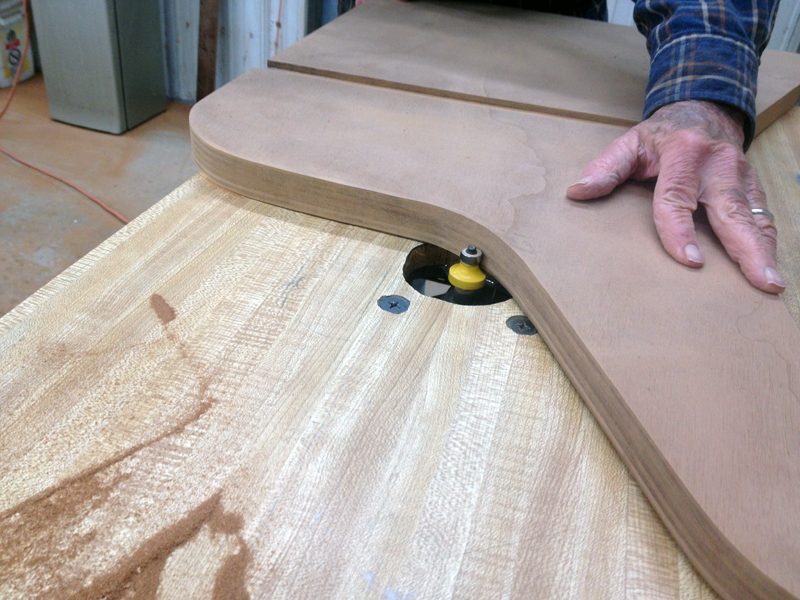
A closer look at the router bit, which is spinning at high speed, cutting a rounded edge on the side piece. There is a steel bearing on top of the yellow bit which guides the cutting blades along the contour of the wood.
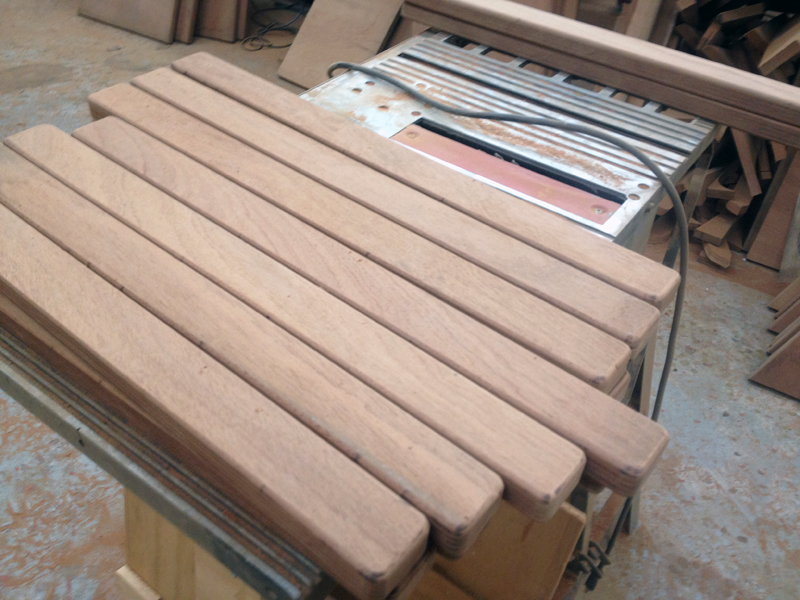
The bench feet are 2" wide and are routered all the way around. They will attach to the bottoms of the side pieces.
Seb routers the edges of the bench feet, using the 1/4" radius bit.
UPDATE FEBRUARY 16,2013
What a great day of accomplishment and team effort! We worked steadily for over 3-1/2 hours, and accomplished a great deal. We surface sanded nine seat backs and 18 side pieces, grooved 18 side pieces, edge sanded all remaining side pieces, and began rounding off the edges of the side pieces. Our next scheduled work day is Monday, Feb. 18, 9 a.m.-noon. See captions below photos for more detail.
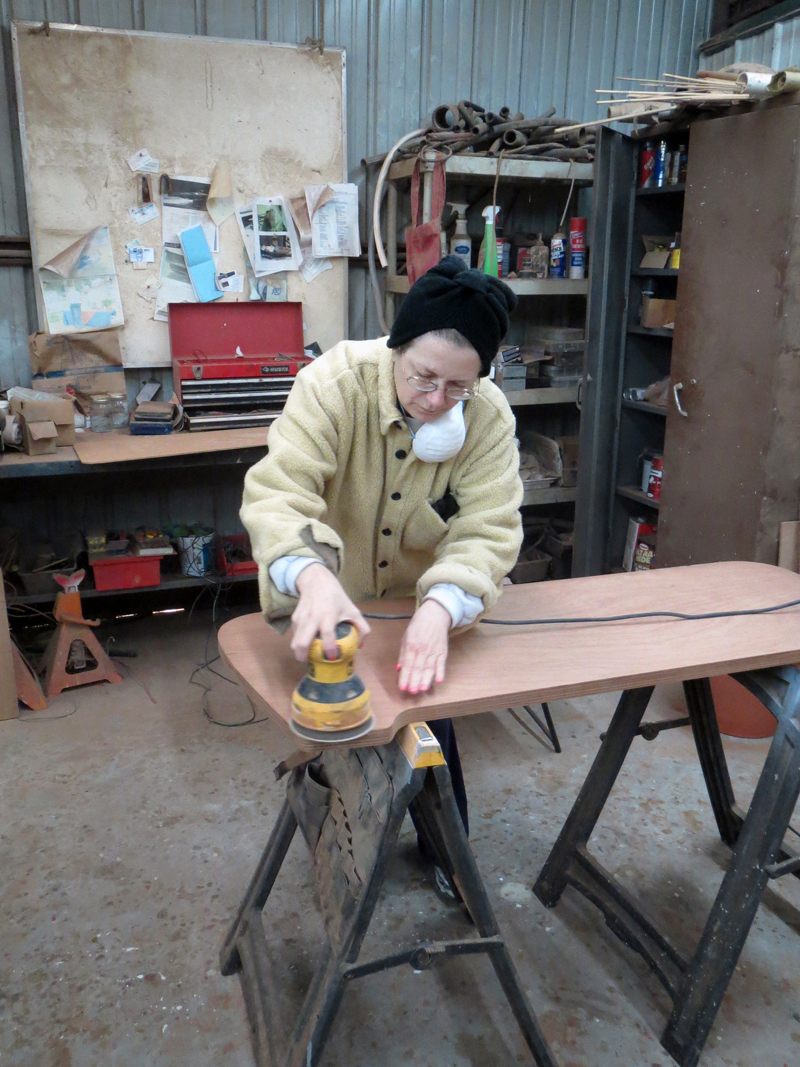
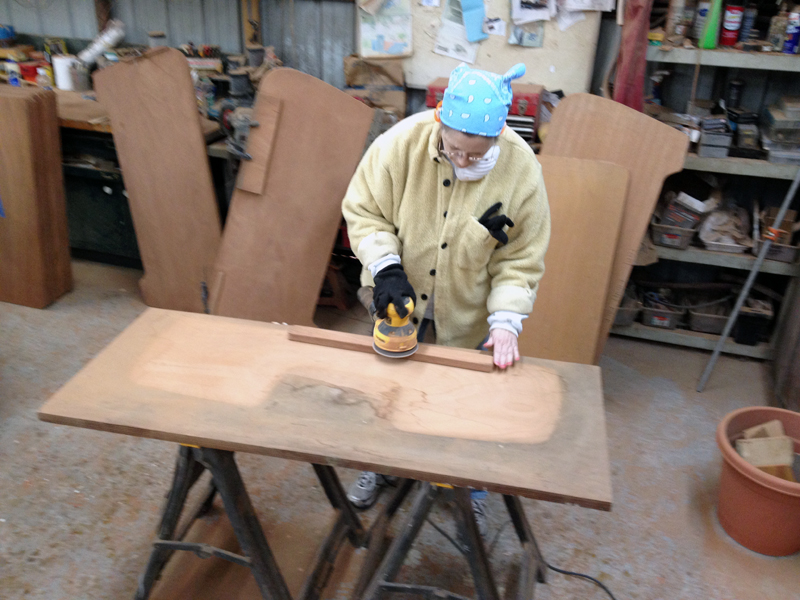
WBA Secretaray Gay Perry surface sands a seat back with a random orbital sander with 220 grit sandpaper.
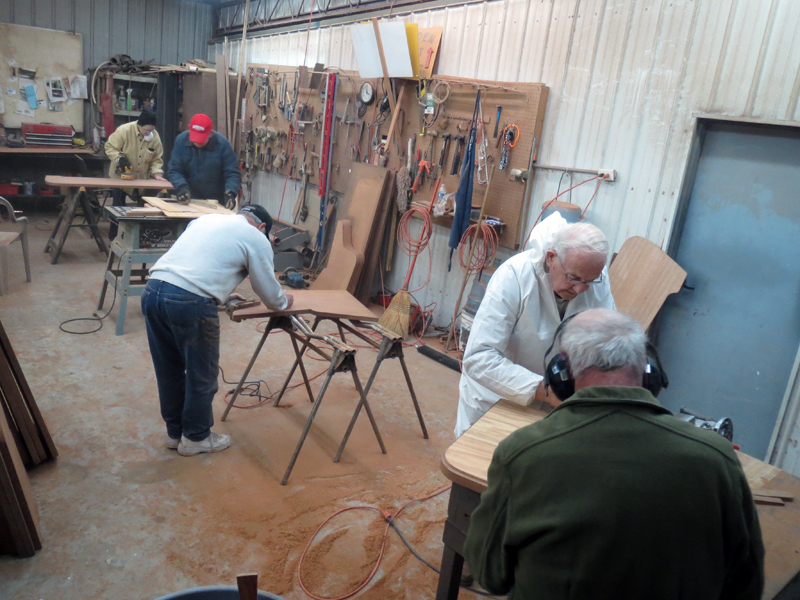
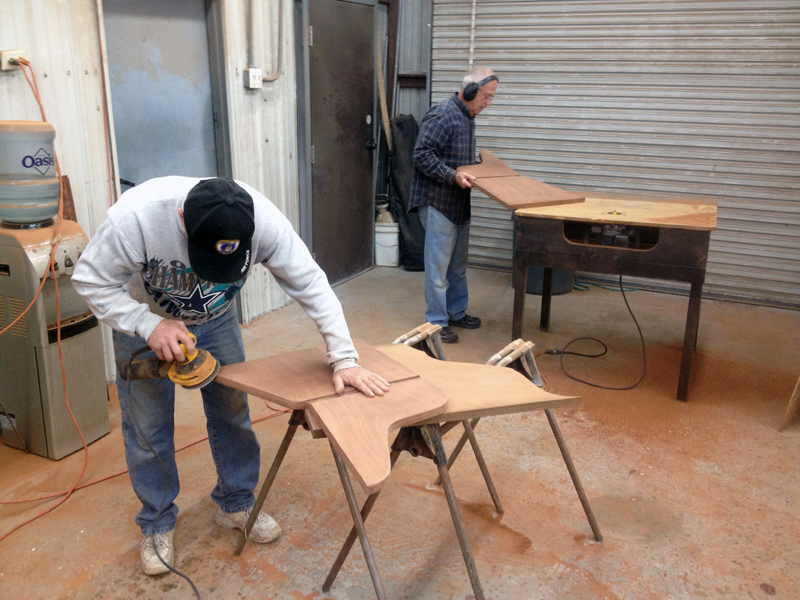
Four work stations inside, and a fifth outside, allowed for maximum productivity today. From back to front, Gay Perry surface sanding, Bob Adair cutting grooves in the sides to support the seat bottoms, Dave Peiffer edge sanding the routered side pieces, and Lew White and Seb Borrellow routering the remaining side pieces (18 in all!)
Seb Borrello routers the side piece to match the template and Lew White steadies the work piece.
Bob Adair sets up a template to cut the grooves in the side pieces. Using a router with his template, he assures that every groove is in the precisely the right place on all side pieces...nine right sides and nine left sides.
The seat groove routered into a side piece.
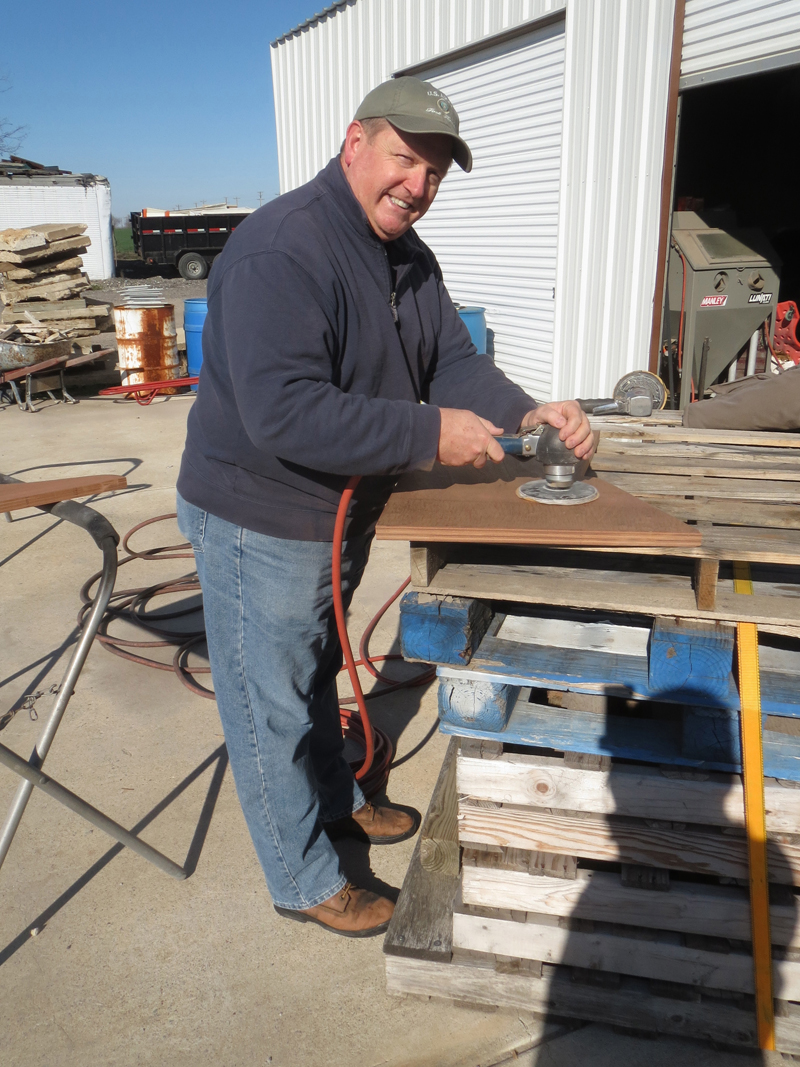
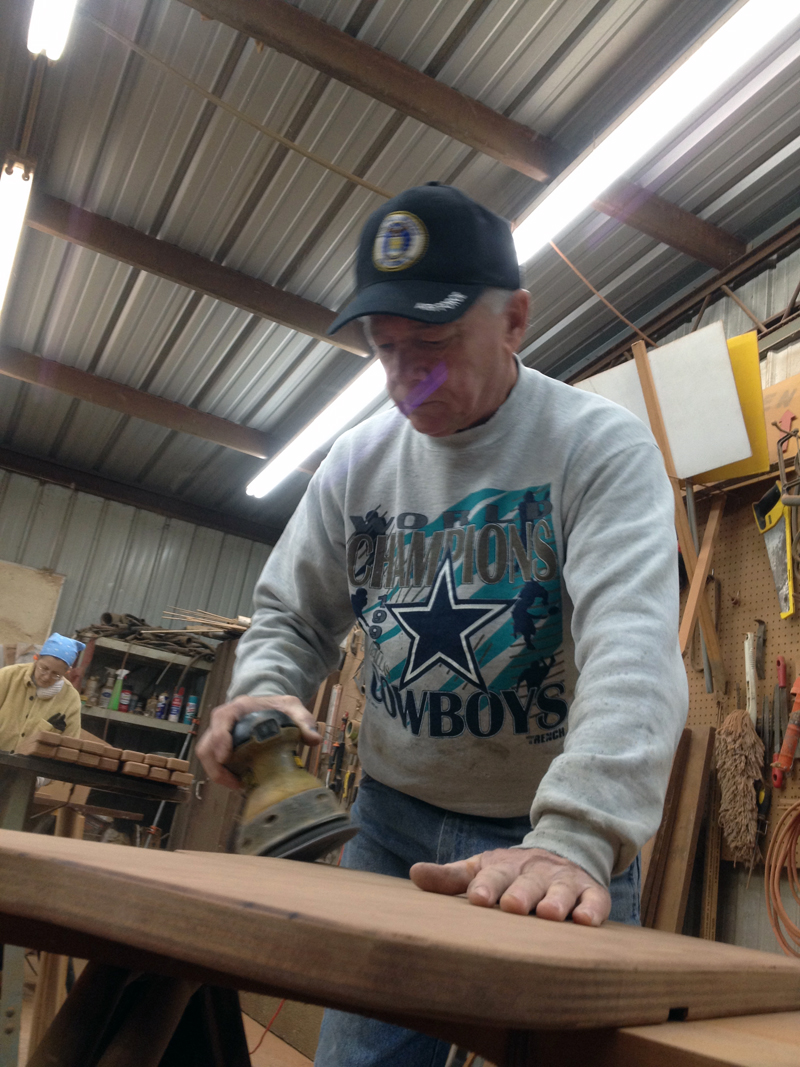
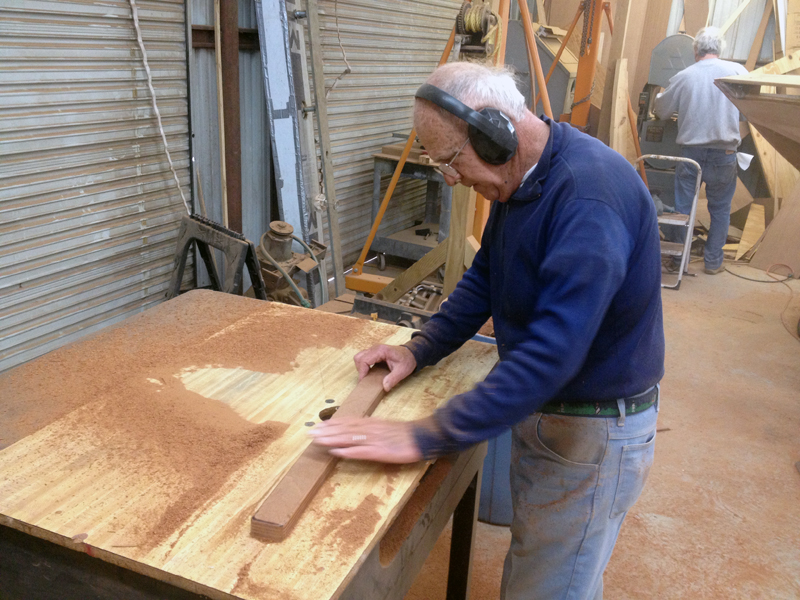
Jim Donovan manned our outside surface sanding station, equipped with Dave Peiffer's air sanders and 220 grit sandpaper.
Lew White rounds of the edges of a side piece, using a 1/4" radius router bit, the router being mounted under the routing table.
Sets of left- and right-hand side pieces are grooved to accept the seat bottoms during assembly. The grooves are 1/4" deep and provide rigidity and extra support for the weight the seats will bear.
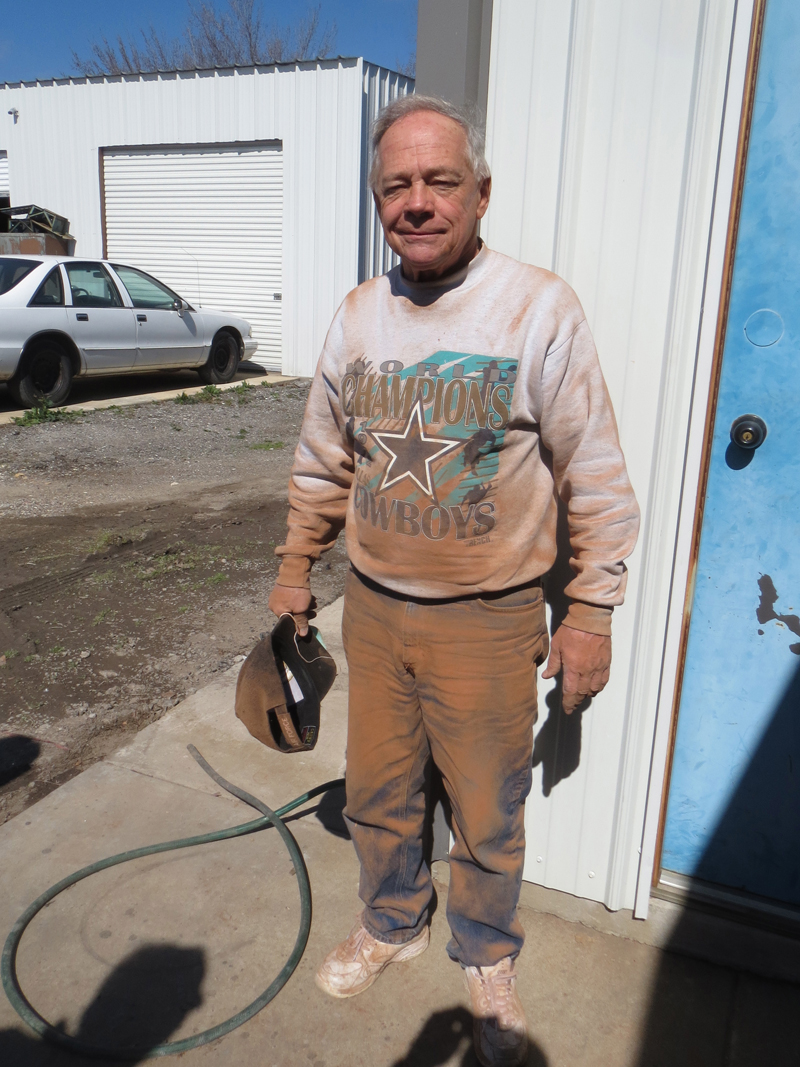
Dave Pfeiffer gets today's prize for most sawdust eaten and worn. Dave was using a belt sander all morning, and really has something to show for it!
UPDATE FEBRUARY 14,2013
Today, we cut out the remaining side pieces and routered 4 more side pieces. Lew and Robin made a new side template, due to wear and tear on the original. Our next scheduled work day is Saturday, Feb. 16. See captions below photos for more detail.
Lew puts the finishing touches on the new side template. The original one was suffering from some nicks that would have caused flaws in the final pieces.
Dave Peiffer (right) shows his skilled hand as he removes any edge irregularities with a miniature belt sander. Dave has done both furniture work and auto body work, and his finesse shows! Seb Borrello (left) is hand sanding the inside radius of the seat back, using a round glue bottle as a curved sanding block. This outside edge must be smooth and flawless before the corners are rounded off with a router. Note that this seat back is of a lighter color than most of the others. We will match this lighter back with other lighter pieces from the lot. Some natural variation in color exists within our stock of vintage plywood. So your bench may be a little lighter or darker, depending on the natural color of the stock. No stain is used in the finishing of the benches.
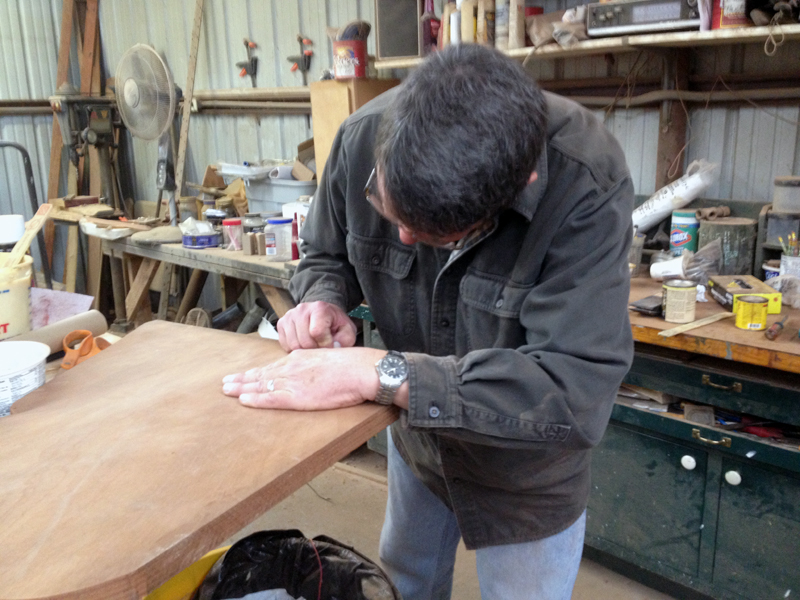
David Kanally prepares a surface check in the plywood for cosmetic filling. The 50+ year-old plywood has a few imperfections here and there as a result of years of storage. These will add to the story value of your bench!!
(l-r) Seb Borrello, Lew White, Robin McGeorge and Dave Peiffer are showing their pride, and their mahogany sawdust, as they wrap up work today!
UPDATE FEBRUARY 13,2013
Today, we cut out and routed 9 seat backs and traced 18 bench side patterns onto the plywood. We also rough cut 11 bench sides and routed 4 bench sides. See captions below photos for more detail.
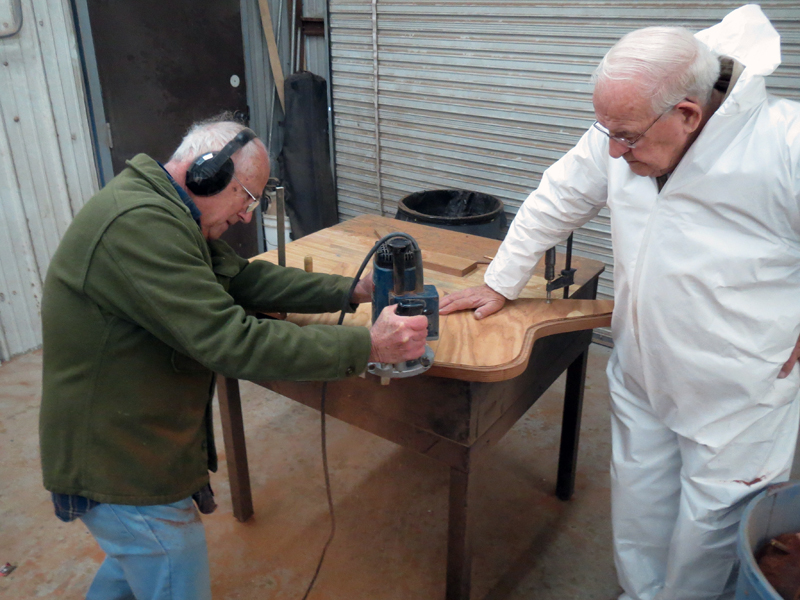
Lew White in his Dr. White Overalls, routers the edge of a seat back, which is in the shape of a Yellow Jacket transom. Robin McGeorge steadies the work piece.
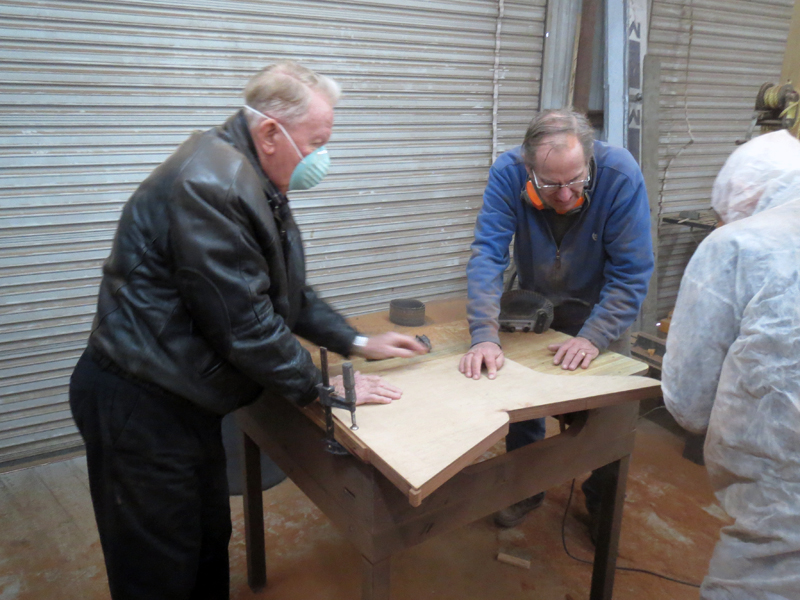
Bob Adair (left) and Robin McGeorge (center) steady a bench side piece while Lew White runs the router around the template.
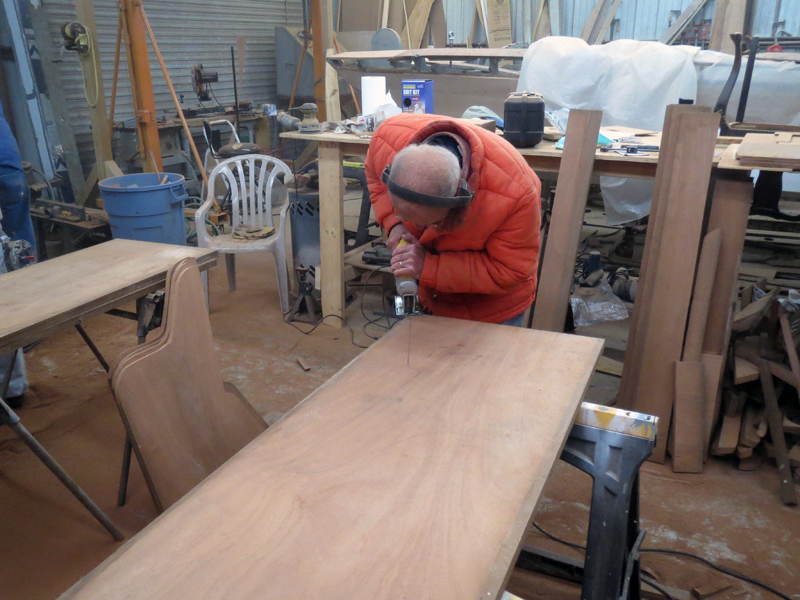
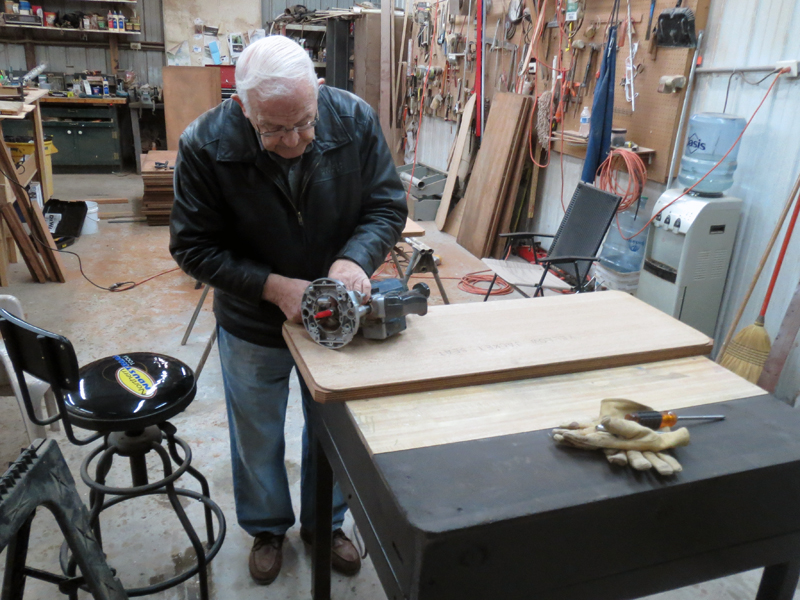
Seb Borrello begins a rough cut-out of a bench side piece using a sabre saw.
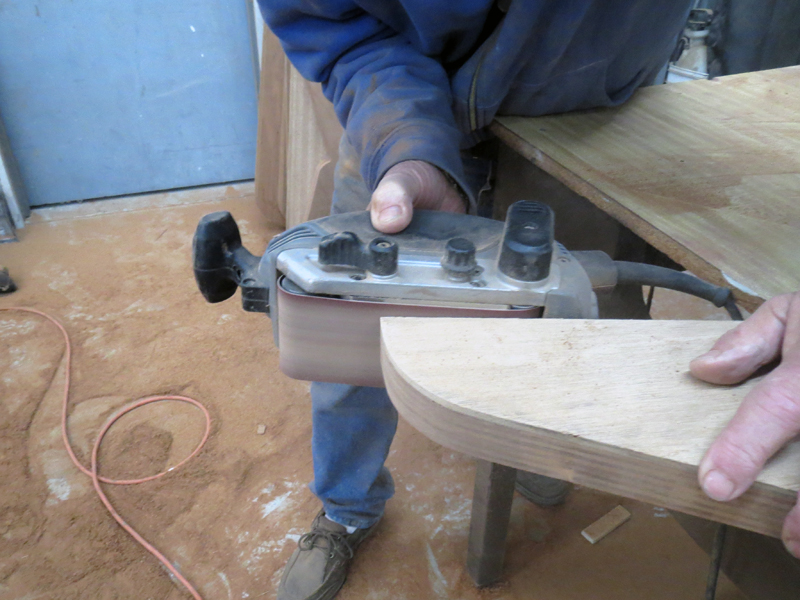
Robin McGeorge uses a small belt sander to remove any router bit marks from the edge of a bench side piece.
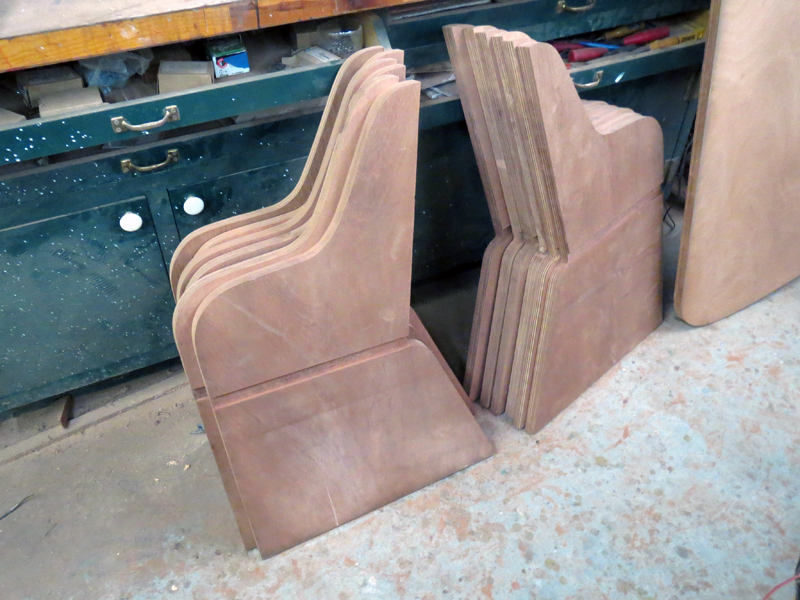
Two routered side pieces rest against nine routered seat backs near the entrance door of the shop.
Seven rough-cut bench side pieces are stacked on saw horses as Lew White sweeps up today's sawdust.
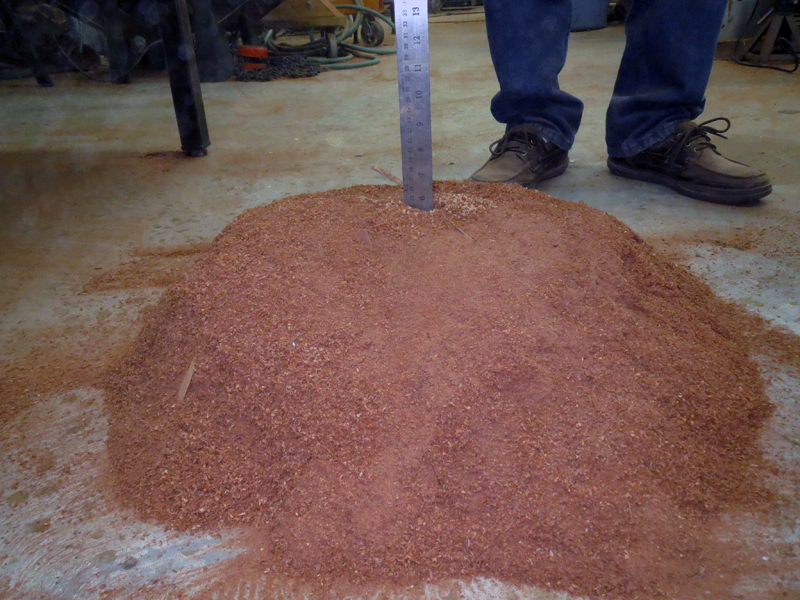
Today's sawdust pile...six inches deep! Larger shavings are from the router. Fine sawdust is from...the saws!
UPDATE FEBRUARY 12,2013
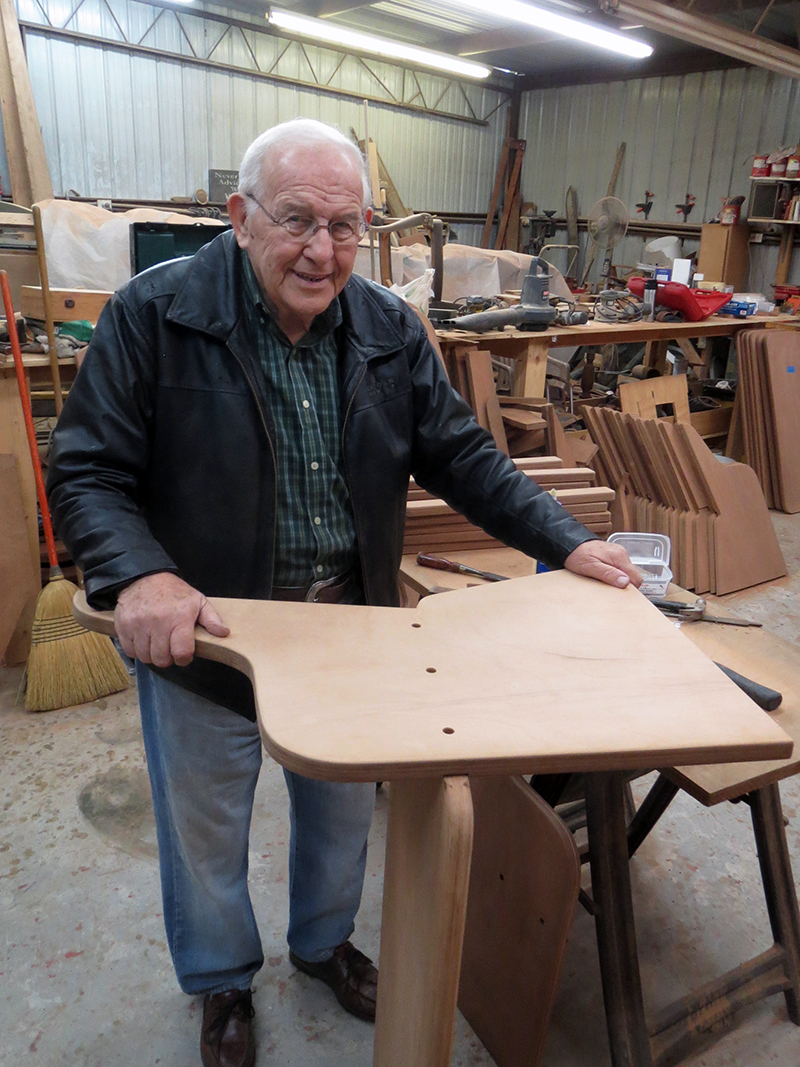
Today, we cut out and routed 9 seat bottoms and traced 9 seat back patterns onto the plywood. See captions below photos for more detail.
Seb Borrello and Lew White select which plywood pieces will be used for specific bench parts.
Robin McGeorge traces the template for the seat bottom onto one of the pieces of plywood.
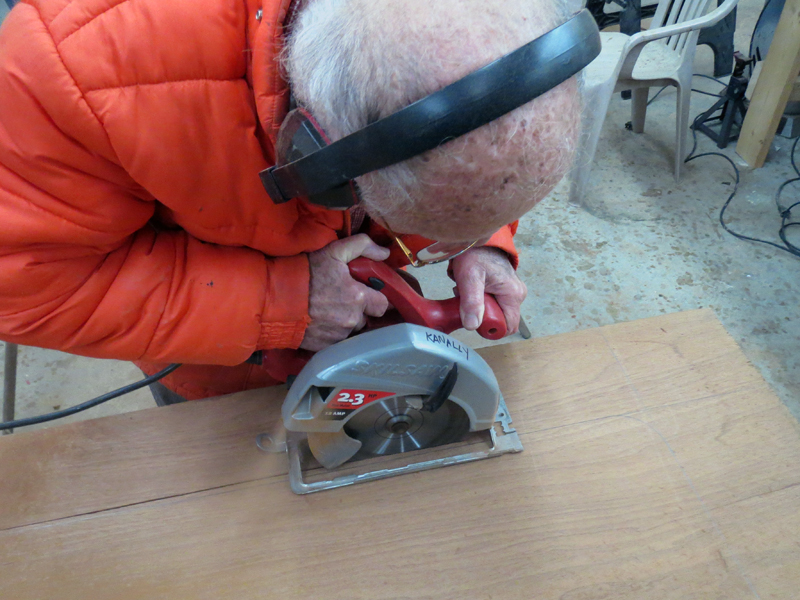
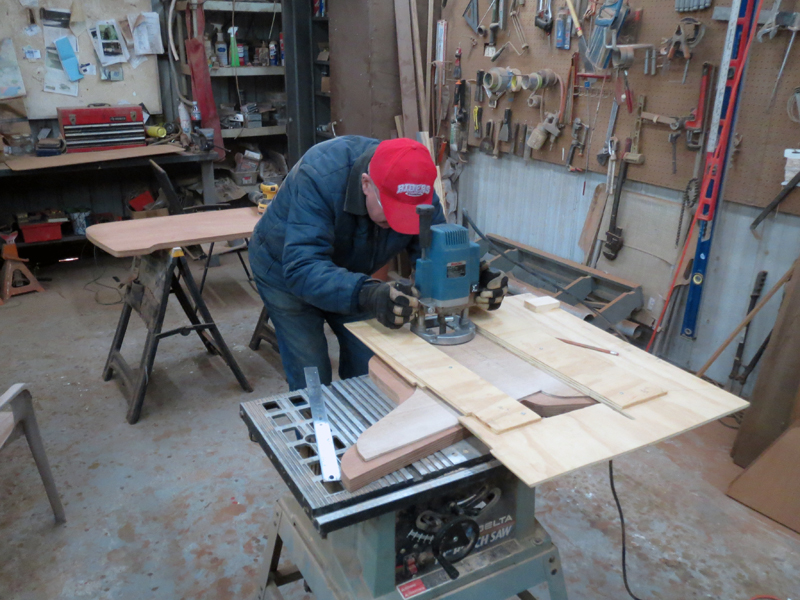
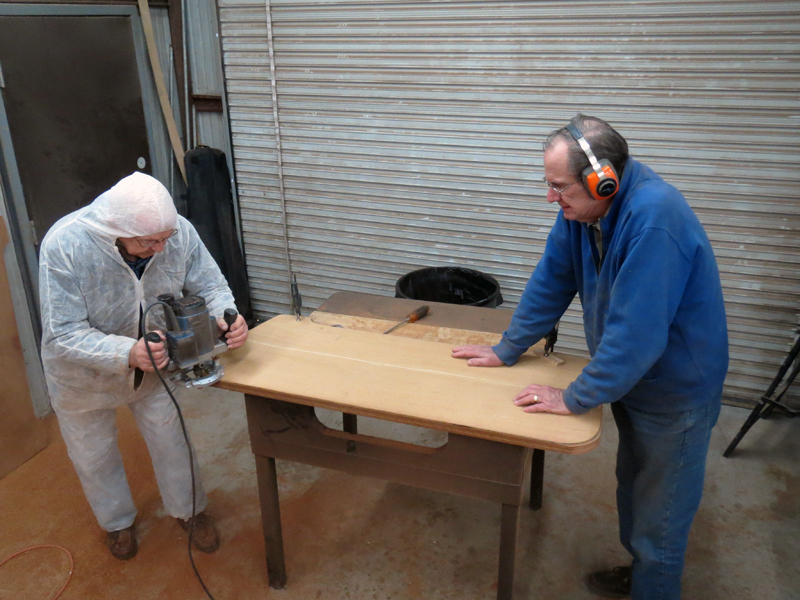
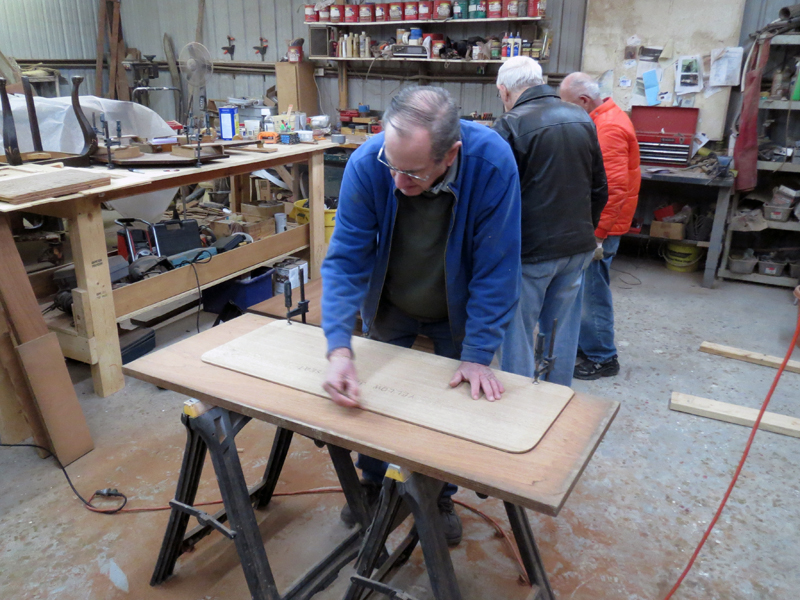
Seb Borrello uses a Skilsaw to cut out the rough shape of the seat bottom. Seb is the only one of us smart enough to wear hearing protection. Huh?
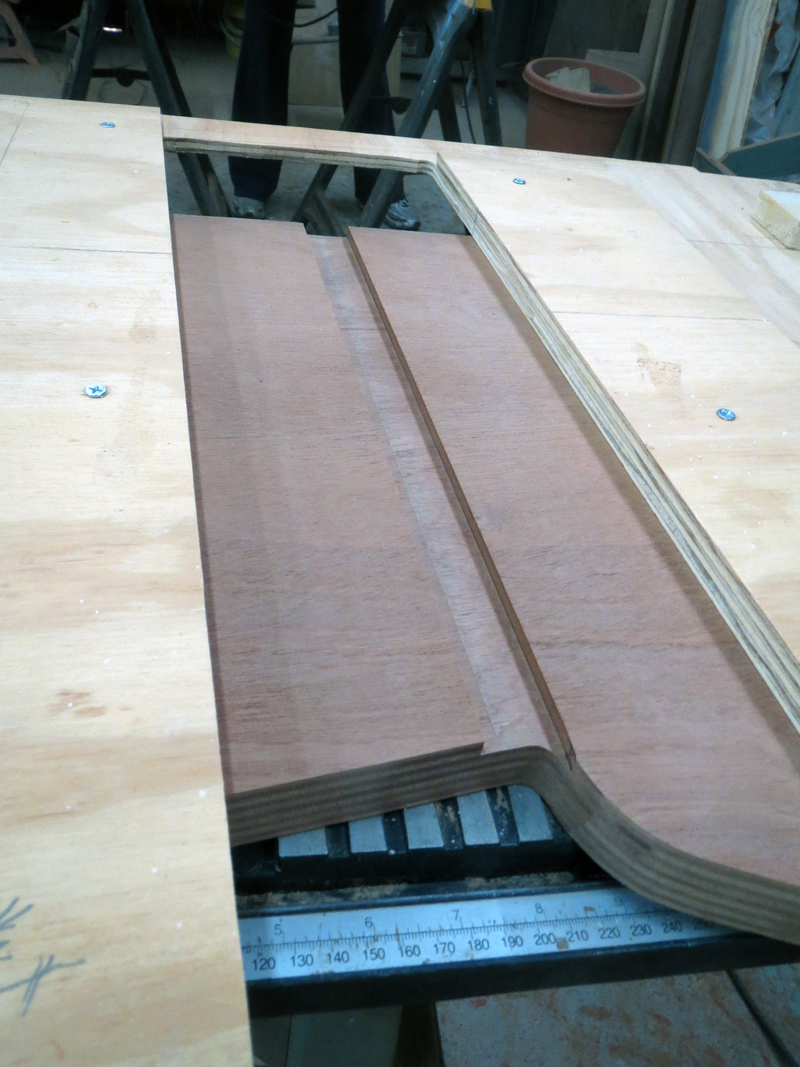
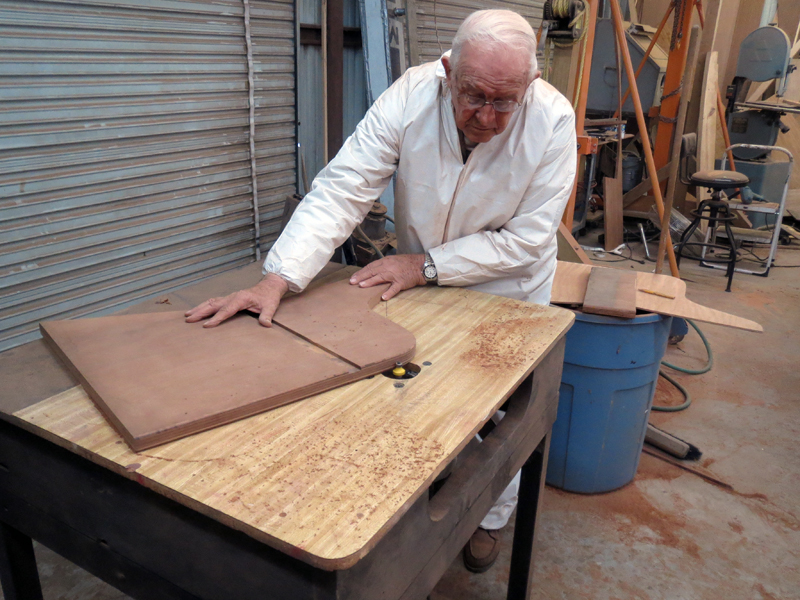
Lew White adjusts the flush-cut router bit in the router before the final routing of the seat bottom shape. Note that the plywood's rough cut edge sticks out a little from the edge of the template resting on top of it. Lew's routing operation will cut the plywood to be exactly flush with the template.
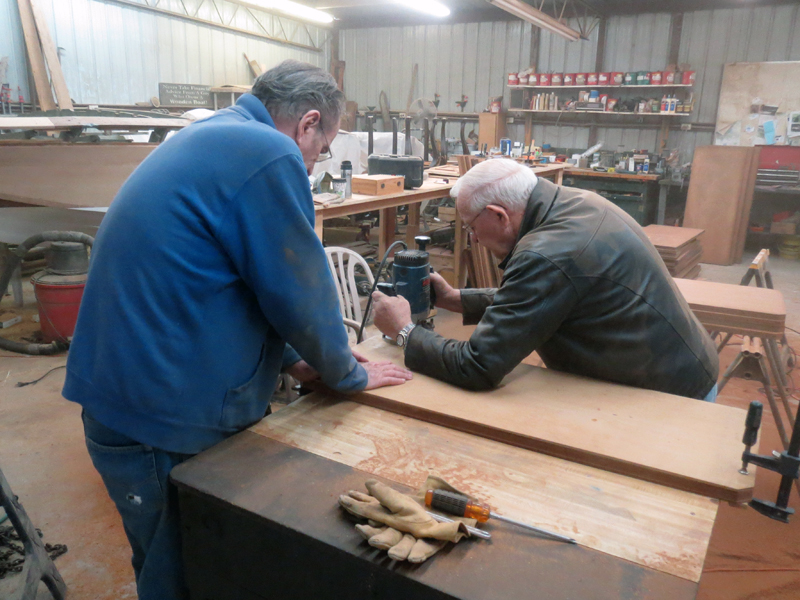
Robin McGeorge steadies the work piece while Lew White runs the router around the template, making the plywood seat piece the exact shape of the template. Seat bottoms were delivered to Bob Adair's home shop for some edge treatment.
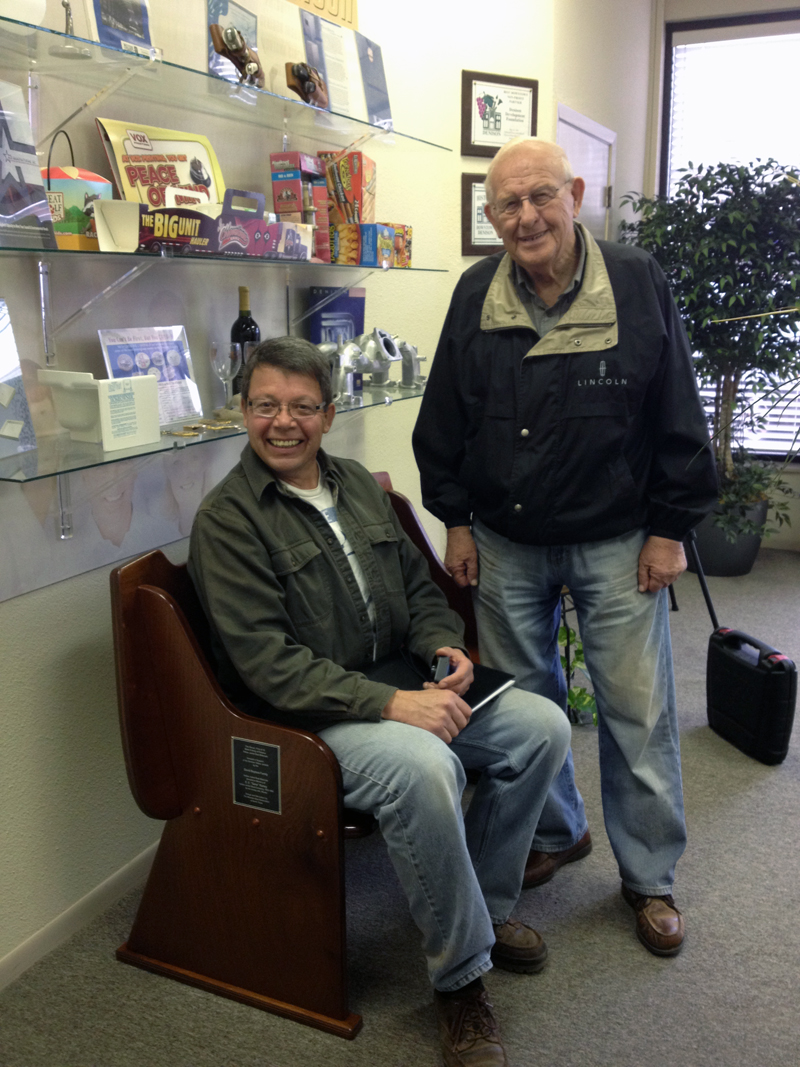
AND IN OTHER NEWS:
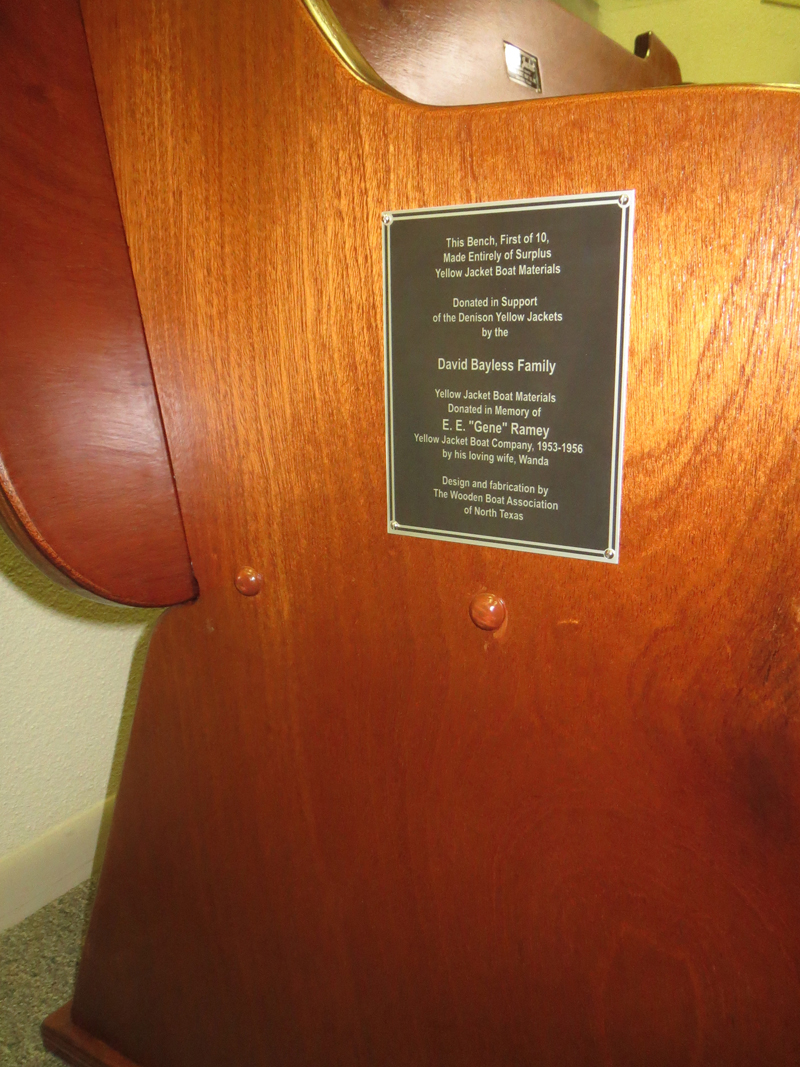
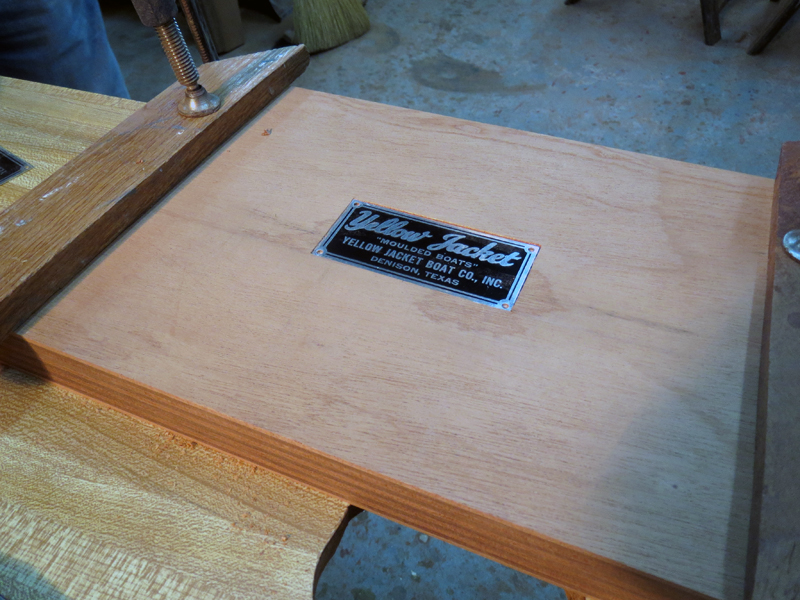
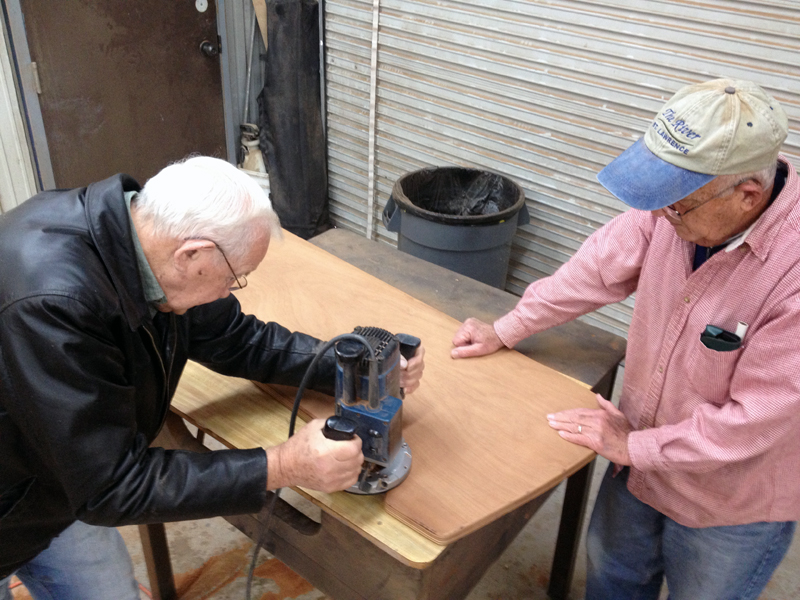
Lew White and David Kanally stopped by the Denison Development Alliance today to affix the David Bayless Family donor plaque to the first of ten Yellow Jacket Benches. The other benches will be numbered, "No. 2 of 10", "No. 3 of 10", etc. based on the order in which pledges were received.