
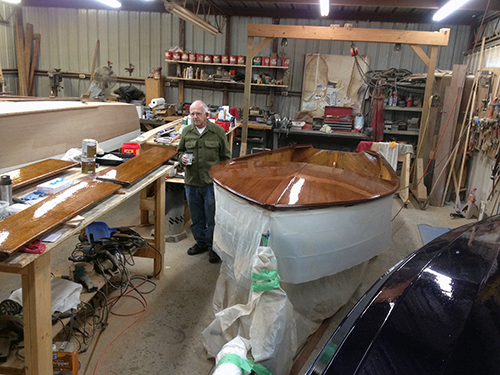
Restoring Pic Cyr's '51 14' Fisherman!
Most recent update at top of page
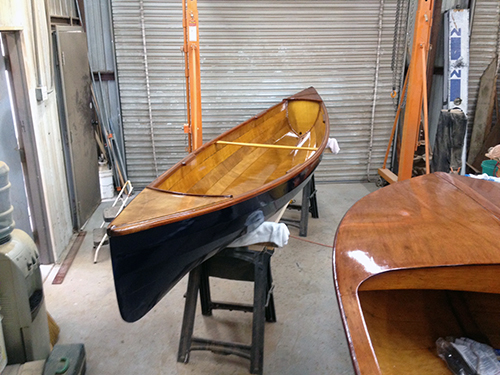
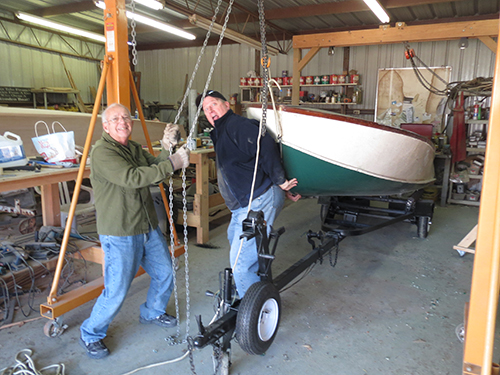
On April 11, 2014, Ken Mattice and David Kanally did final touchups on the Yellow Jacket and attached the stern of the boat to the trailer with green ratchet straps. So we're calling this project complete!
Work Day 45, April 10, 2014
Hardware on, motor on!
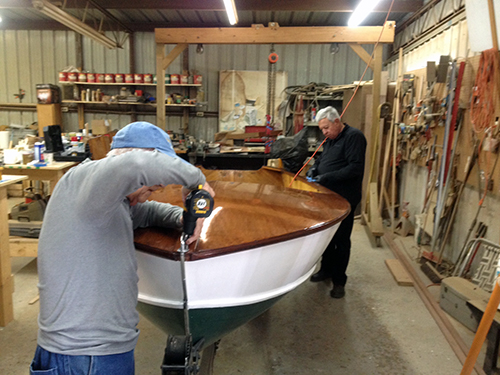
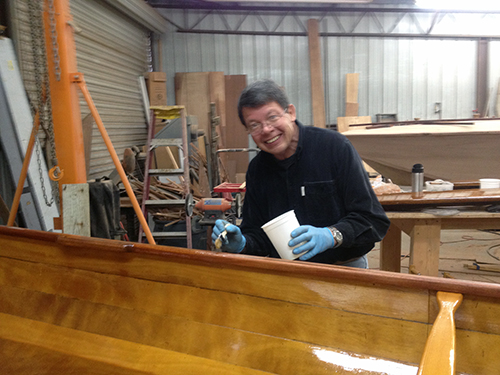
Seb Borrello mounts the freshly polished bow handle, while Ken Mattice cleans buffing compound from the deck seams
Seb attaches the three bench seats to the seat rails with period-correct slotted brass screws.
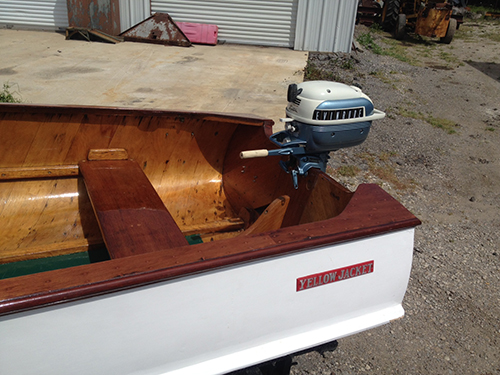
The Evinrude 3hp restored by Chip Rathbun looks right at home on the Yellow Jacket's transom. The Yellow Jacket hull badges restored by Robin McGeorge look mighty nice against that shiny white hull paint.
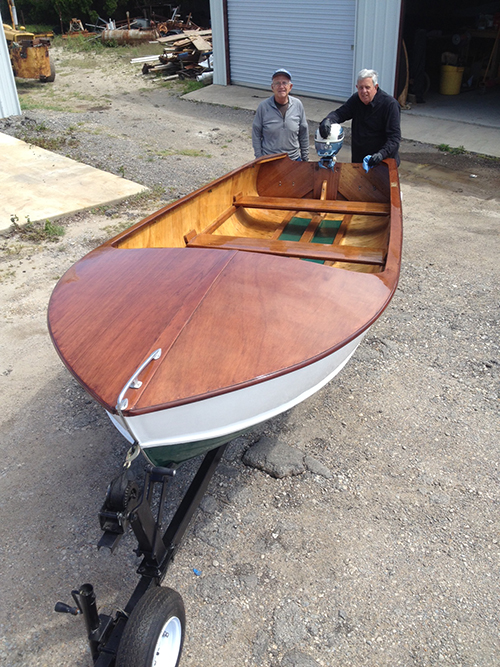
Seb and Ken look proud as punch as the sunlight reveals the full beauty of the Yellow Jacket.
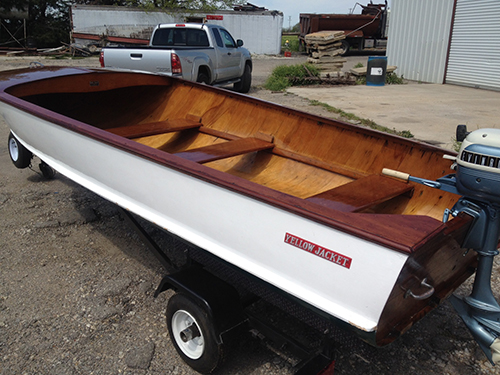
This would make a fine rig for any WBA member!
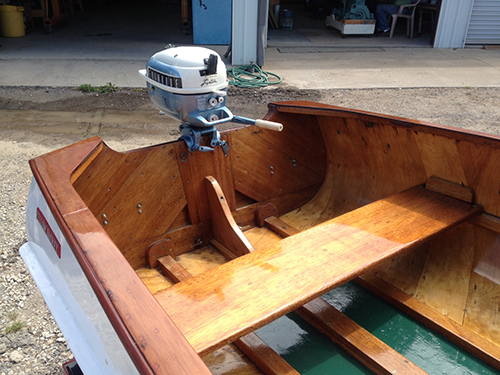
Here's a view of the Evinrude mounted on the transom.
And here's the little motor running! Don't worry, we only let it run a few seconds since it spun the cooling water out of the bucket.
The original "McDerby-Conatster Boat Co." dash tag is back in place.

Ken, Seb and David are happy to see the project nearing a successful completion!
Work Day 44, April 9, 2014
Looking really buff!
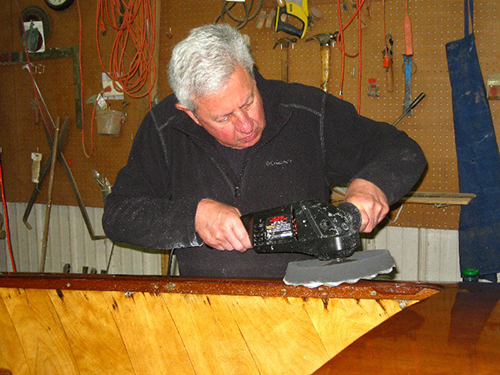
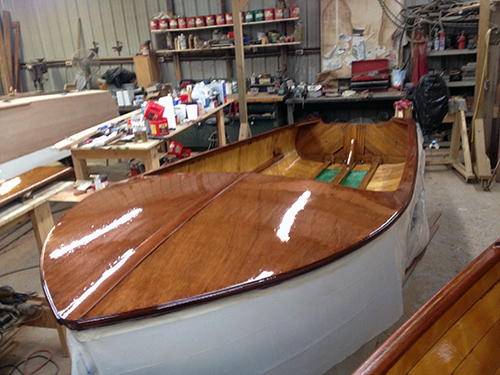
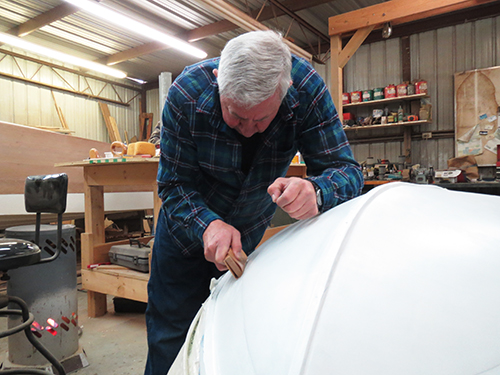
Ken Mattice buffs out the decking after fine sanding with progressively finer wet sandpaper up to 1500 grit.
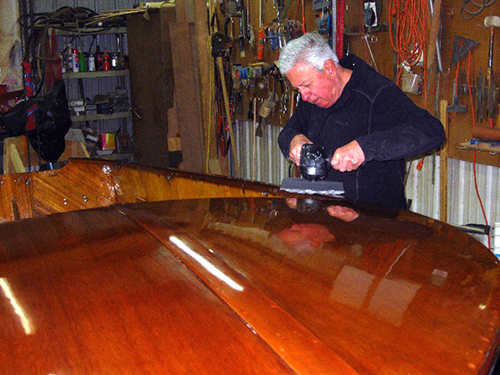
Ken's reflection gives some indication of the beautiful lustre on the decking now. Although we don't have a picture, Seb also put a nice shine on the cast aluminum deck hardware, getting it ready for mounting.
Work Day 43, April 2, 2014
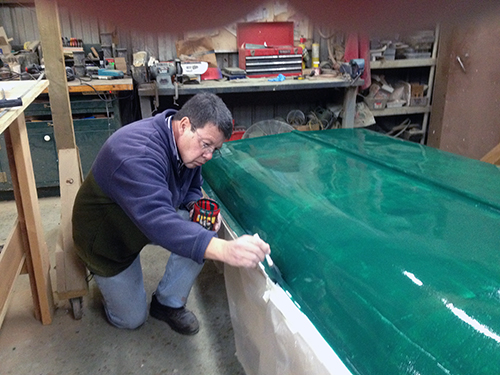
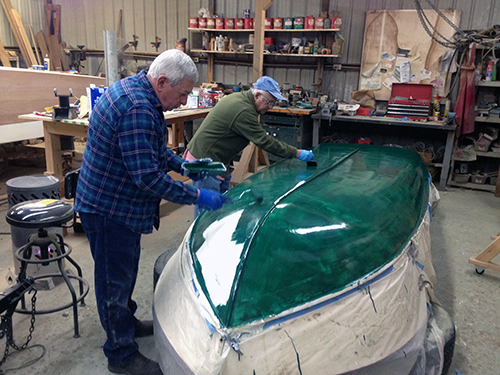
Hull gets second coat, transom handles mounted
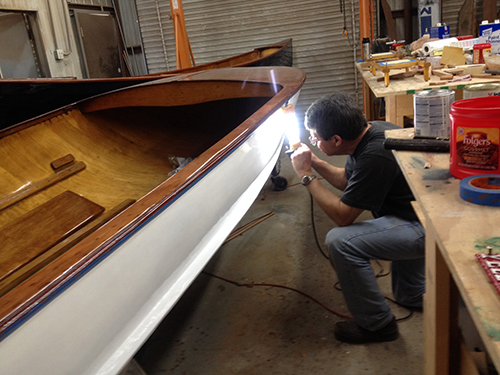
David Kanally uses a trouble light and a foam brush to hunt down any pesky runs in the hull paint. Also today, Ken applied another coat of spar varnish to the canoe seats and Seb mounted the transom handles on the Yellow Jacket. Seb Borrello photo.
Work Day 42, April 1, 2014
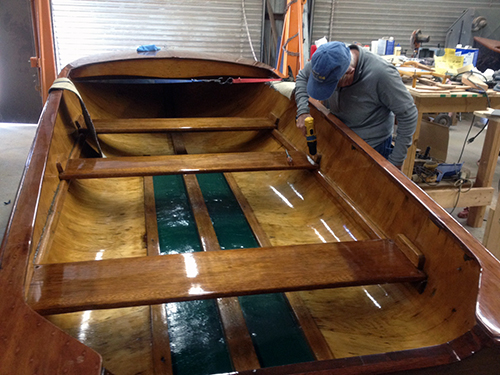
Floor gets second coat of paint, hull badges restored.
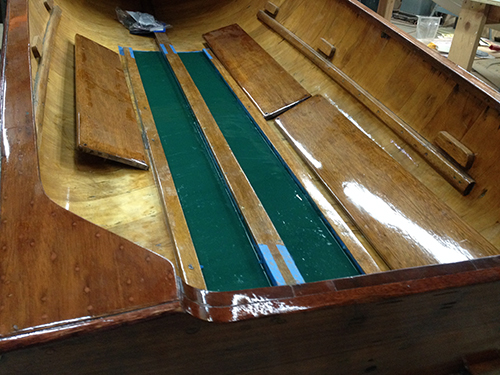
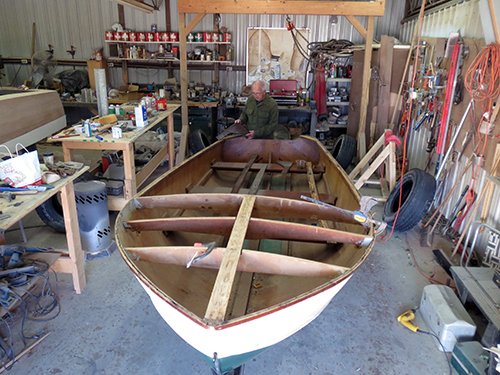
Ken Mattice has done a nice job of repainting the floor. The three bench seats are just sitting inside the boat awaiting installation. Seb Borrello has been fitting period brass slotted screws for attaching the seats. This requires a slight enlargement of the countersinks in the seat screw holes.

Robin McGeorge restored the Yellow Jacket hull badges for the boat. Since our Yellow Jacket is a '51, it has solid aluminum badges instead of the paint-and-decal side graphic typical of later models (1954-1959).
Ken has also been varnishing the new canoe seats. This is coat two, with a few more to come.
Once those seats are installed, the canoe will go to its new owner, WBA member Mike Gomes of North Carolina. Thanks and congratulations, Mike!
Work Day 41, March 30, 2014
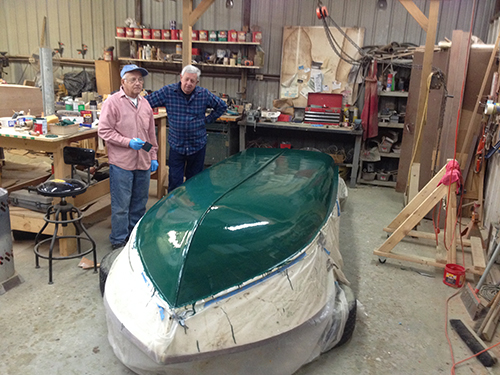
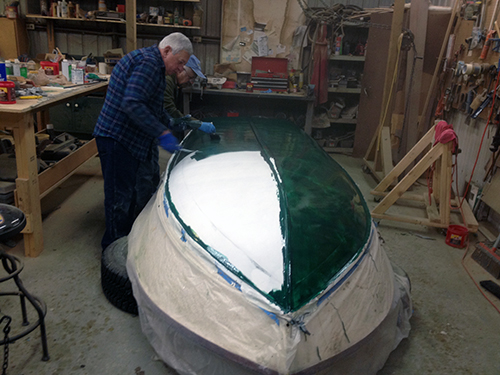
Hull and floor get first coat of paint.
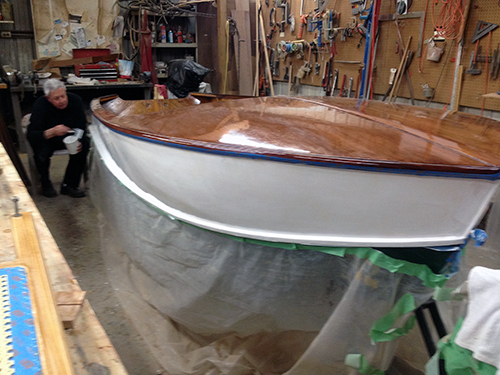
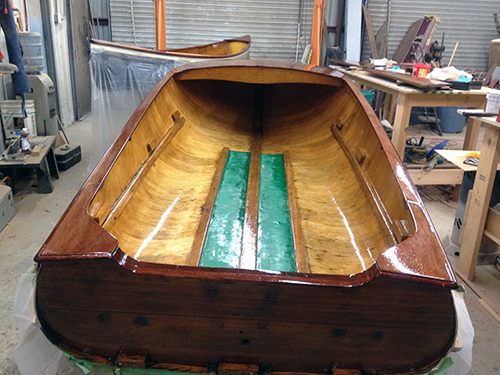
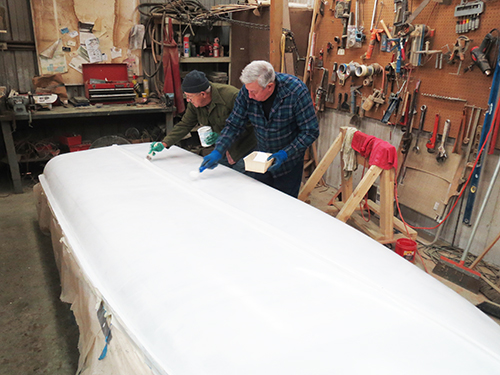
Ken Mattice applies a first coat of gloss white hull paint to the Yellow Jacket. The boat is starting to look really good!
The floor looks better already, after the first coat of Sea Green paint.
Work Day 40, March 29, 2014
Surface prep for painting!
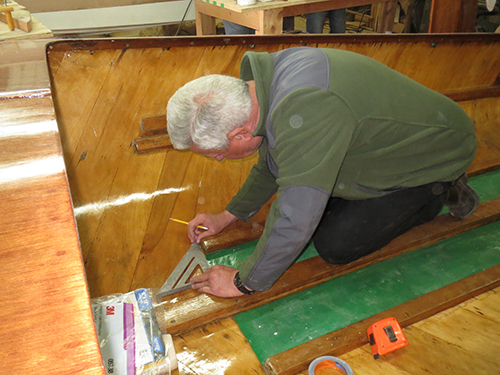
Ken Mattice measures and tapes off the area of the floor to receive a fresh coat of Sea Green paint.
Seb Borrello hits the jackpot in his search for brass slotted screws to hold the bench seats in place. The WBA shop holds many surprises, including leftover supplies and materials from past projects, which members can use.
Here's the canoe we've been talking about! Almost done!
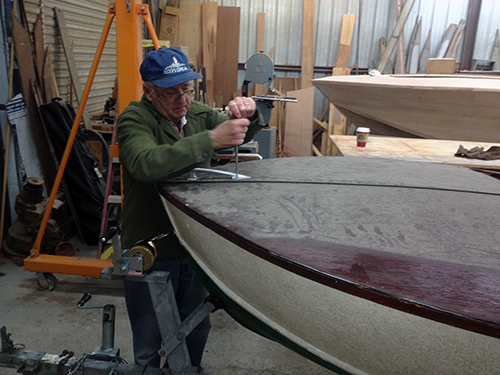
Work Day 39, March 26, 2014
Final coat of varnish is on!
Ken Mattice (l) and Seb Borrello (r) apply the final coat of varnish to the seats and decking.
Ken is using a high-grade foam brush recommended by varnish guru Robin McGeorge. No brush marks, and a nice, flat, final coat.
As Seb lays down the final coat of varnish on the port decking, it's easy to see that the starboard foredeck has been sanded (with 220-grit wet) to be very flat and uniform in preparation for varnish.
Work Day 38, March 22, 2014
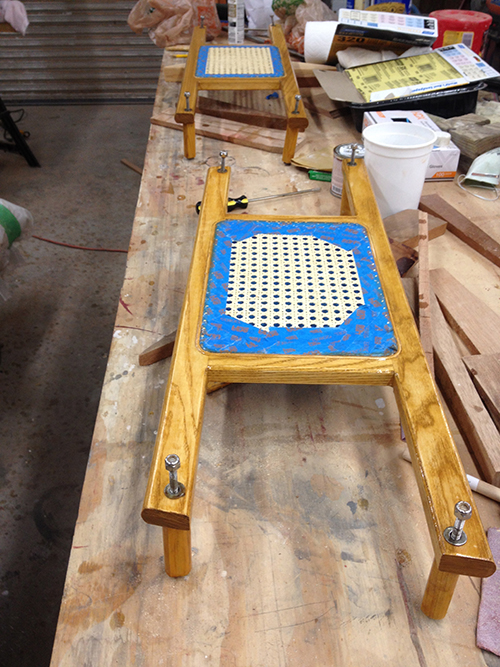
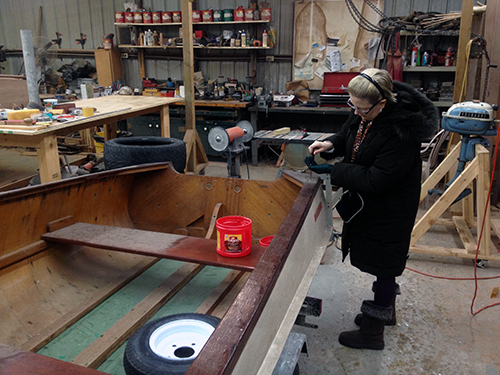
Seats get attention where they need it!
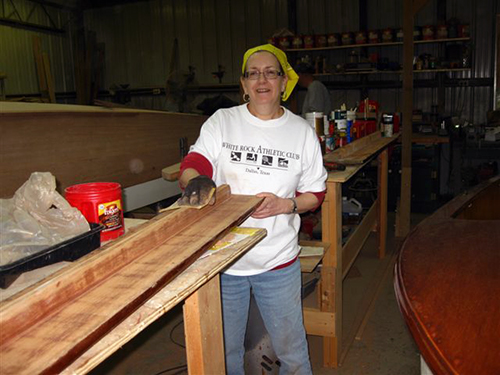
The underside of the Yellow Jacket's bench seats don't need to have a mirror finish, but they sure need to be properly sealed against moisture. Here, Gay Perry sands the seat undersides before applying a thinned coat of varnish as a sealer.
Work Day 37, March 21, 2014
Shiny, shiny!
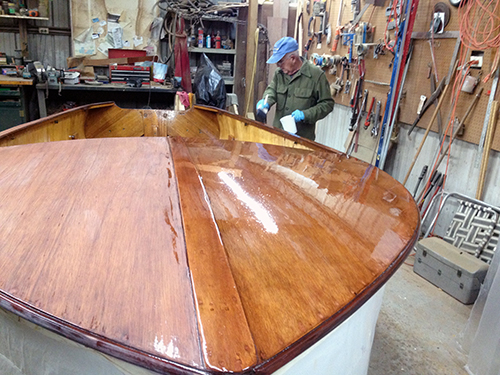
Seb begins application of another coat of spar varnish to the deck. David has just finished varnishing the inside.
The overhead lights are reflected in the wet varnish on the deck. We're getting close to finish coat.
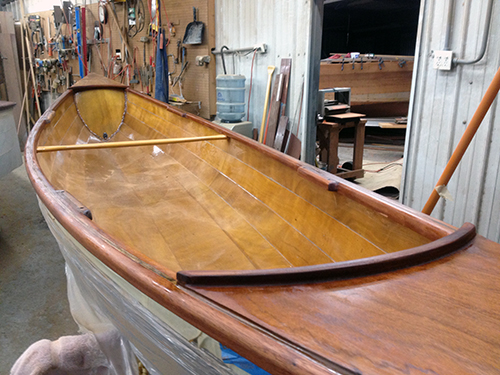
David puts some tung oil on the gunwales of the canoe. This is an experiment, using tung oil as a grain filler...on recommendation of Emmett Smith of the Antique Boat Museum.
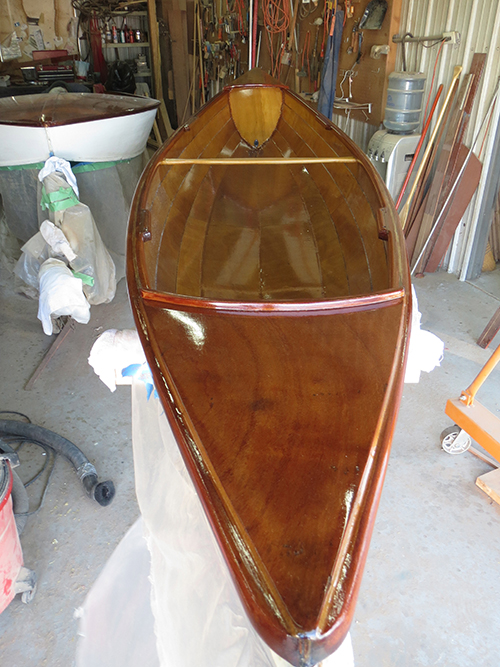
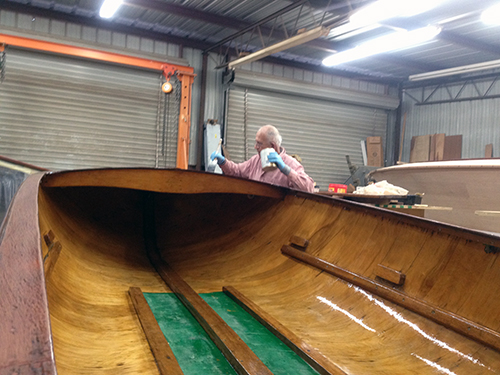
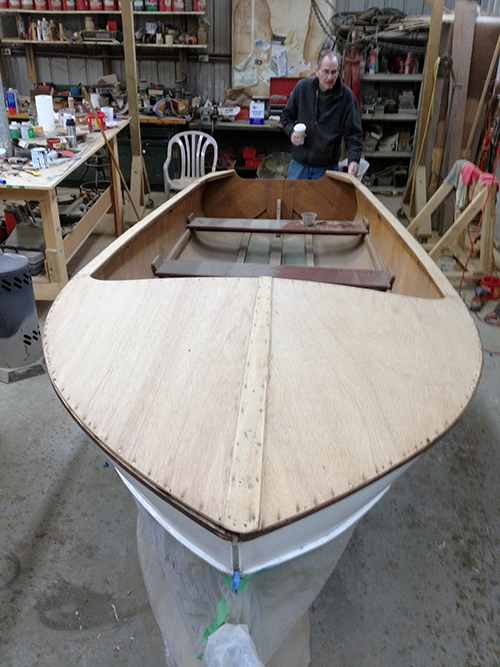
Bow view of the Yellow Jacket at the end of today's work session.
Stern view of the Yellow Jacket at the end of today's work session.
Work Day 36, March 20, 2014
Surface prep!
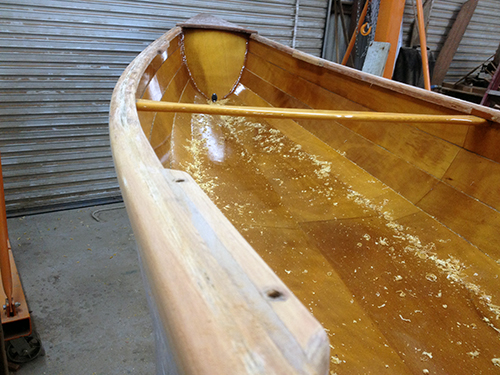
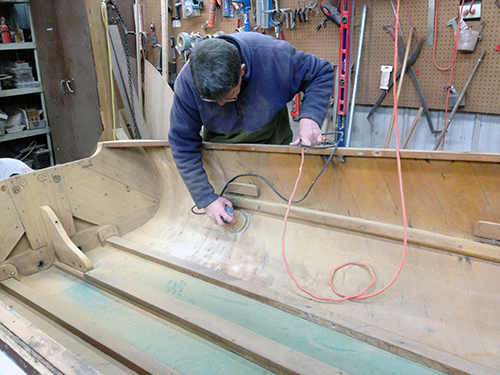
Between-coat sanding of varnish is being done with 220 grit paper. This sanding gives the next coat a roughened surface to "key" into, and it gives us an idea of how far we need to go to get a perfectly flat surface for buffing. Here you can see the high spots are dull and the low spots are shiny. After a couple more coats, the sanding should yield a uniformly dull surface.
The canoe's gunwales and end caps have been fine-sanded (120 grit on bare wood) and then given a coat of Clear Penetrating Epoxy Sealer (CPES). CPES not only seals the grain of the wood, it penetrates any gaps in the wood and kills off any rot spores that may be hiding. Varnish is next!
Work Day 35, March 19, 2014
Varnish dries all by itself, canoe gunwales stripped.
Because it's hard to capture the drama of the Yellow Jacket's varnish drying in a photo, we bring you this shot of the Chesapeake Light Craft Canoe's gunwales, scraped this morning by David using a heat gun. Since the interior of the hull is pristine, it does not need to be stripped. So David decided to strip the gunwales using the targeted heat of a heat gun, rather than the comparitively sloppy chemical stripper method, which could have easily damaged the interior finish.
Work Day 34, March 18, 2014
More varnish! Plus the outboard motor is done!
Ken Mattice cleans the sanding dust from the seats prior to adding the fifth coat of spar varnish.
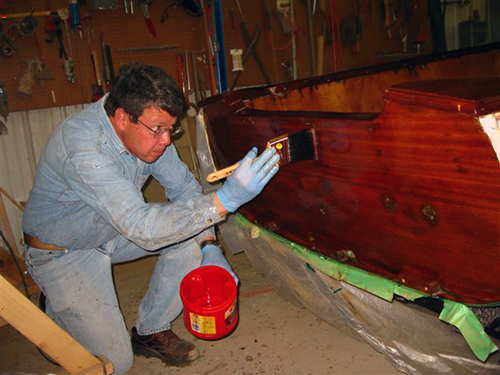
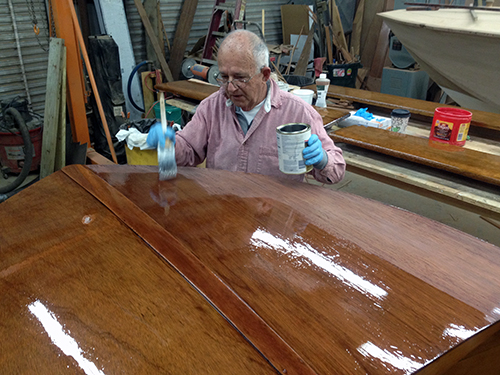
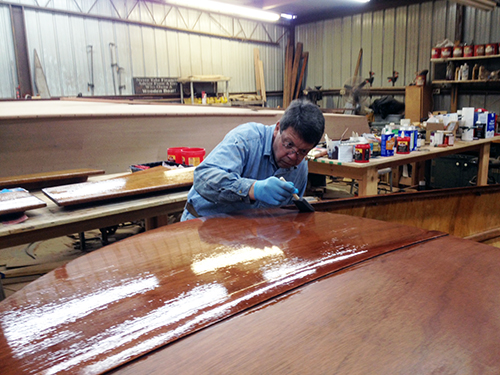
David varnishes the transom, using the patented "evil eye" to spot runs.
Seb adds another coat to the decking, which is really looking good!
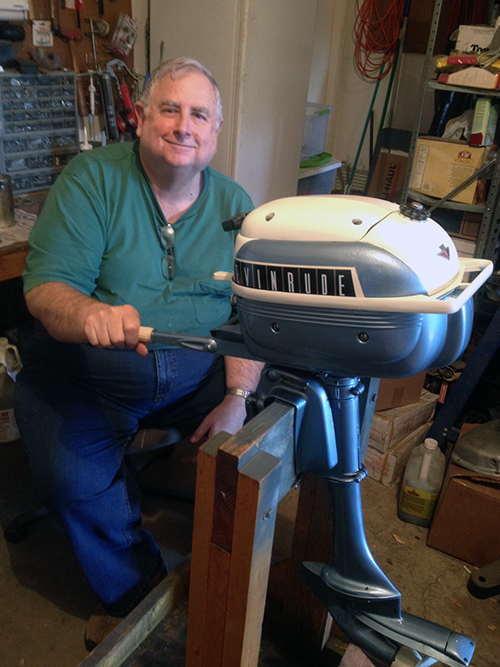
Meanwhile in Flower Mound, WBA member and outboard motor specialist Chip Rathbun has completed the very thorough rebuild of the 1960 Evinrude 3 hp outboard that Pic Cyr donated with the boat. It's good as new!
Work Day 33, March 14, 2014
Varnish day!
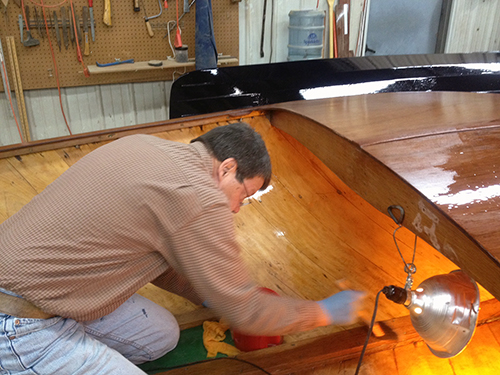
David varnishes the interior. Seb took this picture. Boatress Cheryl is happy to see that David actually does some of the work and gets his picture in the update from time to time.
The Interlux Original "90" spar varnish gives the interior birch veneer a nice golden color.
Seb varnished all the decking and all three seats today. He deserves that cup of coffee!
Work Day 32, March 13, 2014
Sanding the hull interior, varnishing seats, painting canoe!
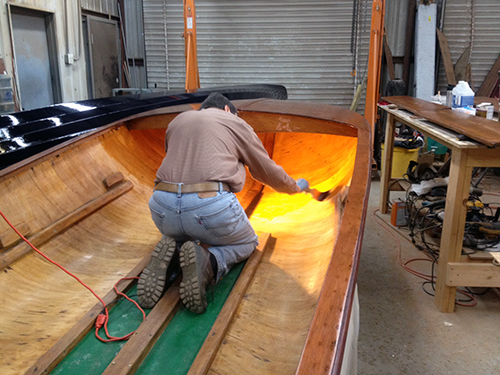
This is what dedication looks like, folks! Seb Borrello doffs his cap and dives under the foredeck to sand some pesky runs from the first coat of varnish. The interior is now ready for subsequent coats!
Ken Mattice applies the fourth coat of spar varnish to the seats. Two or three more coats should do it!!
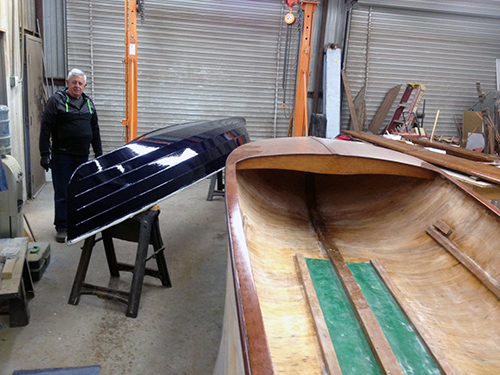
Since the varnish hadn't arrived in time for this morning's work session, we took advantage of the crew's time to put the second coat of midnight blue paint on the 16' Chesapeake Light Craft canoe donated to the club by WBA member Dave Parker. We should be able to do the varnishing phases of the two boats in parallel. Varnish arrived on the afternoon of this day, so we'll start varnishing tomorrow, Friday, March 14, at 10 a.m.
Work Day 31, March 11, 2014
Sealing the deck with Deft lacquer-based finish.
Seb begins to apply a sealer coat of lacquer to the decking. This Deft product will fill any remaining grain and give a smooth surface for the varnish to flow onto, eliminating the normal problems of unevenness due to open grain and surface tension. The decking in the foreground has not yet been coated.
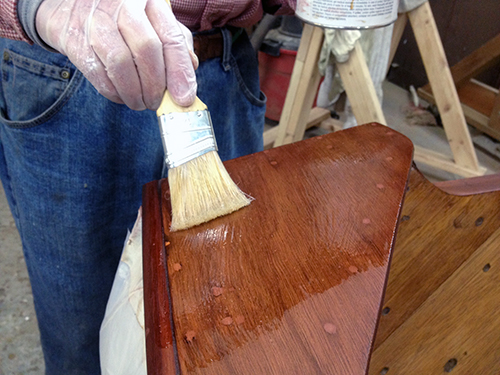
Seb uses a bristle brush to apply the lacquer finish.
David "tips" the coat of lacquer with a foam brush to remove any bristle marks. Deft is pretty self leveling, but this extra step gave David something to do. Notice the "evil eye" David uses to spot any thin spots or brush marks in the lacquer.

The Deft is still wet here, so we get a preview of the look of the boat when varnished. Deft dries to the touch in 30 minutes. We're very happy with the clarity of the grain and the evenness of the stain using our chosen method.
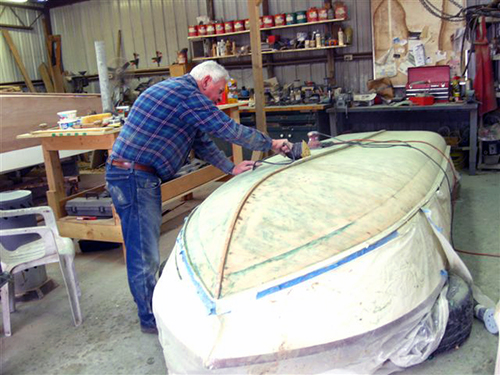
Work Day 30, March 8, 2014
Staining the deck with mahogany oil-based stain.
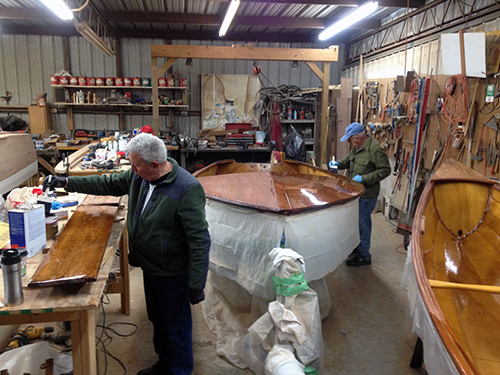
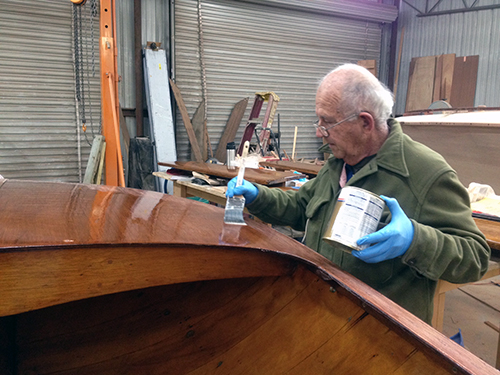
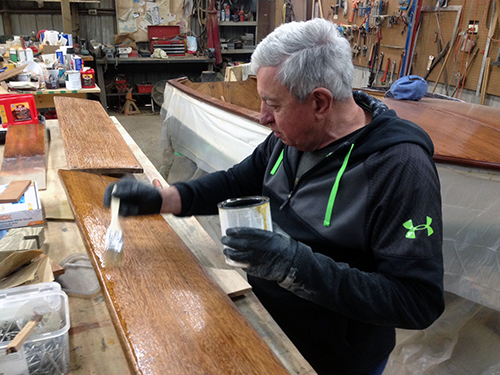
On the left, Ken Mattice applies a sealing coat of spar varnish to the seats of the Yellow Jacket. The seats are solid mahogany, and will need no staining.
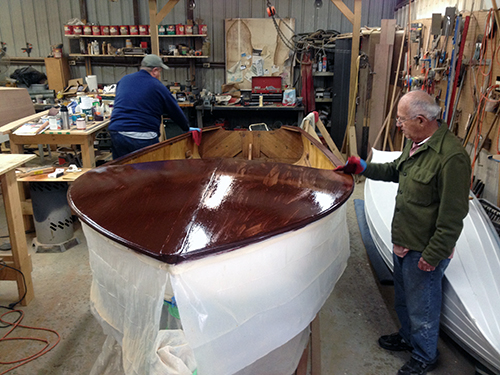
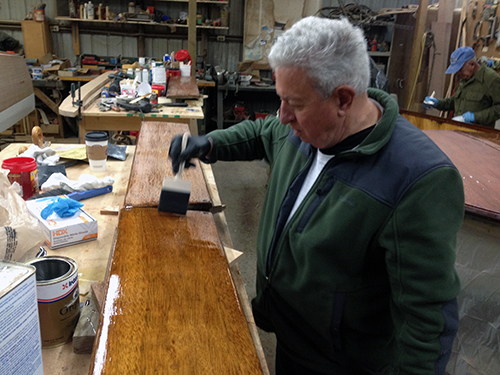
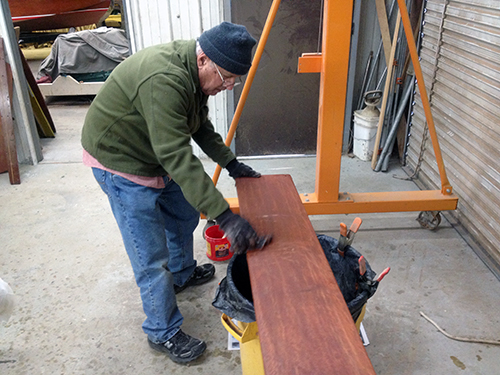
Jim Donovan and Seb Borrello use chip brushes to apply a liberal coat of oil-based mahogany stain to the decking. The stain is allowed to set a bit before rubbing begins.
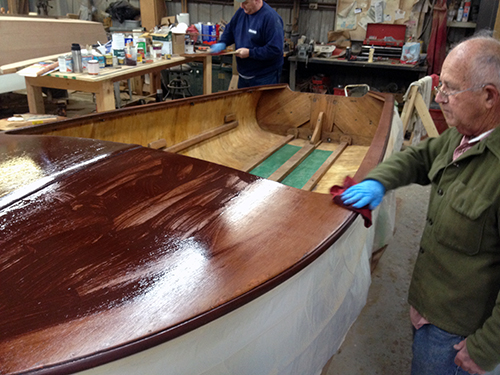
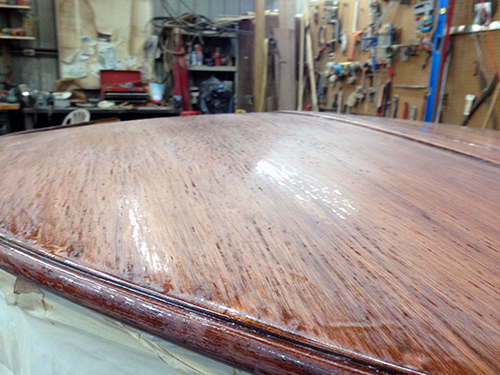
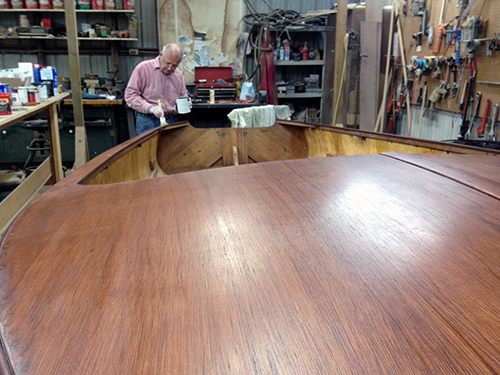
The true beauty of the deck's grain emerges as Seb wipes the stain with a clean rag.

Now completely applied and rubbed, the stain will be allowed to dry for a couple days before we begin sealing and varnishing.
Work Day 29, March 1, 2014
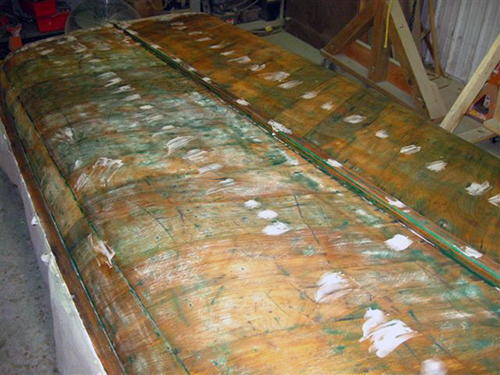
Applying natural wood filler and rubbing with burlap.
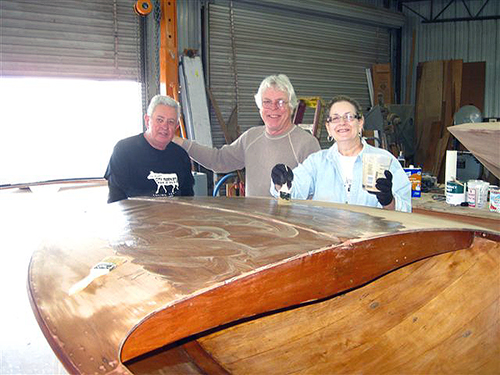
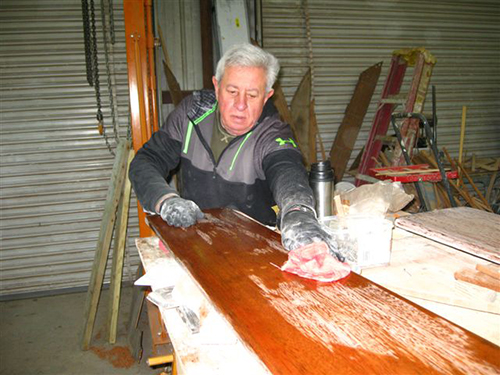
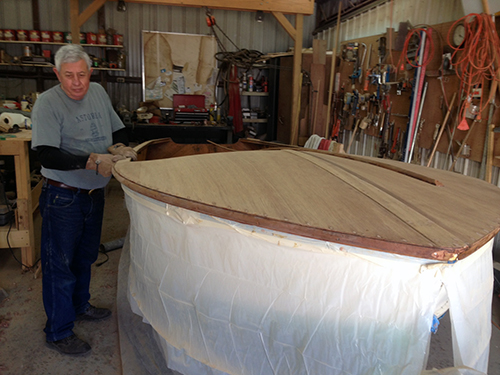
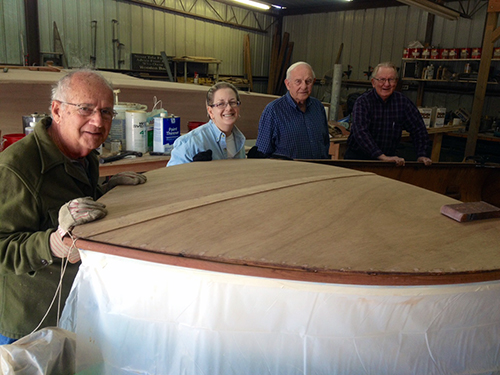
Ken Mattice and Mark Wilson provide oversight and quality assurance as Gay applies natural colored wood filler to the very open-grain mahogany plywood deck. (Seb Borrello photos today)
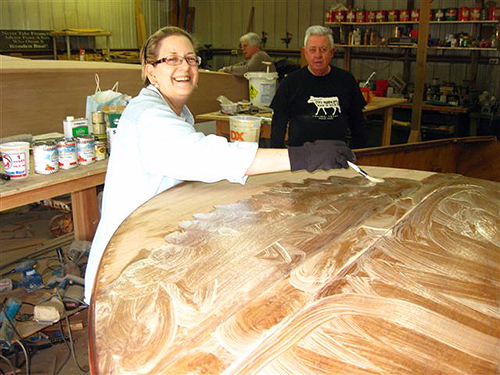
Gay continues liberal application of filler on the starboard foredeck. The filler is applied, then allowed to set up a bit.
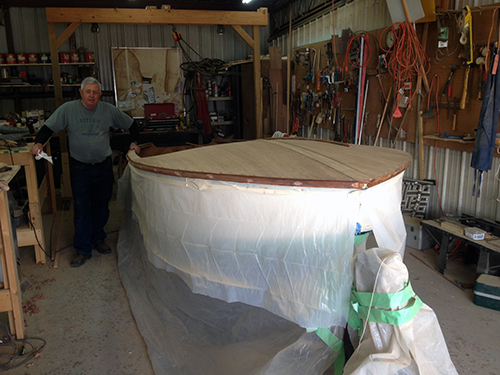
While the filler on the foredeck is setting up, Seb takes the opportunity to apply the first coat of varnish to about half the interior.
Gay and Ken rub the partially set-up filler across the grain with burlap to remove the excess, but leaving filler in the texture and pores of the grain.
Work Day 28, Feb. 19, 2014
Attaching the port rub rail.

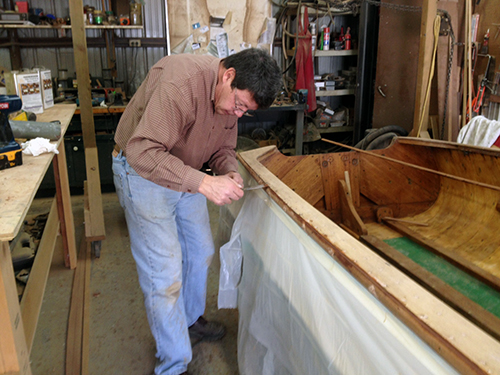
Seb Borrello attaches the stern rub rail before trimming the end of the starboard rub rail which caps it.
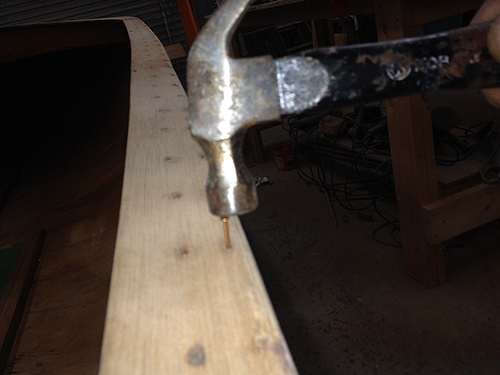
David hammers home a ring nail holding the rub rail to the gunwale. Nails are spaced at 8" intervals.
With both rub rails on, the boat really looks finished off. On the left, the Famowood filling the nail holes has been sanded smooth and flush with the rub rail surface. On the right, the Famowood is still drying, and will be sanded tomorrow.
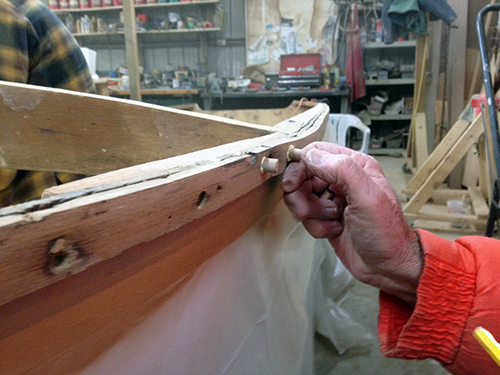
Work Day 27, Feb. 18, 2014
Attaching the starboard rub rail.
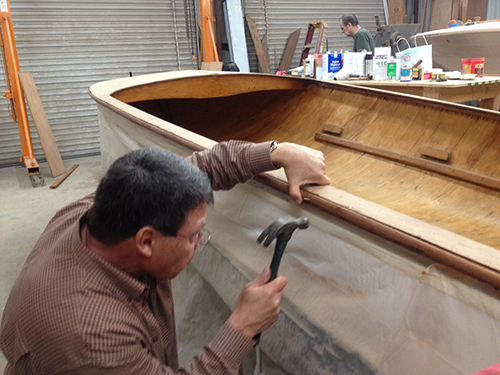
Ken Mattice holds the rub rail in place so David can hammer in the stainless steel ring nails. The rub rail is bedded in Dolfinite, the old-timey bedding compound.
David smooths the seam between the rub rail and the gunwale using a putty knife. Dolfinite is the consistency of peanut butter.
Once the starboard rub rail was attached, Ken filled the nail holes with Famowood.
Work Day 26, Feb. 17, 2014
Steaming rub rails and bending them to fit.
Seb Borrello shows Gay Perry the finer points of sealing the gunwale with CPES prior to the fitting of the rub rails. Gay would go on to seal all the remain gunwale surfaces. The rub rails are seen in the foreground, two pieces of half-round mahogany, 15 feet long, left over from Bob Adair and Lew White's last Yellow Jacket project. Thanks for the donation, guys! Saved us hours of effort!
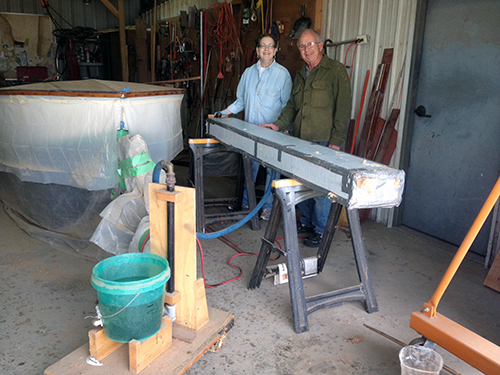
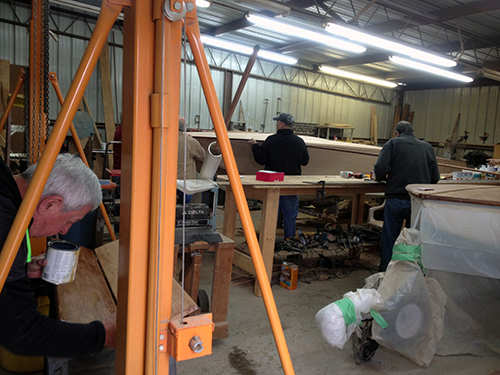
Gay and Seb use a steam generator made by Seb a couple years ago to steam the first forward 8 feet or so of the rub rails. Steaming facilitates bending the rails around the bow of the boat without breaking them.

Clamps hold the steamed rub rails to the side of the boat, while a string holds the bent part of the rail in place for cooling.
Seb, Gay, Lew White and Bob Adair hold the second rub rail in place so it can be clamped for cooling.
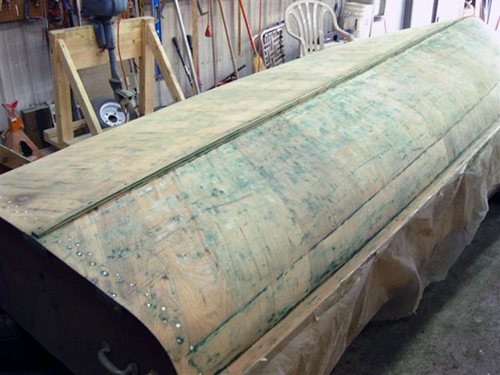
Work Day 25, Feb. 5, 2014
Sanding, sanding, sanding.
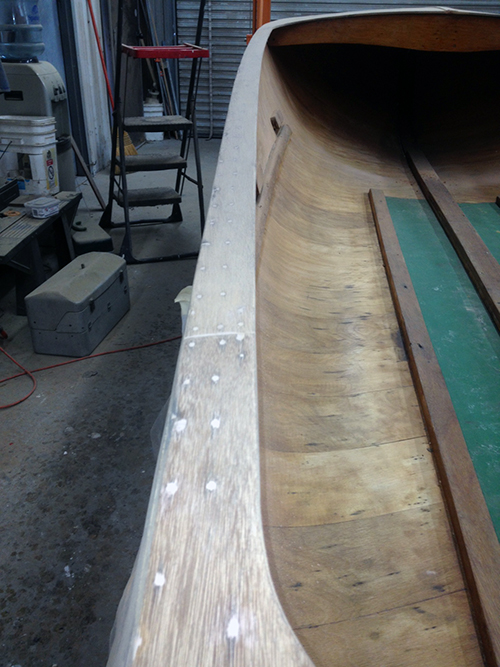
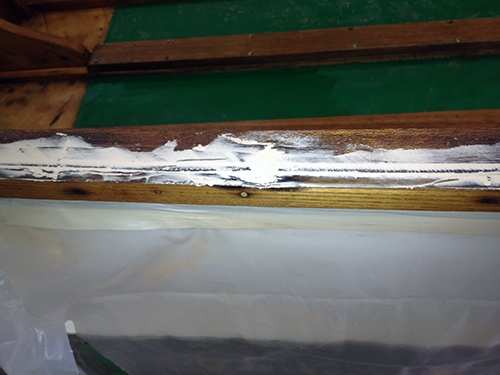
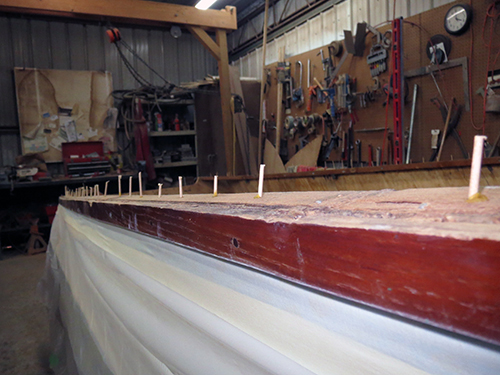
Here's the port gunwale with the Famowood fills all sanded down with 120 grit. You can scroll down to yesterday's post below to compare with photo of same gunwale unsanded.
A closer view of the starboard gunwale showing sanded Famowood. The Famowood looks light by comparison with the mahogany, but will darken to mahogany color with application of filler stain and varnish.

Here's the way she looked at the end of work today. We're now figuring out how to fabricate rub rails.
Work Day 24, Feb. 4, 2014
Famowood
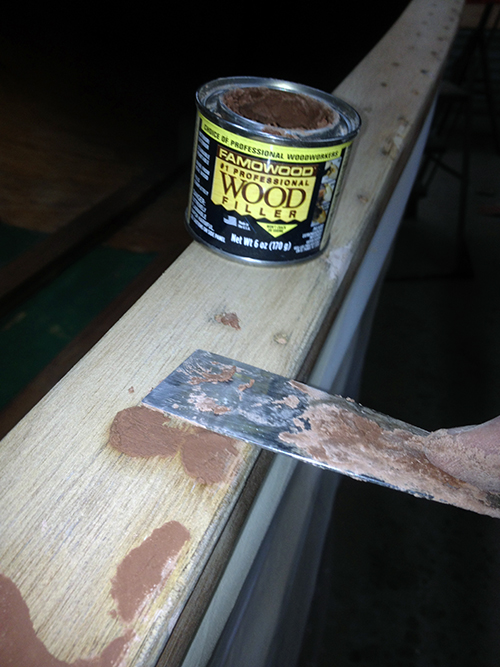
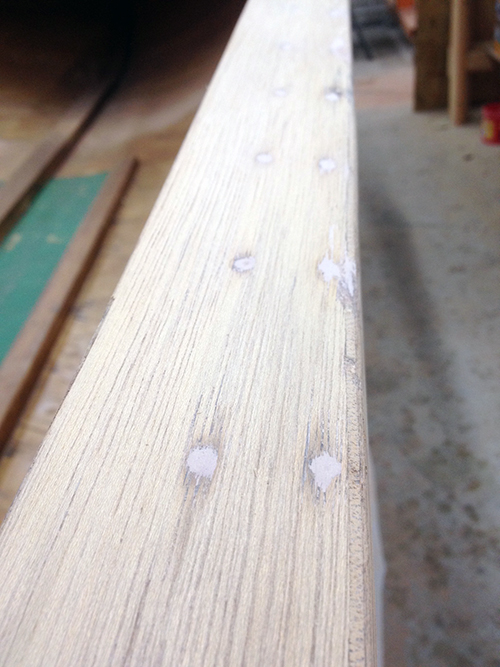
Famowood is a brand of wood filler for nail holes and imperfections. It dries very quickly once you start working with it,, so it's important to move right along. Because it shrinks a bit when drying, David leaves each patch a little "proud" or sticking up above the surface a bit. Once dry, Famowood sands easily. We use the mahogany color for this work. When stained and varnished, it'll blend in pretty well.
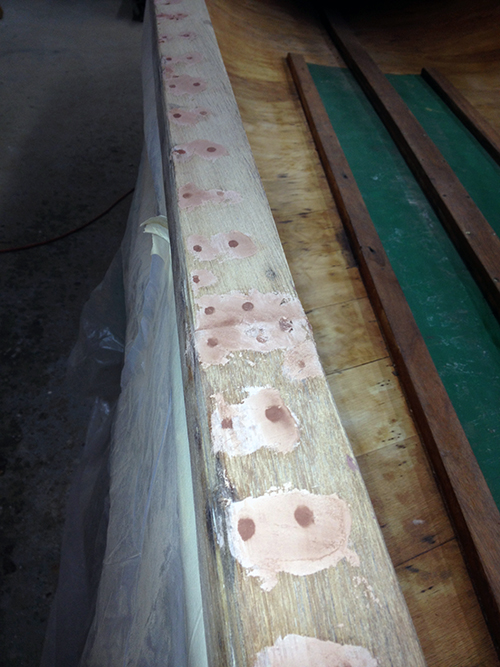
Here's the port gunwale with all the nail holes patched with Famowood, awaiting further drying. Then the excess will be sanded away. The boat originally had all the nail heads showing, but we needed to countersink and fill them so we could do finish sanding and buffing. If the nail heads were exposed, we'd be sanding the stain and varnish right off them! Original Yellow Jackets had sprayed varnish finishes that required no sanding.
Work Day 23, Feb. 3, 2014
Decking is on!
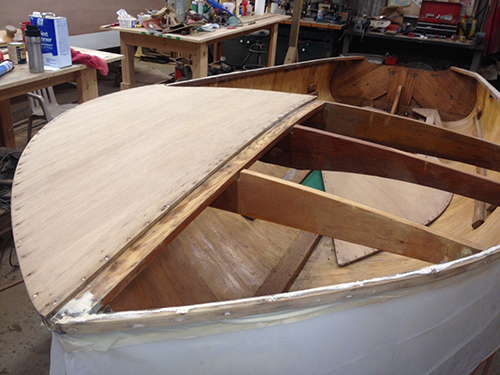
After smoothing the gluing surfaces on the underside of the decking, the gunwales and the deck beams, David put a bead of 3M 5200 on the gluing surfaces, then nailed the decking on with original-style 1" copper nails. Here, the starboard foredeck is already glued and nailed into place.
Now the port foredeck is on as well as the king plank. See how the sanded, thickened epoxy fills the voids in the gunwale, making a smooth surface for gluing and nailing the gunwale decking on. All decking is 3/8" mahogany marine plywood, and all original!
The gunwale decking has a double row of copper nails, one along the exterior gunwale strip, and one along the inboard gunwale strip. Nails will be slightly countersunk and then filled with Famowood.
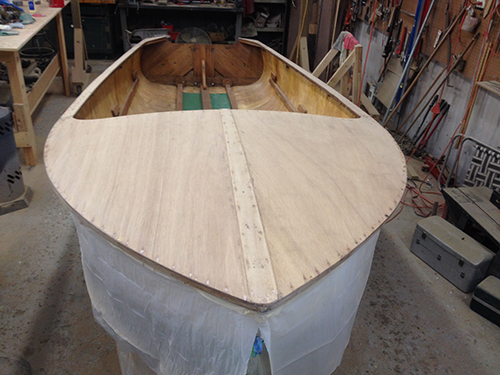
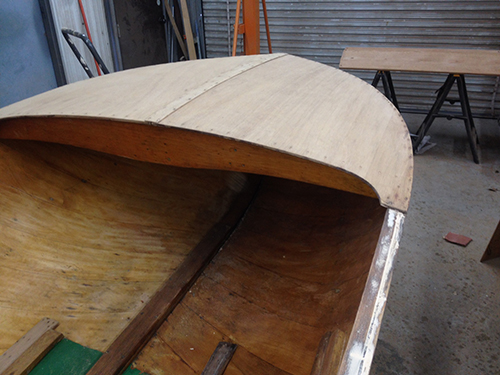
Here she is at the end of the work day today.
Work Day 22, Feb. 1, 2014
Filling and patching imperfections in the decking and gunwales.
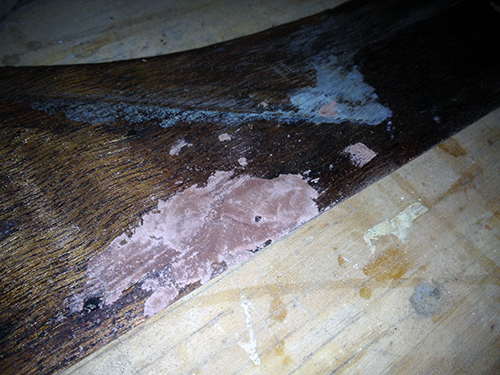
This is the underside of one of the decking pieces for the aft end of the gunwale. We used Famowood to fill a damaged section of the underside that also had a void at the edge that shows. Sanding will make it flush and pretty after the Famowood dries thoroughly. Most of this patch will not show anyway. All of the decking pieces need some treatment like this.
This is a view of the starboard gunwale looking from the top. We used a thickened epoxy mixture to fill voids on this surface, to prepare a fair surface for gluing and nailing the decking onto.
Here's the top of the stem, looking down at the bow of the boat from the top. Here, the thickened epoxy fills gaps and holes that could trap water. Once sanded, this filled area will also provide a smooth surface for attaching the decking.
Here's Seb's repaired section of broken gunwale strip on the port side. Once this Famowood is sanded and stained, it will be almost impossible to know that the gunwale was ever broken.
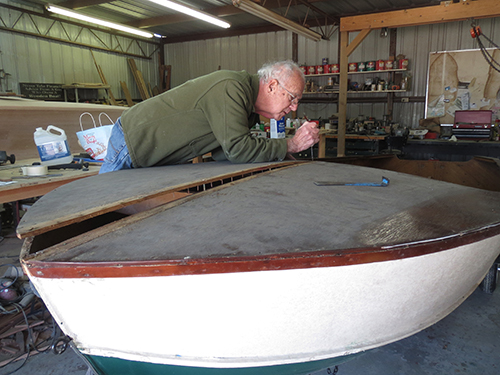
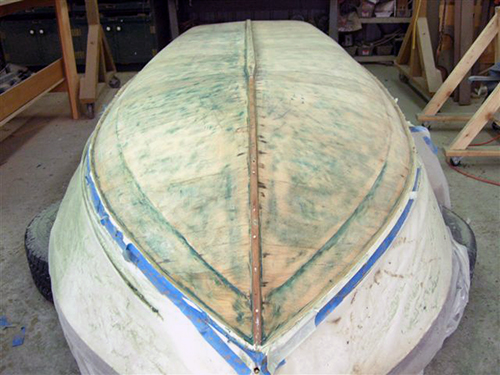
Work Day 21, Jan.31, 2014
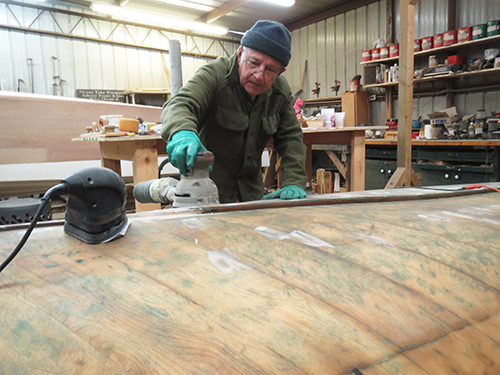
Final sanding and application of CPES to the hull interior and gunwales.
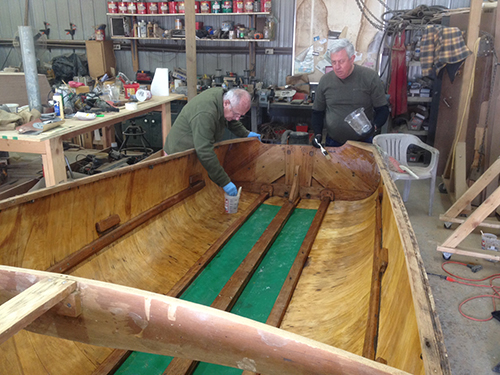
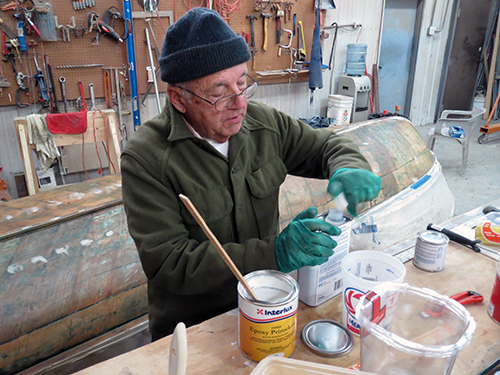
Seb and Ken apply Clear Penetrating Epoxy Sealer to the hull, transom and gunwales.
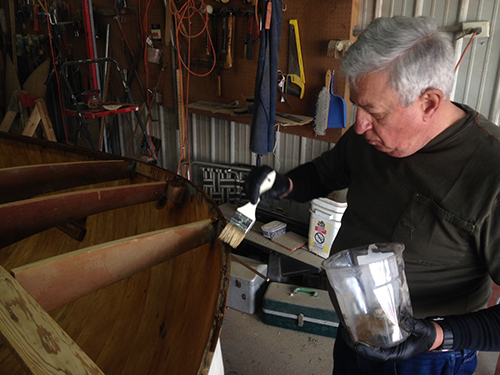
Using a China bristle "chip" brush, Ken can effectively apply the CPES. The inexpensive brush will be discarded afterward, since the hardened, two-part chemical will render it useless.
Work Day 20, Jan.29, 2014
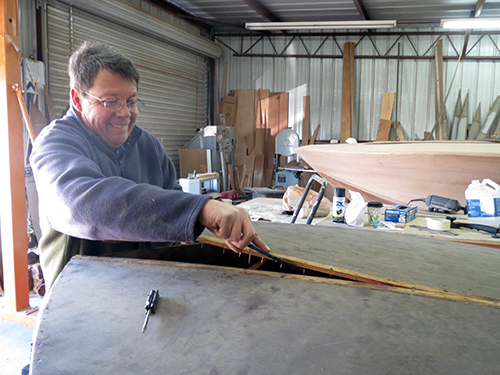
Seb repairs broken gunwale piece, reattaches deck beam, tightens up transom; Ken sands and sands; David tests tung oil as a grain filler.
Ken Mattice sands the hull interior with 120 grit in preparation for CPES, while Seb Borrello plugs screw holes with bungs on the repaired section of broken gunwale. David had already sanded the varnish and stain off the gunwale strips at this point. Seb also reattached the forward deck beam to the hull on the starboard side...it had detached during the starboard gunwale repair operation.
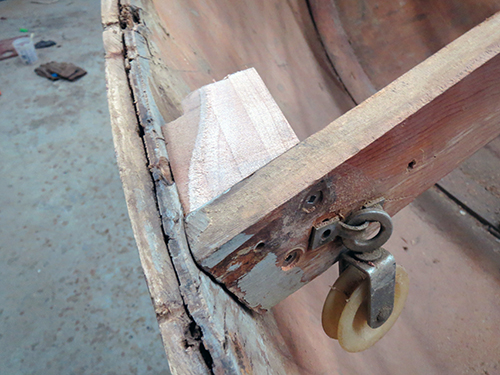
Seb's repair of the broken gunwale is almost imperceptible. A backpiece Seb inserted gives the screws holding the broken piece in place something to hold onto. Once the glue on the bungs dries, Seb will use a chisel to trim them and then sand everything flush.
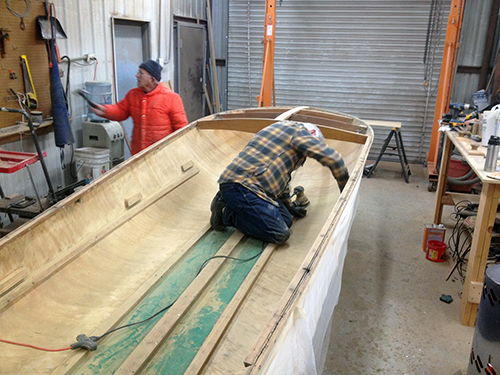
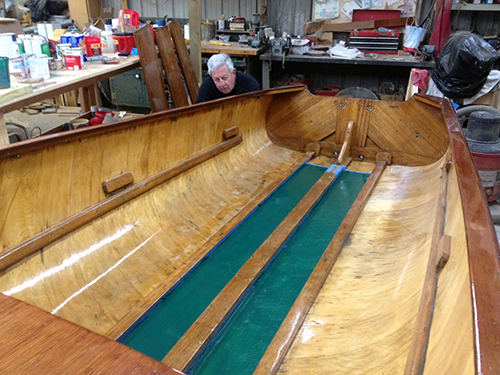
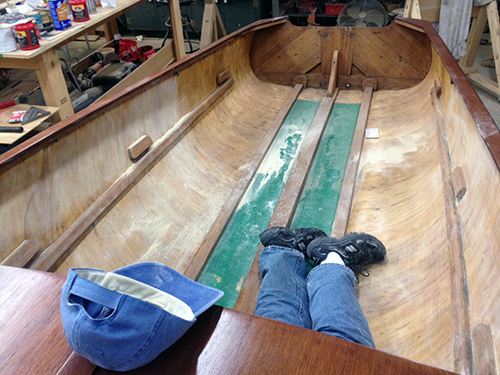
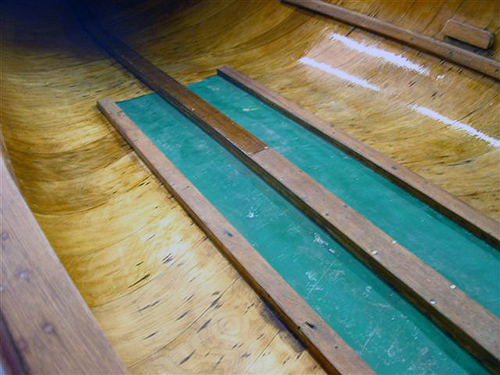
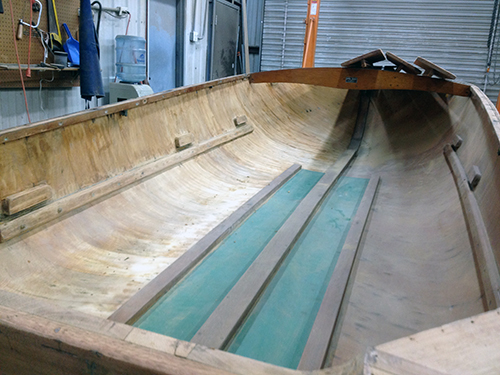
The boat is nearly ready for CPES. All old varnish has been removed from the hull interior, keels and gunwales. Ken sands the flattest areas with a random orbital sander, while the curves require hand sanding (120 grit.) Green area will be painted to match the bottom color. Seb puts the hammer away after tapping bungs into place on the gunwale repair. On the saw horses in the background is a piece of scrap plywood which we used to test a method of filling grain suggested by Emmett Smith of the Antique Boat Museum: pure tung oil sanded in with 220 grit paper, then allowed to set up before wiping down. If it works the way we think it will, we'll use this method to fill the very open-grained decking prior to staining.
Work Day 19, Jan.27, 2014
Ken and David finish stripping and sanding the starboard side interior, make gunwale repairs.
Ken hand sands the complex, concave curves of the hull interior. Notice clamps along the gunwale, which are holding it in place while the glue dries. David put in copper nails clinched on burrs in place of the ring nails that originally held the gunwale strip to the hull. Ken also sanded the remaining plugs in the nail holes that Seb had filled with toothpicks on Saturday.
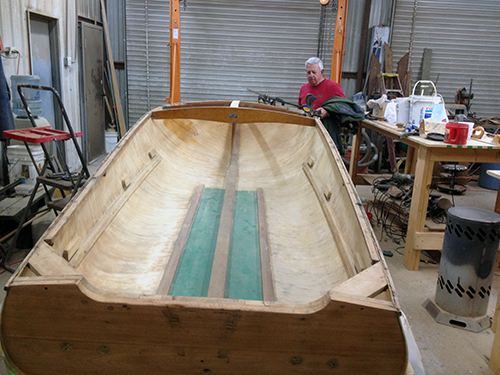
Hull interior strippped and sanded. You can see a little patch near the port bow that is a little darker. That's where David applied a little CPES to see how the color would be. It'll be a nice golden color...the beautiful birch of the early Yellow Jacket hulls.
Work Day 18, Jan.25, 2014
Seb makes a porcupine; Ken dequills it; David keeps on stripping; Robin consults, again.
Since we'll be re-nailing the decking in exactly the same holes, Seb filled all the old nail holes with toothpicks, gluing them in with water resistant wood glue. They look a little bit like porcupine quills sticking up.
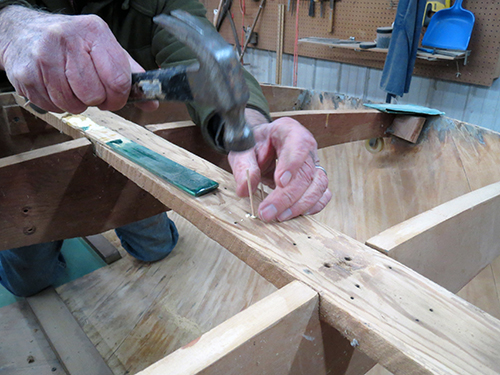
Seb taps the glued toothpicks into holes in the deck beam structure. They dry at least overnight.
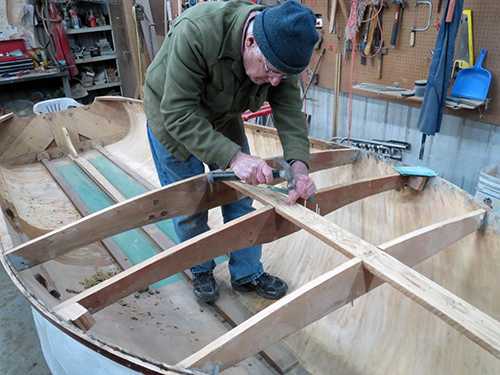
Behind Seb, you can see where David began stripping the starboard side of the interior. By the end of today's work session, he had stripped all but about three feet near the bow.

Ken Mattice sands off the "quills" of Seb's "porcupine" to create a clean, flat surface for gluing and nailing the deck back on when the time comes.
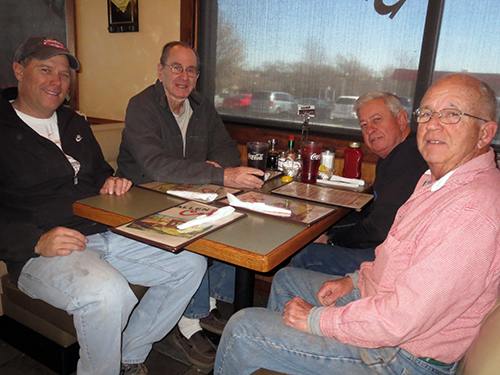
A previously undocumented part of a typical Saturday work day at the WBA shop: lunch at the Allen Cafe! (l-r): Marc Hill who did some engine work on his own boat today, Robin McGeorge, consultant, Ken Mattice, Seb Borrello. To be fair, Robin went out to the shop after lunch to work on the flag staffs on the '51 Chris-Craft Riviera he and Troy have restored.
Work Day 17, Jan.22, 2014
The interior is stripped half naked!
So the interior is now half stripped. Word has it that additional work was done on the seats today as well, but no photos.
Work Day 16, Jan.21, 2014
Seb strips and sands the seats, David begins stripping and sanding the interior
Seb uses stripper first, then a random orbital sander, to get the three seats down to bare wood.
David uses a sander to remove varnish from the transom and the interior. He quickly switches to stripper, finding better living through chemistry.

Here's the way the interior looked after some stripping and sanding. You can tell where David left off!
Work Day 15, Jan.16, 2014
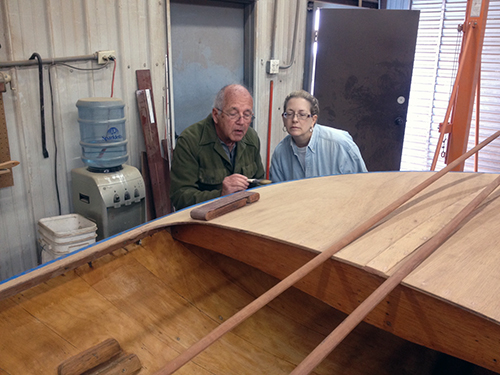
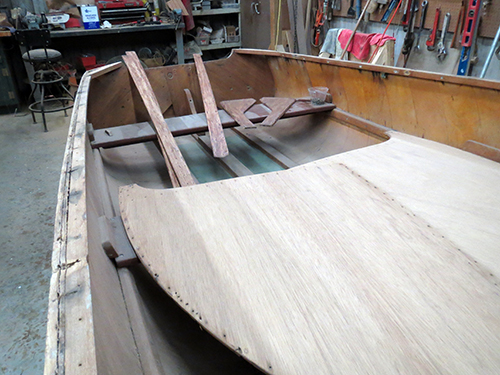
David sands the remaining deck pieces. Robin McGeorge consults.
Robin McGeorge adjusts the deck pieces which are placed temporarily just for the photo. Next step will be cinching up the gunwales against the hull with copper nails.
Work Day 14, Jan.15, 2014
Seb repairs a deck beam without busting a gusset. David strips and sands the starboard foredeck piece. Seb and David strip the remaining decking.
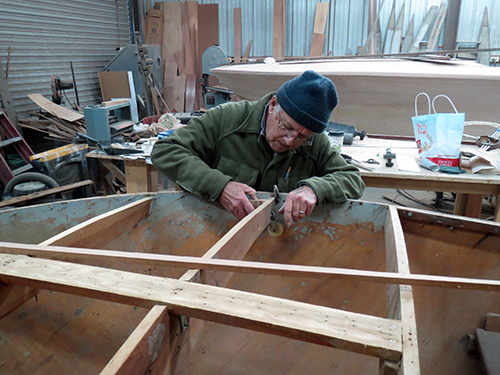
Seb eyes the compound angles required to fashion a gusset to attach the deck beam that was loose.

Deck beam is securely screwed to Seb's gusset, which in turn, is glued and screwed to the hull (starboard side).
Deck beam secured to gusset, port side.
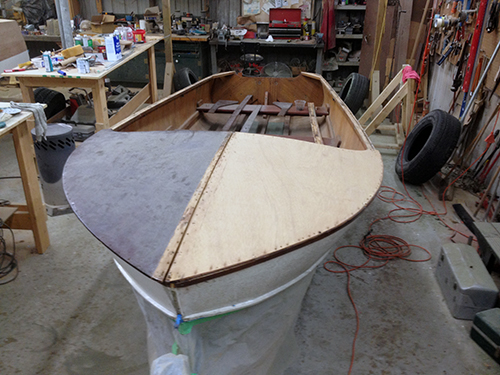
Now both the port and starboard foredeck pieces are stripped and sanded.
Remaining decking can be seen on the aft seat of the boat: it's been stripped and now awaits sanding, which is on the docket for Thursday.
Work Day 13, Jan.14, 2014
Boat masked, port foredeck piece stripped and sanded
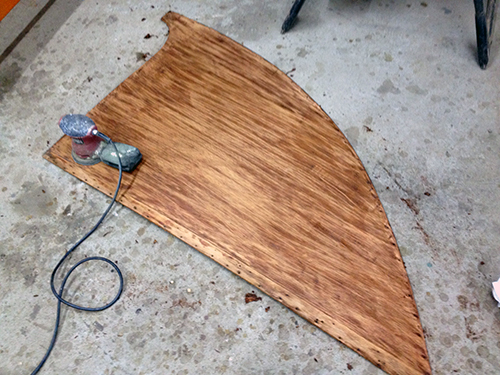
The port foredeck plywood stripped pretty easily using a paste stripper. Here it is, ready for sanding to begin.
Note how nicely the port foredeck sanded clean...the starboard foredeck piece has not yet been stripped, so you can really see the difference. You can also see the unstained strip on the centerline of the starboard piece that had been covered by the king plank. The foredeck pieces were placed here temporarily, just for the photo.
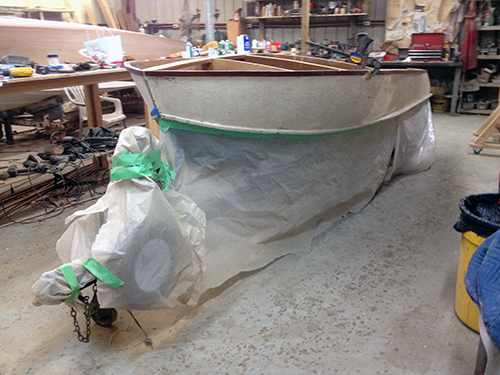
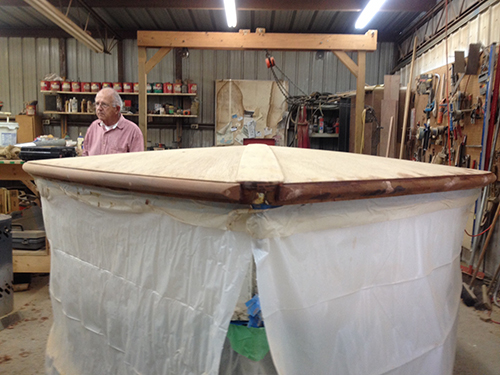
Here's the masking on the boat to protect the nicely painted bottom and the trailer from all sorts of drips to come...CPES, stain, varnish and white topside paint.
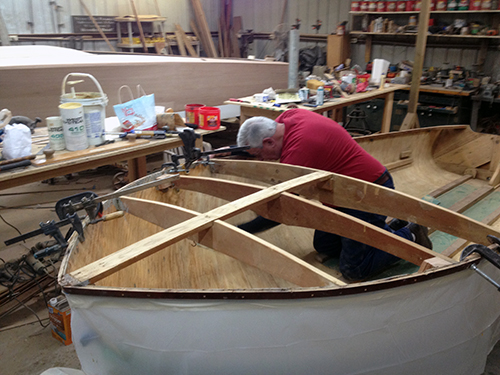
Work Day 12, Jan.13, 2014
Stem strip is on, boat righted onto trailer, decking removed!
Seb Borrello and Jim Donovan clown around after the hardest work was done. Seb raised the boat's bow with one of the shop's gantries while David watched Jim pivot the boat at the stern, from its upside-down to its right side-up position, rotisserie style. Then David rolled the trailer underneath the raised boat, and Seb and Jim lowered it.
David uses a small pry bar to remove half the foredeck. The foredeck was fastened with copper nails, with a few screws at the corners and key stress points on the deck beams.
Before the foredeck can be removed, a few screws at the corners must be removed. Seb wrestled the corroded screws from their 62-year-old nesting places.
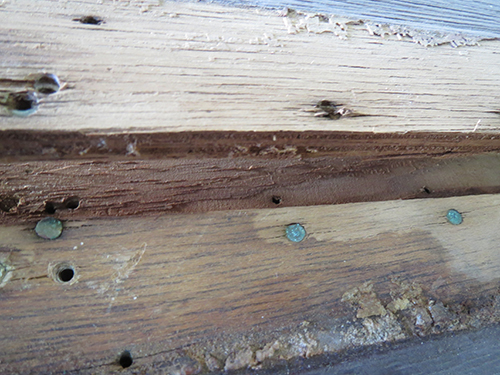
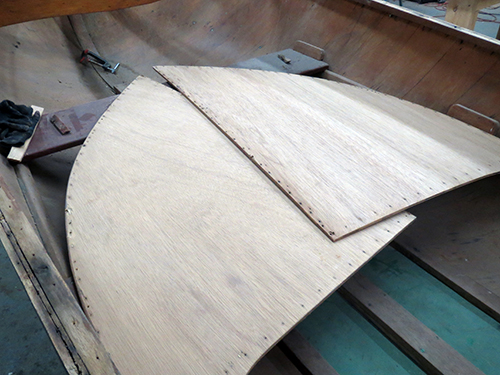
The top half of the picture shows the raised section of foredeck. In the middle is the center deck beam. The bottom half is the other half of the fordeck, still nailed in place. We had already removed the king plank, exposing the unvarnished wood down the center of the foredeck. Notice that the holes in the raised foredeck match the holes in the deck beam 1-for-1. This means that no other fasteners had been used since the boat was new, so the decking is original. Note also the bluish-green corrosion on the nails, giving away their copper content. The plan is to strip, sand and re-use all the original decking on this boat.

Seb pries the second half of the foredeck loose.
Seb examines the last piece of decking removed from the gunwale. Stripping and sanding is next!
Work Day 11, Jan.11, 2014
Dave Peiffer's spare tire bracket mounted, second coat of bottom paint is on!
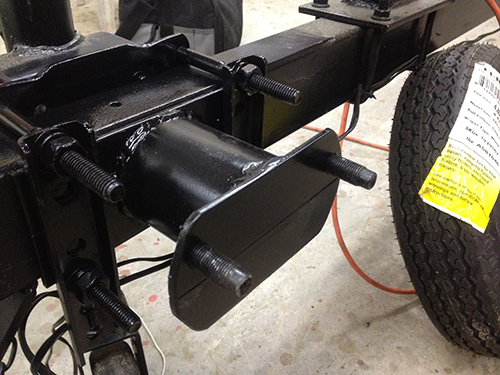
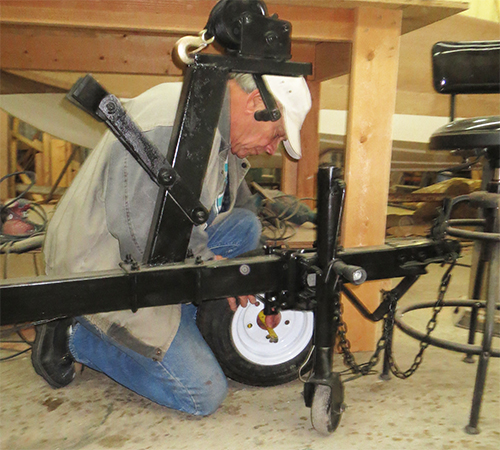
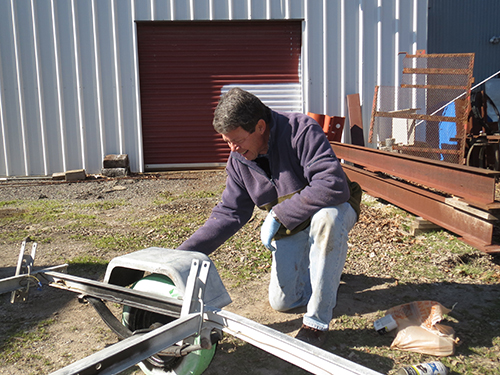
Dave Peiffer designed and fabricated the spare tire bracket with a back plate that gets clamped on to the mount for the existing tongue jack.
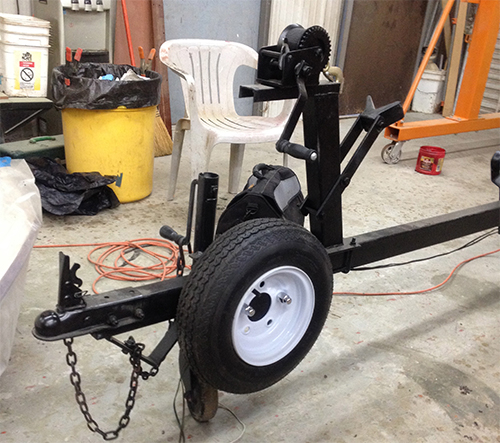
Here's the spare tire all secured on Dave Peiffer's bracket. Thanks, Dave!
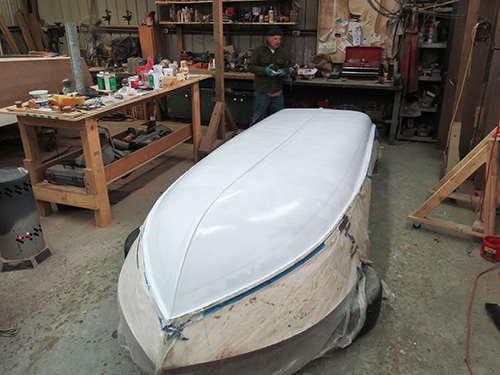
Seb Borrello and Ken Mattice finish up the bottom's second coat. Looking good, guys!
Work Day 10, Jan.9, 2014
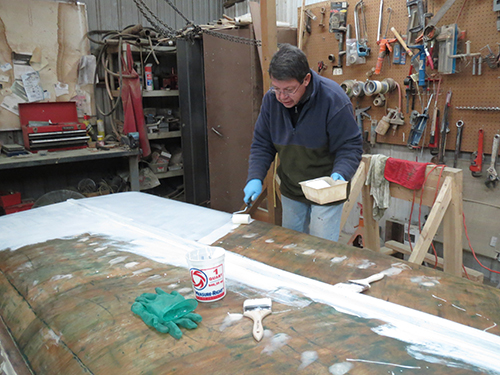
First coat of bottom paint goes on!
Ken Mattice rolls on the one-part epoxy paint while Seb Borrello tips it smooth with a foam brush.
David Kanally cuts in the corners where Ken's roller won't reach. David is using a disposable foam brush.
Ken and Seb near completion of the first coat of bottom paint. The team opted for a thin coat, given the marginal drying conditions. Second coat will go on Saturday, Jan. 11.
The first coat begins its slow drying process. The color is "Sea Green", the closest stock color to the original we could find.
Work Day 9, Jan.4, 2014
Ken Mattice and Seb Borrello apply a second coat of epoxy primer, while Dave Peiffer works on an idea for a spare tire mounting bracket for the trailer.
Ken Mattice hand sands an imperfection in the bottom before the second coat of primer is applied.
Seb Borrello and Ken Mattice use the now-proven roller method for applying the second coat of 2-part expoxy primer sealer to the bottom.
Dave Peiffer puts on his thinking cap to come up with a design for a bracket to mount the spare tire on the trailer. More on his design later!
Work Days 7-8, Jan. 2-3, 2014
On Jan. 2, David re-carpeted and re-installed the trailer bunks. The on Jan. 3., he cleaned and re-installed the trailer tail lights, and put the winch strap back in place. Later that morning, Seb and David successfully applied the first coat of the 2-part epoxy primer/sealer on the bottom.
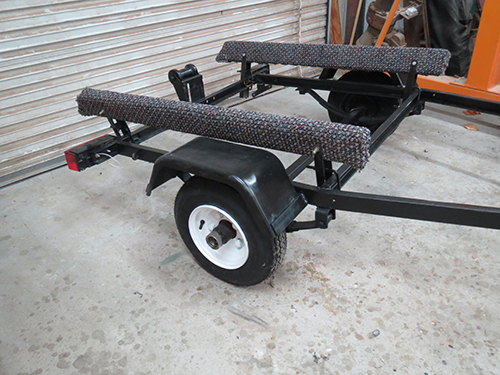
Thanks to Robin McGeorge and Troy Marshall for the donation of carpeting for the trailer bunks. Lookin' sharp!
Seb does some final sanding before the application of epoxy primer.
Seb shows his chemistry chops as he does an accurate job of mixing the thinner with the epoxy base, then the hardener with the diluted base.
David uses a foam roller to apply the epoxy primer/sealer, after first trying a brush and finding that the mixture did not have particularly good leveling properties.
There's enough primer left for a second coat, which is slated for application on Jan. 4.
Work Days 5-6, Dec. 31, 2013-Jan. 1, 2014
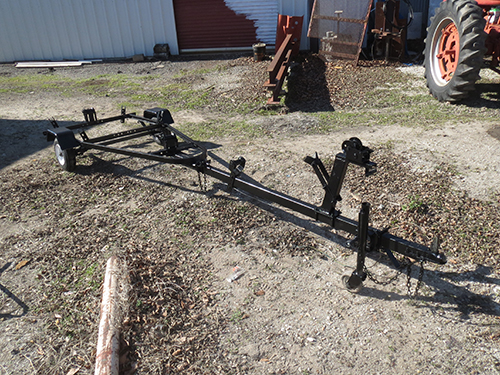
Seb and Ken did some additional gap filling and fairing with thickened epoxy on Dec. 31 (sorry, no photos!) while David Kanally repacked the trailer's wheel bearings and painted the trailer's wheels. Then on New Year's day, with the help of Marc Hill and Robin McGeorge, David sanded and painted the trailer black. Lookin' good! Ready for the bunks to be recarpeted and the lights put back on!
Work Day 4, December 23, 2013
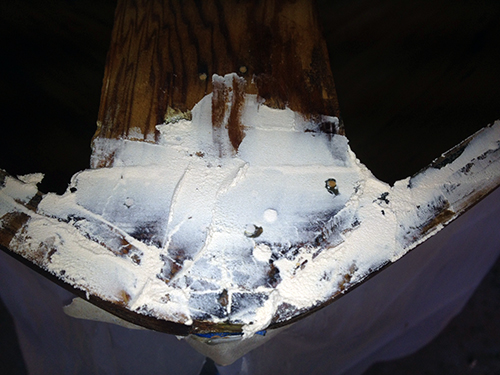
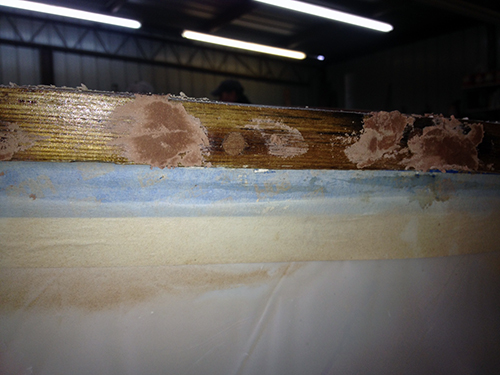
Seb Borrello fills screw heads and imperfections with thickened epoxy.
Ready now for light sanding, priming and painting. That'll wait until after Christmas.
Work Day 3, December 20, 2013
Seb Borrello and Ken Mattice finish sanding and apply a liberal coat of Clear Penetrating Epoxy Sealant
Ken uses a detail sander to remove the final bits of paint from the side of the keel.
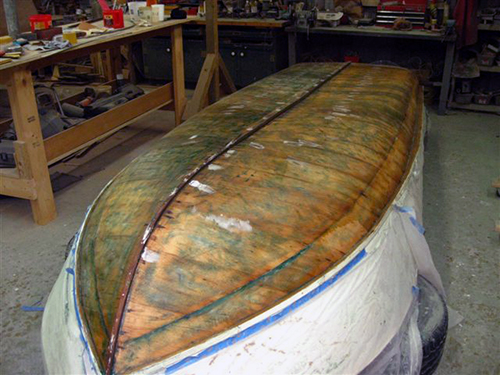
The bottom is looking nice and smooth, ready for CPES
The stern view is equally clean and smooth. Can you believe this boat is over 60 years old?

Ken and Seb use chip brushes to apply the very effective CPES to the hull. The product is quite watery in consistency, so it penetrates all the wood fibers to waterproof, stabilize and rotproof them.
The hull sides have been masked to protect the paint from CPES runoff.
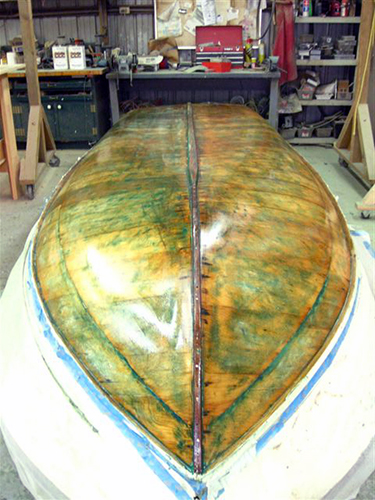
The freshly coated hull glistens with curing CPES. Since it will take a while for the CPES to cure, Seb and Ken believe that Monday, December 23 will be the next work day.
Work Day 2, December 18, 2013
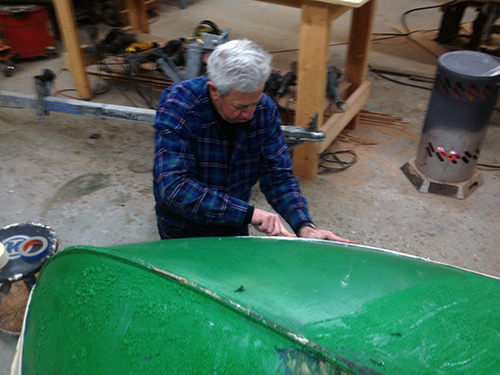
WBA members Seb Borrell and Ken Mattice sand the bottom in preparation for a liberal coating of CPES.

Next work days, Friday, December 20, and Saturday, December 21, 2013.
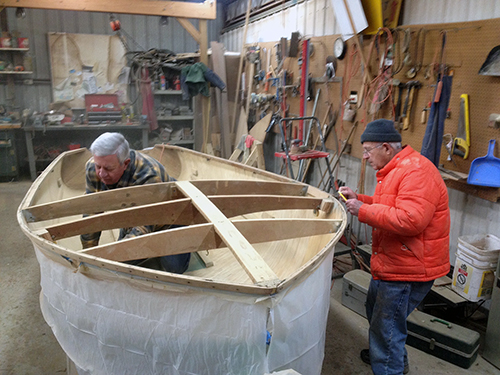
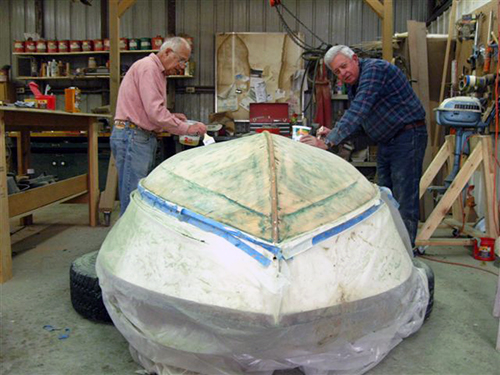
Work Day 1: December 14, 2013
WBA members Seb Borrello, Gay Perry, David Kanally, Troy Marshall, Robin McGeorge, Ken Mattice, Marc Hill and Bill Baldwin were on hand for the "flippin' and strippin' phase of the restoration.
Seb loosens the screws holding the original cast aluminum bow handle on the king plank.
Gay Perry said she was only going to be an observer this day, because she wore her good clothes. You see how far that got her! Here, she removes the aft cleats, which are not original, so will go into the spare parts bin.
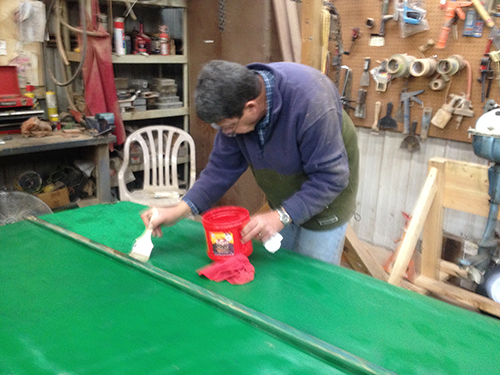
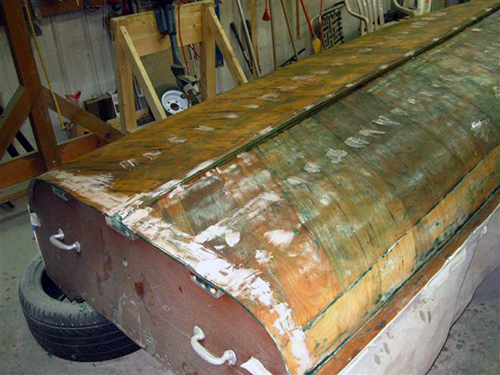
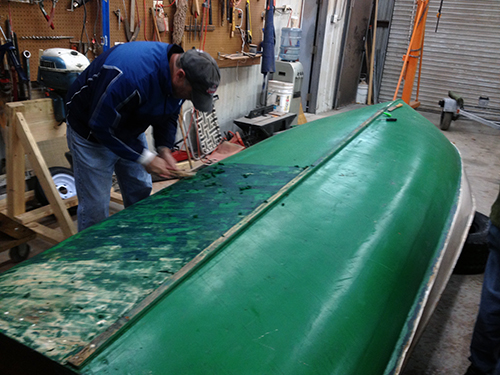
David Kanally applies a thick coat of paste paint stripper. As we scraped the paint off, we found the bottom had been painted three times. This coat is a pretty bright green. The coat under it was midnight blue. The original coat was a darker, forest green.
Marc Hill scrapes away the top coat revealing the dark blue second coat.
Seb begins stripping the port side, while a second dose of stripper on the aft of the starboard side shows remnants of the original forest green color.
Ken Mattice masks the white painted sides with masking tape and plastic sheeting to protect topsides from falling paint stripper mixture.
So stripping is complete; (the remaining paint will yeild quickly to sanding, the next step). Next work day TBA.
Pic donates the Yellow Jacket to the WBA December 10, 2013
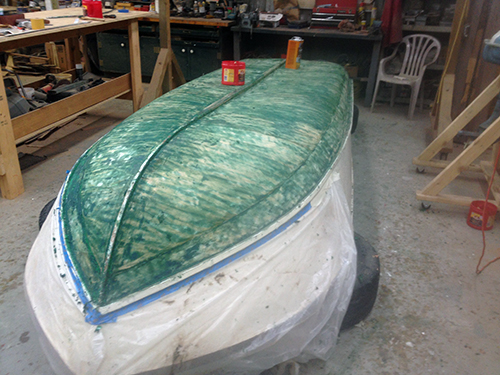
Pic Cyr, WBA member and long-time Yellow Jacket enthusiast donated his dad's 1951 Yellow Jacket Fisherman, a very early and rare example of the marque. The boat is in unmolested, condition and will require only refinishing to return to its original glory.
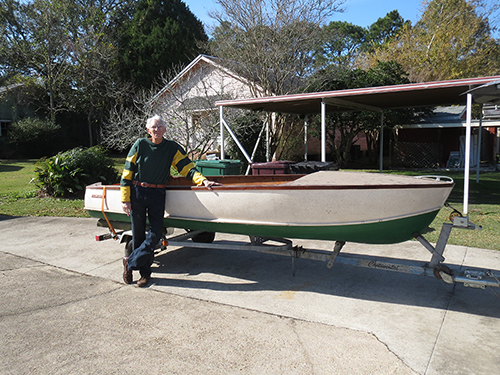
Pic poses beside the Yellow Jacket he donated to the WBA. It had been stored at his mom's house in Jeanerette, LA, requiring a bit of a round trip to get the boat back to the Lucas shop. Trailer was procured from WBA member Steve Griffitts. David Kanally made the trip to retrieve the boat.

Now back at the shop, the boat can be carefully examined for evidence of its model year. Note the high arch in the foredeck, the green bottom, the horizontal cast aluminum logo, and the painted topsides.
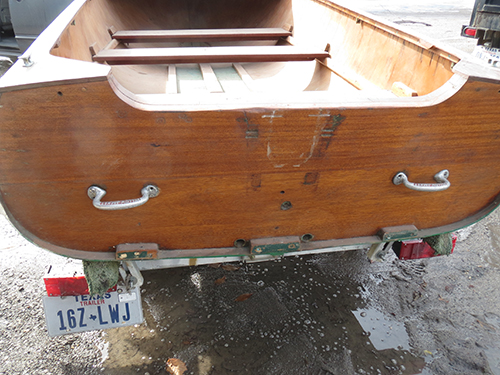
Early Yellow Jackets had double-planked solid mahogany transons, unlike the plywood transoms of later models.
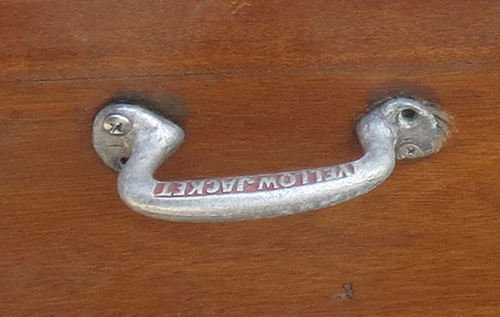
Custom-cast transom handles bear the Yellow Jacket name, but are much more rounded than the handles of later models.
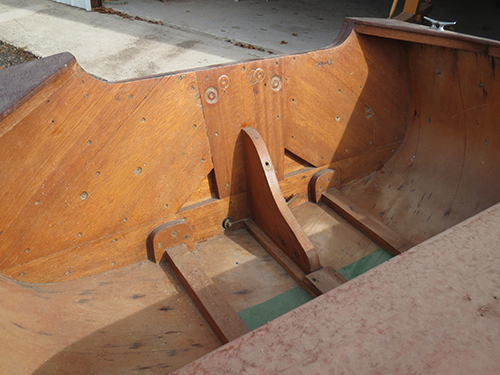
The 1959 planked transom is supported by a knee. The 1952 transoms also had smaller knees on each of the side "sister" keels.
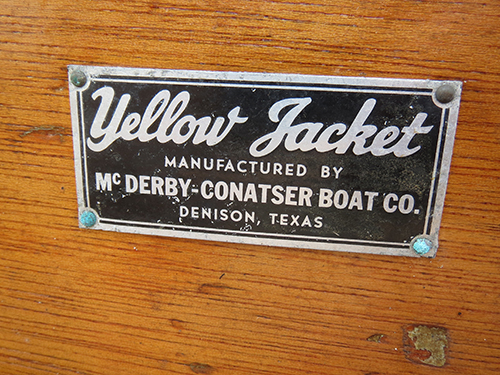
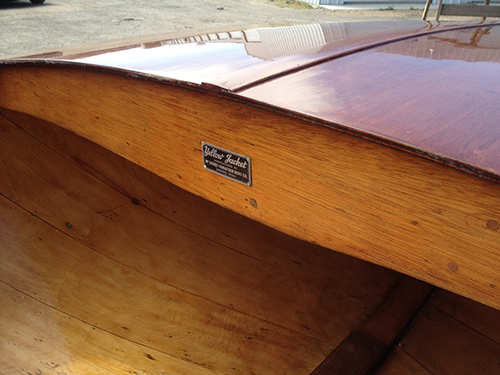
The dash tag still bears the name "McDerby-Conatser Boat Company", which changed to "Yellow Jacket Boat Company" around 1953.
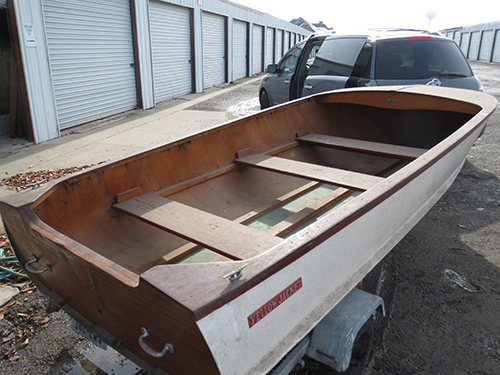
The Fisherman model has a short foredeck and three bench seats. No seat suspension involved, as with later models. We don't believe the aft cleats are original, so they won't be going back on to the finished boat.
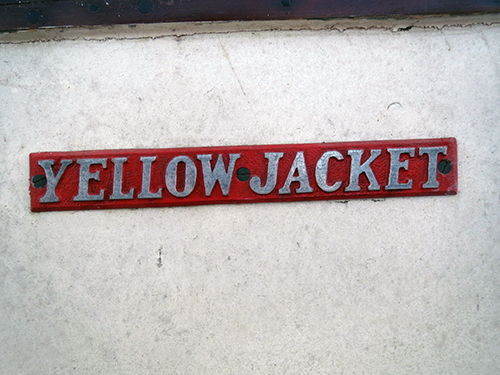
The cast aluminum Yellow Jacket hull badge was replaced in later models with painted side graphics and Yellow Jacket "jet bee" decals.